Free Shipping on Domestic Orders $75+

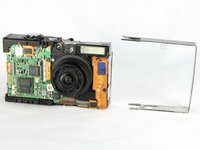
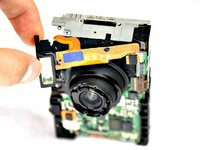
Canon PowerShot SD1000 Flash Unit Replacement

What you need

  1. Canon PowerShot SD1000 Flash Unit Replacement, Back Panel: step 1, image 1 of 2 Canon PowerShot SD1000 Flash Unit Replacement, Back Panel: step 1, image 2 of 2
    • Remove the two 2.9 mm screws from the side panel closest to the camera lens.

    Ask FixBot

    Add Comment

  2. Canon PowerShot SD1000 Flash Unit Replacement: step 2, image 1 of 1
    • Remove the two 2.9 mm screws from the camera bottom panel.

    Ask FixBot

    Add Comment

  3. Canon PowerShot SD1000 Flash Unit Replacement: step 3, image 1 of 1
    • Remove the two 2.9 mm screws from the side panel farthest from the lens.

    Ask FixBot

    Add Comment

  4. Canon PowerShot SD1000 Flash Unit Replacement: step 4, image 1 of 1
    • Pull the back panel away from the camera body, starting at the end with the function buttons.

    Ask FixBot

    Add Comment

  5. Canon PowerShot SD1000 Flash Unit Replacement: step 5, image 1 of 1
    • Remove the small cover panel and the attached wrist strap mount.

    Ask FixBot

    Add Comment

  6. Canon PowerShot SD1000 Flash Unit Replacement, Front Case: step 6, image 1 of 1
    • Remove the front cover by gently pulling it away from the camera body.

    Ask FixBot

    Add Comment

  7. Canon PowerShot SD1000 Flash Unit Replacement: step 7, image 1 of 1
    • Place the front cover, back cover, and wrist strap mount in a safe place until you are ready for reassembly.

    Ask FixBot

    Add Comment

  8. Canon PowerShot SD1000 Flash Unit Replacement, LCD Screen: step 8, image 1 of 1
    • Remove the two 2.4 mm screws located at the top of the LCD panel.

    Ask FixBot

    Add Comment

  9. Canon PowerShot SD1000 Flash Unit Replacement: step 9, image 1 of 2 Canon PowerShot SD1000 Flash Unit Replacement: step 9, image 2 of 2
    • Pull up the metal frame surrounding the LCD screen starting at the side of the camera.

    Ask FixBot

    Add Comment

  10. Canon PowerShot SD1000 Flash Unit Replacement: step 10, image 1 of 1
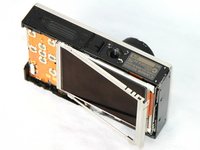
    • Push the metal frame away from the metal tab using the spudger to detach the frame.

    • Rotate the metal frame upwards.

    • The metal framing should be attached by a metal tab towards the bottom of the camera, near the function buttons.

    Ask FixBot

    Add Comment

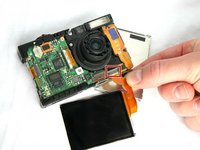
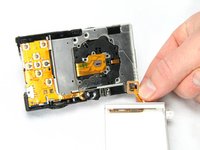
  11. Canon PowerShot SD1000 Flash Unit Replacement: step 11, image 1 of 2 Canon PowerShot SD1000 Flash Unit Replacement: step 11, image 2 of 2
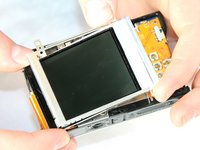
    • Carefully lift the metal frame from the camera.

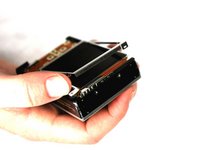
    • Remove the black LCD screen, leaving the thin lens pieces in place.

    • BE CAREFUL; both components are attached by an orange connector ribbon and cannot be removed yet.

    Ask FixBot

    Add Comment

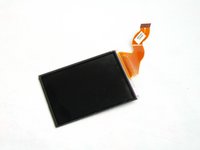
  12. Canon PowerShot SD1000 Flash Unit Replacement: step 12, image 1 of 3 Canon PowerShot SD1000 Flash Unit Replacement: step 12, image 2 of 3 Canon PowerShot SD1000 Flash Unit Replacement: step 12, image 3 of 3
    Tool used on this step:
    Tweezers
    $4.99
    Buy
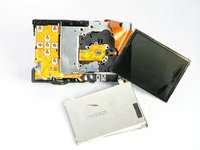
    • Carefully pull on the orange connector ribbon to disconnect the LCD screen.

    • The LCD screen can be pulled out of the frame before disconnecting its connector ribbon.

    • Tweezers are helpful to disconnect the ribbon.

    Ask FixBot

    Add Comment

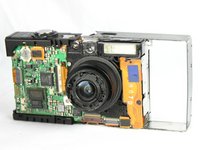
  13. Canon PowerShot SD1000 Flash Unit Replacement, Flash Unit: step 13, image 1 of 2 Canon PowerShot SD1000 Flash Unit Replacement, Flash Unit: step 13, image 2 of 2
    • Slide the metal frame off of the camera on the side that is closest to the flash mechanism.

    Ask FixBot

    Add Comment

  14. Canon PowerShot SD1000 Flash Unit Replacement: step 14, image 1 of 1
    • Use a Phillips #00 screwdriver to remove the 2.4 mm screw that secures the flash assembly.

    Ask FixBot

    Add Comment

  15. Canon PowerShot SD1000 Flash Unit Replacement: step 15, image 1 of 1
    • Use the spudger to gently and carefully disconnect the flash assembly ribbon from the black connector lock.

    Ask FixBot

    Add Comment

  16. Canon PowerShot SD1000 Flash Unit Replacement: step 16, image 1 of 2 Canon PowerShot SD1000 Flash Unit Replacement: step 16, image 2 of 2
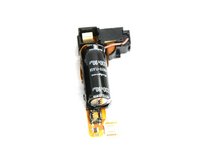
    • Pull the flash assembly forward out of the camera to remove it.

    • BE CAREFUL when handling the flash assembly. Touching the capacitor (the black cylinder attached to the flash assembly) could shock you.

    Ask FixBot

    Add Comment

Conclusion

To reassemble your device, follow these instructions in reverse order.

Cancel: I did not complete this guide.

One other person completed this guide.

Phillip Phung

Member since: 01/19/12

666 Reputation

9 Guides authored

Team

Cal Poly, Team 8-18, Maness Winter 2012 Member of Cal Poly, Team 8-18, Maness Winter 2012

CPSU-MANESS-W12S8G18

4 Members

12 Guides authored

0 Guide Comments

Add Comment

View Statistics:

Past 24 Hours: 4

Past 7 Days: 9

Past 30 Days: 57

All Time: 4,118