
Canon PowerShot S50 Left Motherboard Replacement

Jacob and 6 other contributors
Last updated on Jan 28, 2014
Views: 1.8K
View statistics:
- Past 24 Hours:
- 2
- Past 7 Days:
- 9
- Past 30 Days:
- 47
- All Time:
- 1,783
Comments: 0
No one has left comments on this guide. Will you be first?
Go to guide commentsCompleted: 0 1
No one has marked this guide "completed." Will you be the first?
1 person has marked this guide "completed." It's you — great job!
Favorites: 0 1
No one has favorited (and subscribed to) this guide. Will you be the first?
1 person has favorited (and subscribed to) this guide — and that's you!
Featured Guide
This guide has been found to be exceptionally cool by the iFixit staff.
Introduction
Go to step 1 ↓Use this guide to remove and/or replace the motherboard on the left side of the camera.
What you need
Tools
-
-
-
Spudger4.9
-


-
-
-
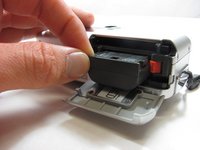
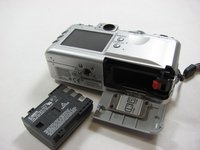
Place camera LCD side up and press up on the battery door.
-
Let it swing open until you can see the battery inside.
 Ask FixBot
-
-
-
Press down on the orange plastic.
-
This will gently eject the battery from its compartment.
-
-
-
-
-
Look at the camera from the side with the lanyard and 4 screws.
-
Remove the two 3.4 mm screws on the metallic colored part.
-
-
-
Remove the 3mm screw on the top left.
-
Now remove the 5.3mm screw on the bottom.
-
-
-
Place the camera LCD side down.
-
Remove the two 5.3mm screws by the battery door.
-
-
-
Remove the four 3.4mm screws on the bottom of the camera around the tripod mount.
-
-
-
Stand the camera back up.
-
Remove the two 3.6mm screws on the side with the A/V Out port.
-
-
-
Lift open the rubber flap covering the A/V Out port.
-
Remove the 3.4mm screw in the center.
-
-
-
There will be a brown plastic piece keeping the thin plastic ribbon in place.
-
Use the spudger to pull out the brown plastic piece attached to the orange plastic.
-
-
Tool used on this step:Tweezers$4.99
-
Use a pair of tweezers and remove the metal piece inside the camera.
-
-
-
-
-
-
Disconnect the black and red cable on the left side of the lens.
-
-
-
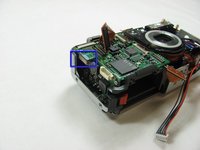
Pull off the orange ribbon on the upper left of the motherboard.
-
Remove the other two orange ribbons on the middle of the left motherboard.
-
-
-
Remove the 3.3mm screw halfway up the left side of the motherboard just to the left of the lens.
-
Go under the piece of plastic and remove the 2.6mm screw.
-
-
-
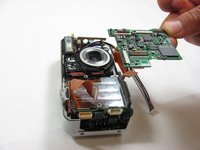
Unplug the top part of the left motherboard.
-
Gently lift the left motherboard up to remove
-
-




To reassemble your device, follow these instructions in reverse order.

Team

Cal Poly, Team 7-34, Maness Spring 2012 Member of Cal Poly, Team 7-34, Maness Spring 2012
CPSU-MANESS-S12S7G34
5 Members
72 Guides authored
