Free Shipping on Domestic Orders $75+

Canon PowerShot G16 Button Circuit Board Replacement

What you need

  1. Canon PowerShot G16 Button Circuit Board Replacement, Battery: step 1, image 1 of 3 Canon PowerShot G16 Button Circuit Board Replacement, Battery: step 1, image 2 of 3 Canon PowerShot G16 Button Circuit Board Replacement, Battery: step 1, image 3 of 3
    • Open the battery flap on the bottom of the camera by applying pressure and pushing in the direction of the arrow.

    • Remove your finger and allow the flap to pop open.

    Ask FixBot

    Add Comment

  2. Canon PowerShot G16 Button Circuit Board Replacement: step 2, image 1 of 3 Canon PowerShot G16 Button Circuit Board Replacement: step 2, image 2 of 3 Canon PowerShot G16 Button Circuit Board Replacement: step 2, image 3 of 3
    • Push the brown lever so that it pivots counterclockwise.

    • Grip and remove the battery.

    Ask FixBot

    Add Comment

  3. Canon PowerShot G16 Button Circuit Board Replacement, Button Circuit Board: step 3, image 1 of 3 Canon PowerShot G16 Button Circuit Board Replacement, Button Circuit Board: step 3, image 2 of 3 Canon PowerShot G16 Button Circuit Board Replacement, Button Circuit Board: step 3, image 3 of 3
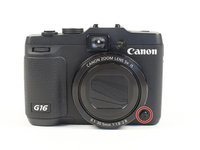
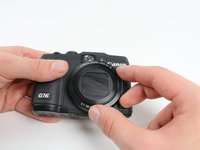
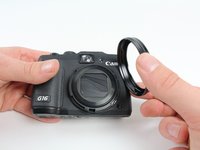
    • Remove the ring around the lens by simultaneously pressing the black button located at the bottom right of the ring and rotating the ring counterclockwise.

    Ask FixBot

    Add Comment

  4. Canon PowerShot G16 Button Circuit Board Replacement: step 4, image 1 of 1
    • Remove the four 3.3 mm screws on the bottom of the camera using a Phillips #00 screwdriver.

    Ask FixBot

    Add Comment

  5. Canon PowerShot G16 Button Circuit Board Replacement: step 5, image 1 of 1
    • Remove the 3.3 mm screw on the right side of the viewfinder using a Phillips #00 screwdriver.

    Ask FixBot

    Add Comment

  6. Canon PowerShot G16 Button Circuit Board Replacement: step 6, image 1 of 1
    • Remove the two 3.3 mm screws near the speaker using a Phillips #00 screwdriver.

    Ask FixBot

    Add Comment

  7. Canon PowerShot G16 Button Circuit Board Replacement: step 7, image 1 of 1
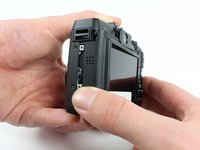
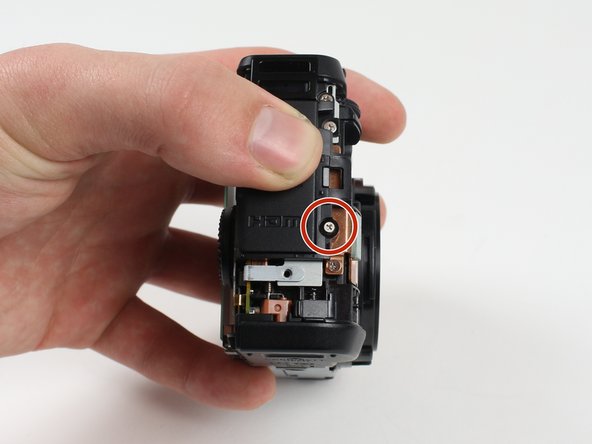
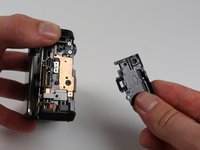
    • Open the port cover by lifting up the tab with your finger and remove the 7.3 mm screw underneath the cover using a Phillips #00 screwdriver.

    • Remove the other 3.3 mm screw below the ports using a Phillips #00 screwdriver.

    Ask FixBot

    Add Comment

  8. Canon PowerShot G16 Button Circuit Board Replacement: step 8, image 1 of 2 Canon PowerShot G16 Button Circuit Board Replacement: step 8, image 2 of 2
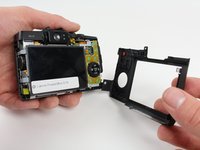
    • Using your fingers, carefully pull the the back cover off by grabbing the bottom left of the back cover and pulling outwards.

    Ask FixBot

    Add Comment

  9. Canon PowerShot G16 Button Circuit Board Replacement: step 9, image 1 of 1
    • Using your fingers, carefully pry the front cover off starting at the bottom right.

    Ask FixBot

    Add Comment

  10. Canon PowerShot G16 Button Circuit Board Replacement: step 10, image 1 of 2 Canon PowerShot G16 Button Circuit Board Replacement: step 10, image 2 of 2
    • Remove the 3.8 mm screw at the bottom right of the port cover housing using a Phillips #00 screwdriver.

    • Lift away the port cover housing.

    Ask FixBot

    Add Comment

  11. Canon PowerShot G16 Button Circuit Board Replacement: step 11, image 1 of 1
    Tool used on this step:
    Tweezers
    $4.99
    Buy
    • Reorient the camera so that you are looking at the back.

    • Make sure to pull the connector straight down as pulling up may cause harm to the connector.

    • Unplug the button circuit board from the motherboard by unlocking the ZIF connector (gently lift the brown lock that keeps the cable in place).

    • Pull the connector downwards with the tweezers.

    Ask FixBot

    Add Comment

  12. Canon PowerShot G16 Button Circuit Board Replacement: step 12, image 1 of 1
    • Remove the 3.0 mm screw on the top of the button memory board using a Phillips #00 screwdriver.

    • Remove the 2.8 mm screw on the bottom of the button memory board using a Phillips #00 screwdriver.

    Ask FixBot

    Add Comment

  13. Canon PowerShot G16 Button Circuit Board Replacement: step 13, image 1 of 1
    • Lift the button circuit board away from the camera.

    Ask FixBot

    Add Comment

Conclusion

To reassemble your device, follow these instructions in reverse order.

Cancel: I did not complete this guide.

4 other people completed this guide.

Jonathan Harger

Member since: 01/11/16

1,270 Reputation

5 Guides authored

Team

Cal Poly, Team 70-6, Forte Winter 2016 Member of Cal Poly, Team 70-6, Forte Winter 2016

CPSU-FORTE-W16S70G6

4 Members

7 Guides authored

2 Guide Comments

Your instructions were so simple. Now my Canon G15 is like new. Thanks so much for the good step by step instructions. Feel so fixing things on my own.

mhkoo1 - Reply Share

where do i buy a button circuit board

u81ou812 - Reply Share

Add Comment

View Statistics:

Past 24 Hours: 1

Past 7 Days: 11

Past 30 Days: 60

All Time: 2,610