Free Shipping on Domestic Orders $75+

Canon PowerShot A630 Front Panel Replacement

What you need

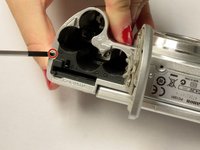
  1. Canon PowerShot A630 Front Panel Replacement, Front Panel: step 1, image 1 of 2 Canon PowerShot A630 Front Panel Replacement, Front Panel: step 1, image 2 of 2
    • Open the battery door by sliding the tab on the battery door while pushing the battery door away from the camera.

    • Remove batteries.

    Ask FixBot
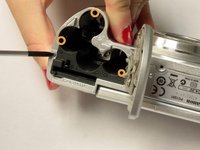
  2. Canon PowerShot A630 Front Panel Replacement: step 2, image 1 of 2 Canon PowerShot A630 Front Panel Replacement: step 2, image 2 of 2
    • Remove the three indicated .2mm screws using a Phillips #00 screwdriver.

    • Gently pull off side-panel to remove it.

    Ask FixBot
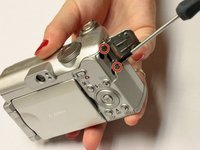
  3. Canon PowerShot A630 Front Panel Replacement: step 3, image 1 of 1
    • Remove the two indicated .2mm screws using a Phillips #00 screwdriver.

    Ask FixBot
  4. Canon PowerShot A630 Front Panel Replacement: step 4, image 1 of 2 Canon PowerShot A630 Front Panel Replacement: step 4, image 2 of 2
    • Remove the indicated .2mm screw using a Phillips #00 screwdriver.

    • Remove the three .2mm screws located on the internal side of the top panel within the battery chamber using a Phillips #00 screwdriver.

    Ask FixBot
  5. Canon PowerShot A630 Front Panel Replacement: step 5, image 1 of 2 Canon PowerShot A630 Front Panel Replacement: step 5, image 2 of 2
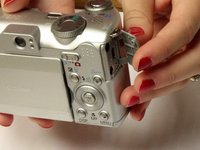
    • Open 'DIGITAL A/V OUT' door on camera.

    • Remove the two indicated .2mm screws using a Phillips #00 screwdriver.

    Ask FixBot
  6. Canon PowerShot A630 Front Panel Replacement: step 6, image 1 of 1
    • Grip the sides of the top panel and gently pull to separate the top panel from the camera body.

    • The top panel will not completely detach.

    Ask FixBot
  7. Canon PowerShot A630 Front Panel Replacement: step 7, image 1 of 2 Canon PowerShot A630 Front Panel Replacement: step 7, image 2 of 2
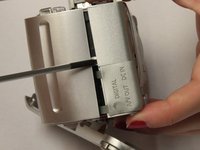
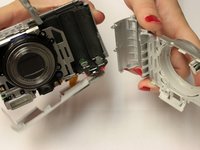
    • Gently pull the front and back panels apart, and use a Phillips #00 screwdriver to remove the screw connecting the panels.

    • Gripping the top and bottom, gently pull the front panel away from the camera body to remove it.

    Ask FixBot
Conclusion

To reassemble your device, follow these instructions in reverse order.

4 other people completed this guide.

Kelly Duggan

Member since: 10/13/14

460 Reputation

3 Guides authored

Team

Clemson, Team 2-5, Benson Fall 2014 Member of Clemson, Team 2-5, Benson Fall 2014

CLEM-BENSON-F14S2G5

4 Members

18 Guides authored

0 Guide Comments

Add Comment

View Statistics:

Past 24 Hours: 0

Past 7 Days: 10

Past 30 Days: 64

All Time: 1,133