Free Shipping on Domestic Orders $75+

Canon PowerShot A3400 IS Flash Assembly Replacement

What you need

  1. Canon PowerShot A3400 IS Flash Assembly Replacement, Battery: step 1, image 1 of 1
    • Place thumb on area right next to where it says open and slide to the right to open.

    Ask FixBot

    Add Comment

  2. Canon PowerShot A3400 IS Flash Assembly Replacement: step 2, image 1 of 1
    • Remove the battery by pushing the orange object outwards; the battery will spring up and out.

    Ask FixBot

    Add Comment

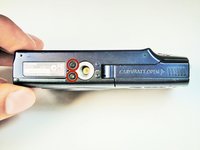
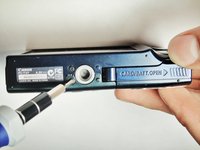
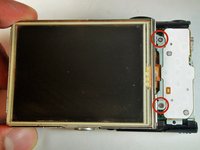
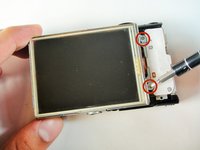
  3. Canon PowerShot A3400 IS Flash Assembly Replacement, Plastic Case: step 3, image 1 of 2 Canon PowerShot A3400 IS Flash Assembly Replacement, Plastic Case: step 3, image 2 of 2
    • Remove the two 5.00 mm screws in the bottom of the casing with a Philips #000 screwdriver

    Ask FixBot

    Add Comment

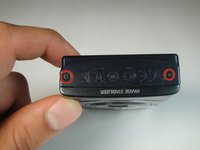
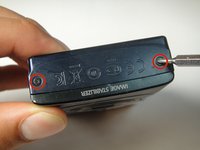
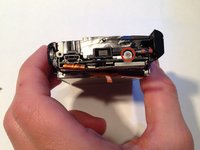
  4. Canon PowerShot A3400 IS Flash Assembly Replacement: step 4, image 1 of 2 Canon PowerShot A3400 IS Flash Assembly Replacement: step 4, image 2 of 2
    • Place the camera on to the side that has the image stabilizer label.

    • Remove the 5.00 mm screws that are on this side using the screwdriver.

    Ask FixBot

    Add Comment

  5. Canon PowerShot A3400 IS Flash Assembly Replacement: step 5, image 1 of 1
    • Place camera on to the side with the A/V Out Digital Cover facing up.

    • Remove this visible 5.00 mm screw.

    • Pull the A/V Out Digital cover back to uncover the next step.

    Ask FixBot

    Add Comment

  6. Canon PowerShot A3400 IS Flash Assembly Replacement: step 6, image 1 of 1
    • Remove the 5.00 mm screw from behind the cover.

    Ask FixBot

    Add Comment

  7. Canon PowerShot A3400 IS Flash Assembly Replacement: step 7, image 1 of 1
    • Make sure the battery cover is open.

    Ask FixBot

    Add Comment

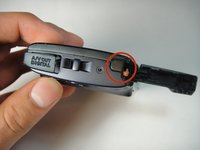
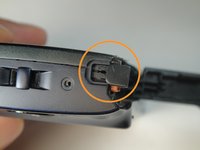
  8. Canon PowerShot A3400 IS Flash Assembly Replacement: step 8, image 1 of 2 Canon PowerShot A3400 IS Flash Assembly Replacement: step 8, image 2 of 2
    • Turn the camera onto the side with the A/V out Digital cover.

    • Use your finger to pull this tab to the right.

    Ask FixBot

    Add Comment

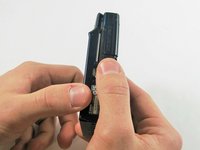
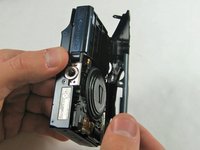
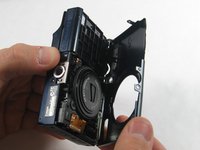
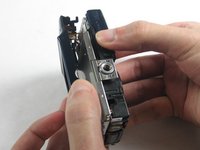
  9. Canon PowerShot A3400 IS Flash Assembly Replacement: step 9, image 1 of 3 Canon PowerShot A3400 IS Flash Assembly Replacement: step 9, image 2 of 3 Canon PowerShot A3400 IS Flash Assembly Replacement: step 9, image 3 of 3
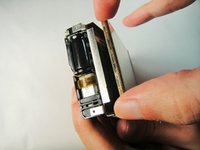
    • Remove the lens side by using your fingers or a spudger to pry it gently open.

    • Try to pry it loose all around that side so that it is easier to pull off.

    Ask FixBot

    Add Comment

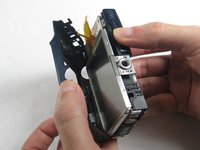
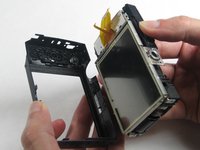
  10. Canon PowerShot A3400 IS Flash Assembly Replacement: step 10, image 1 of 3 Canon PowerShot A3400 IS Flash Assembly Replacement: step 10, image 2 of 3 Canon PowerShot A3400 IS Flash Assembly Replacement: step 10, image 3 of 3
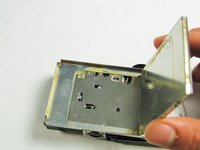
    • Using your fingers, pull the screen side gently off.

    • Try to loosen it all around that side so that it is easier to try and pull it off.

    Ask FixBot

    Add Comment

  11. Canon PowerShot A3400 IS Flash Assembly Replacement, Flash: step 11, image 1 of 3 Canon PowerShot A3400 IS Flash Assembly Replacement, Flash: step 11, image 2 of 3 Canon PowerShot A3400 IS Flash Assembly Replacement, Flash: step 11, image 3 of 3
    • Remove the three 5 mm screws

    Ask FixBot

    Add Comment

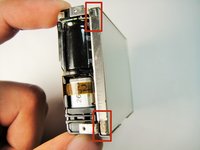
  12. Canon PowerShot A3400 IS Flash Assembly Replacement: step 12, image 1 of 3 Canon PowerShot A3400 IS Flash Assembly Replacement: step 12, image 2 of 3 Canon PowerShot A3400 IS Flash Assembly Replacement: step 12, image 3 of 3
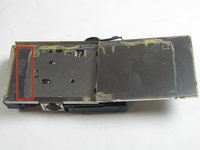
    • Remove the screen by pulling at the two points as shown.

    Ask FixBot

    Add Comment

  13. Canon PowerShot A3400 IS Flash Assembly Replacement: step 13, image 1 of 2 Canon PowerShot A3400 IS Flash Assembly Replacement: step 13, image 2 of 2
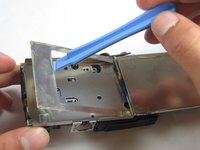
    • Remove the metal plate with the plastic opening tool.

    Ask FixBot

    Add Comment

  14. Canon PowerShot A3400 IS Flash Assembly Replacement: step 14, image 1 of 2 Canon PowerShot A3400 IS Flash Assembly Replacement: step 14, image 2 of 2
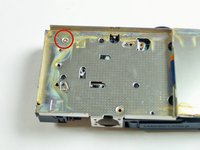
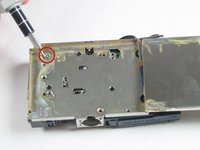
    • Remove the 5 mm screw

    Ask FixBot

    Add Comment

  15. Canon PowerShot A3400 IS Flash Assembly Replacement: step 15, image 1 of 3 Canon PowerShot A3400 IS Flash Assembly Replacement: step 15, image 2 of 3 Canon PowerShot A3400 IS Flash Assembly Replacement: step 15, image 3 of 3
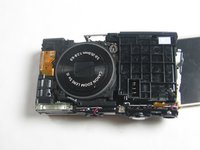
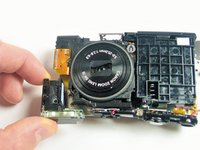
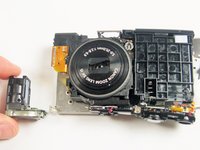
    • Gently pull the flash assembly away.

    Ask FixBot

    Add Comment

Conclusion

To reassemble your device, follow these instructions in reverse order.

Cancel: I did not complete this guide.

2 other people completed this guide.

Emily Pretorius

Member since: 01/13/15

349 Reputation

3 Guides authored

1 Guide Comment

easy to take off but waste of putting it back together..

The Heat - Reply Share

Add Comment

View Statistics:

Past 24 Hours: 1

Past 7 Days: 6

Past 30 Days: 34

All Time: 967