Introduction
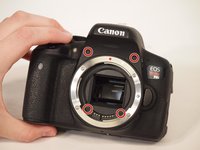
If the flash of your Canon Rebel T6i (also known as model EOS 750D) is malfunctioning — not producing any light or not triggering when taking a picture — use this guide to remove and replace the entire flash assembly.
Make sure to check the flash settings on your camera and confirm that the flash assembly is faulty. The camera flash should trigger when the camera mode is set to Automatic (A+) and the scene you are photographing is very dark.
Before beginning, remove the battery from your camera and disconnect from from any external power source.
What you need
-
-
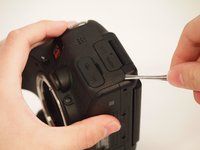
Remove two 6.8 mm JIS #000 screws on the right side.
-
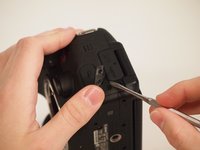
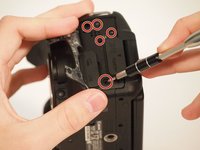
Remove six 5.3 mm JIS #000 screws on the bottom.
-
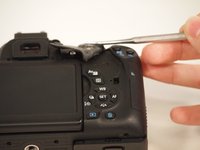
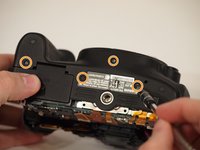
Remove two 5.3 mm JIS #000 screws on either side of the viewfinder.
 Ask FixBot
-
-
-
Remove one 5.9 mm JIS #000 screw on the top right.
-
Remove one 3.4 mm JIS #000 screw on the top left.
-
-
-
Using a metal spudger, pry the rubber grip off of the casing on the left side of the camera.
-
Remove five silver 5.8 mm JIS #000 screws from underneath the grip.
-
-
-
Using the metal spudger, pry the rubber grip located just below the turndial.
-
-
-
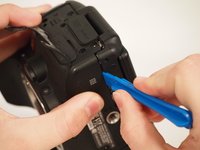
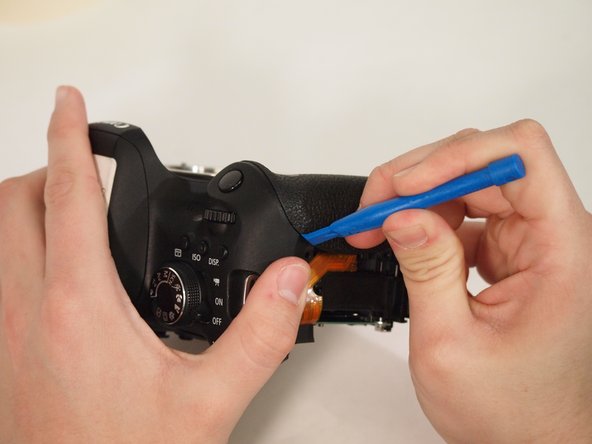
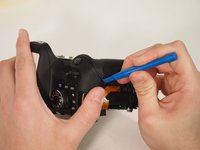
Carefully use the plastic opening tool to pry the casing apart along the seam.
-
Follow the seam with the plastic tool until the back is ready to remove.
-
-
-
-
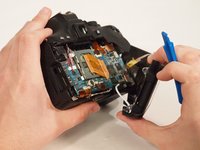
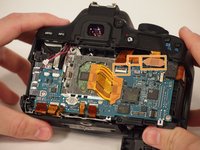
To disconnect the white wire, pinch the wire casing and pull it directly out from the camera.
-
To disconnect the ribbon connector, softly pull the back away from the motherboard. It should come undone with little force.
-
Once removed, set the back in a safe place.
-
-
Tool used on this step:Tweezers$4.99
-
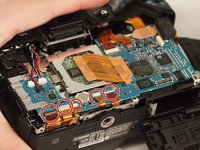
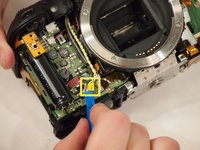
Remove the five ribbon connectors along the bottom of the assembly using either needle nose tweezers or a plastic opening tool to flip the small flaps to the "up" position.
-
Use a nylon spudger to pull each ribbon connector out of its connection using the hole in the center of the ribbon.
-
-
-
Remove the button cell battery from the motherboard using a pair of tweezers.
-
-
-
Disconnect the small plastic connectors on the top left corner of the motherboard by gripping the small plastic portion of the wire and gently pulling out of the connector.
-
Disconnect the three ribbon connectors along the top.
-
-
-
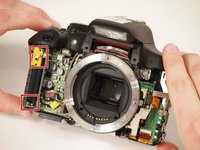
Remove the four screws from the front of the camera. There are two screws above the lens mount and two screws inside the lens mount.
-
Remove the four screws from the bottom of the camera.
-
-
-
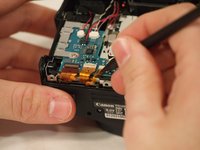
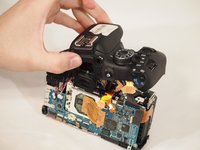
Using the plastic opening tool, pry the front of the casing off of the camera.
-
-
-
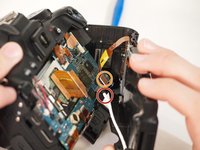
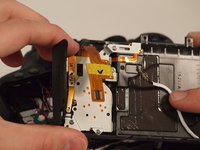
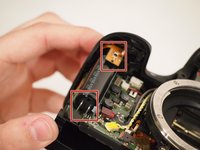
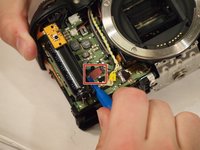
Remove the yellow and red connections on the front near the black cylinder (capacitor).
-
The yellow connector will just pop out if pried from the bottom using a plastic opening tool.
-
The red connector will pull out of the casing with either a plastic opening tool or a thin set of tweezers.
-
-
-
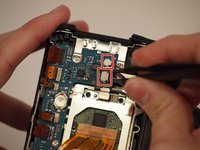
Remove the diopter adjustment knob next to the viewfinder using a JIS #000 screwdriver.
-
-
-
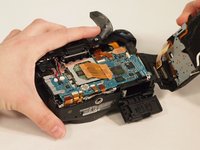
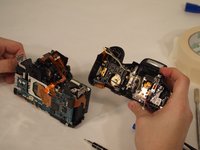
Remove the entire upper flash assembly by gently pulling it up and off the camera.
-


To reassemble your device, follow these instructions in reverse order.
Cancel: I did not complete this guide.
3 other people completed this guide.
Team

University of Memphis, Team S2-G1, Kim Spring 2018 Member of University of Memphis, Team S2-G1, Kim Spring 2018
UM-KIM-S18S2G1
3 Members
11 Guides authored