Free Shipping on Domestic Orders $75+

Canon EOS Rebel T5 SD Card Board Replacement

What you need

  1. Canon EOS Rebel T5 SD Card Board Replacement, Battery: step 1, image 1 of 1
    • Lay the camera on its back so that the card/battery door is facing you.

    • Using your fingernail, slide the tab on the battery door up to release the battery door latch.

    Ask FixBot
  2. Canon EOS Rebel T5 SD Card Board Replacement: step 2, image 1 of 1
    • Lift the now free card/battery door to reveal the battery compartment.

    • Push the gray lever to the right side so that the battery can be removed and replaced with a new one.

    Ask FixBot
  3. Canon EOS Rebel T5 SD Card Board Replacement, SD Card: step 3, image 1 of 1
    • Lay the camera on its back so that the card/battery door is facing you.

    • Using your fingernail, slide the tab on the battery door up to release the battery door latch.

    Ask FixBot
  4. Canon EOS Rebel T5 SD Card Board Replacement: step 4, image 1 of 1
    • Open the battery compartment by lifting the card/battery door. You will see a thin SD Card slot below the battery.

    • Push in the old SD card until it clicks to remove it and then push in the new card until it clicks into place.

    Ask FixBot
  5. Canon EOS Rebel T5 SD Card Board Replacement, Back Cover: step 5, image 1 of 1
    • Turn the camera so that the back is facing to your right.

    • Remove the 5mm JIS #000 screw above the rubber USB port cover.

    Ask FixBot
  6. Canon EOS Rebel T5 SD Card Board Replacement: step 6, image 1 of 1
    • Remove the rubber piece.

    • Unscrew the two screws under the rubber cover to completely remove the rubber cover piece.

    • It is held in place by a notched tether, but can be easily manipulated to slide out.

    Ask FixBot
  7. Canon EOS Rebel T5 SD Card Board Replacement: step 7, image 1 of 1
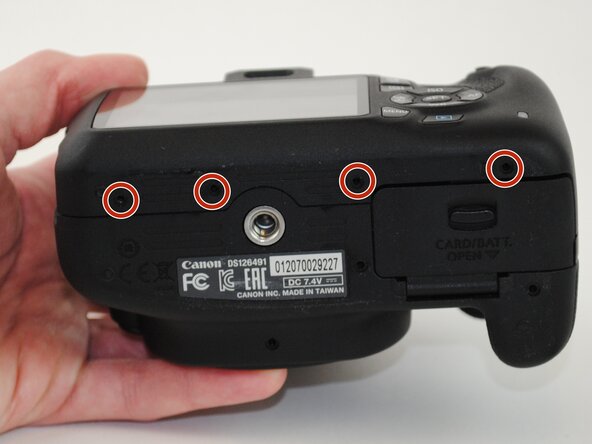
    • Turn your camera so that the bottom is facing you.

    • Remove the four 5mm JIS #000 screws.

    Ask FixBot
  8. Canon EOS Rebel T5 SD Card Board Replacement: step 8, image 1 of 1
    • Now turn the camera so that the front is facing towards your right.

    • Remove the two remaining 5mm JIS #000 screws.

    Ask FixBot
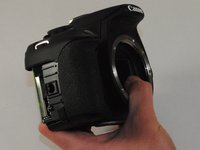
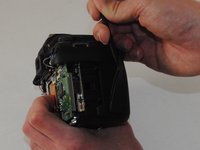
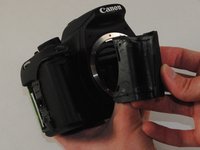
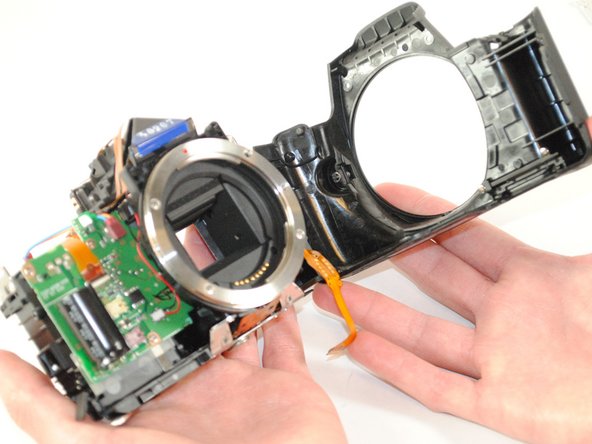
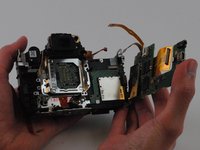
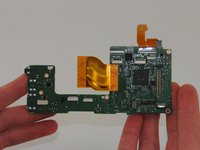
  9. Canon EOS Rebel T5 SD Card Board Replacement: step 9, image 1 of 3 Canon EOS Rebel T5 SD Card Board Replacement: step 9, image 2 of 3 Canon EOS Rebel T5 SD Card Board Replacement: step 9, image 3 of 3
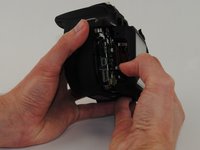
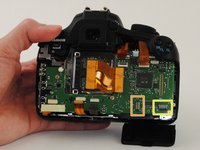
    • Now that all of the exterior screws have been removed, grip the camera firmly on both sides.

    • Gently pry the back panel from the main body of the camera.

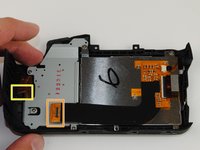
    • There are two ribbon cables that need to be removed in order for the back panel to come free from the camera body, as indicated.

    • This back panel contains various control components of the camera as well as the LCD screen.

    Ask FixBot
  10. Canon EOS Rebel T5 SD Card Board Replacement, LCD Screen: step 10, image 1 of 2 Canon EOS Rebel T5 SD Card Board Replacement, LCD Screen: step 10, image 2 of 2
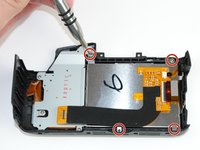
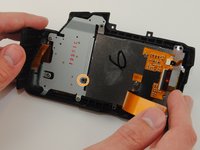
    • Remove the four silver 4mm JIS #000 screws connecting the LCD screen to the back of the camera.

    • Be sure to lift the ribbon cable to remove the remaining hidden black 4mm JIS #000 screw.

    Ask FixBot
  11. Canon EOS Rebel T5 SD Card Board Replacement: step 11, image 1 of 1
    • The LCD screen can now be lifted from the right side to be replaced.

    Ask FixBot
  12. Canon EOS Rebel T5 SD Card Board Replacement, Motherboard: step 12, image 1 of 2 Canon EOS Rebel T5 SD Card Board Replacement, Motherboard: step 12, image 2 of 2
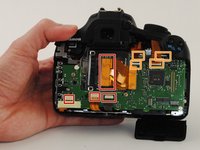
    • Remove all ribbon cables with the plastic spudger.

    • Gently pry up the black plastic tabs to slide out the ribbon cables

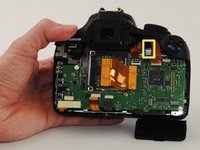
    • Take note of this black cable and where it connects to the motherboard. This is a fiber optic cable which is used for the camera flash. It will need to be reconnected after replacing the motherboard.

    • When reconnecting the fiber optic cable, simply push the black cable into the hole in the connector and push it all the way in.

    Ask FixBot
  13. Canon EOS Rebel T5 SD Card Board Replacement: step 13, image 1 of 1
    • Turn your camera so that the top is facing you.

    • Remove the two black 5 mm JIS #000 screws.

    Ask FixBot
  14. Canon EOS Rebel T5 SD Card Board Replacement: step 14, image 1 of 3 Canon EOS Rebel T5 SD Card Board Replacement: step 14, image 2 of 3 Canon EOS Rebel T5 SD Card Board Replacement: step 14, image 3 of 3
    • Turn the grip side toward you.

    • Remove the rubber grip, using the plastic spudger.

    Ask FixBot
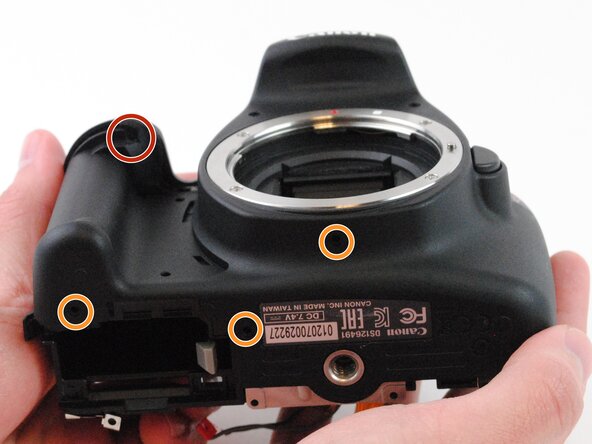
  15. Canon EOS Rebel T5 SD Card Board Replacement: step 15, image 1 of 1
    • Remove the black 5 mm JIS #000 screw, located under the grip.

    • Remove the three 3.5mm JIS #000 screws on the bottom of the case.

    Ask FixBot
  16. Canon EOS Rebel T5 SD Card Board Replacement: step 16, image 1 of 1
    • Remove the top panel of the device.

    Ask FixBot
  17. Canon EOS Rebel T5 SD Card Board Replacement: step 17, image 1 of 2 Canon EOS Rebel T5 SD Card Board Replacement: step 17, image 2 of 2
    • Remove the front panel of the camera.

    Ask FixBot
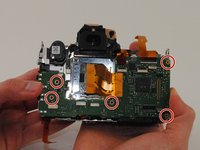
  18. Canon EOS Rebel T5 SD Card Board Replacement: step 18, image 1 of 3 Canon EOS Rebel T5 SD Card Board Replacement: step 18, image 2 of 3 Canon EOS Rebel T5 SD Card Board Replacement: step 18, image 3 of 3
    • Remove the five silver 5mm JIS #000 screws.

    • The motherboard can now be removed.

    Ask FixBot
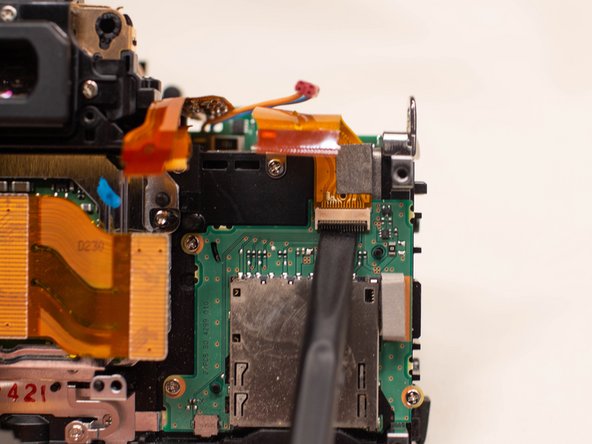
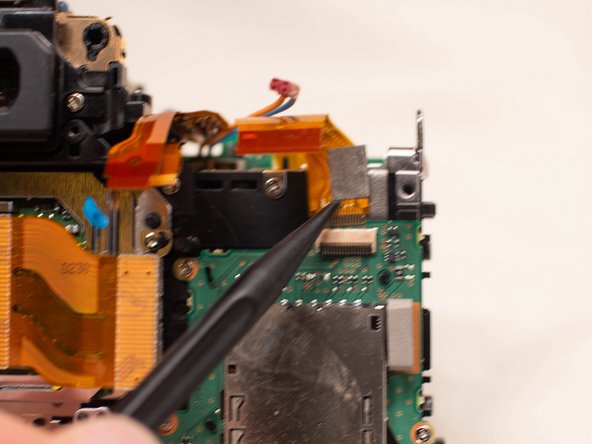
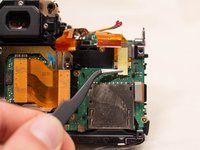
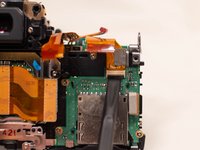
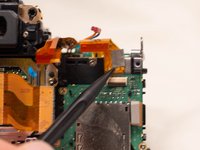
  19. Canon EOS Rebel T5 SD Card Board Replacement, SD Card Board: step 19, image 1 of 3 Canon EOS Rebel T5 SD Card Board Replacement, SD Card Board: step 19, image 2 of 3 Canon EOS Rebel T5 SD Card Board Replacement, SD Card Board: step 19, image 3 of 3
    • Using a pair of tweezers, remove the tape covering the SD card board ribbon cable.

    • Using the plastic spuger, lift up the black locking tab on the SD card board ribbon cable and disconnect the ribbon cable.

    Ask FixBot
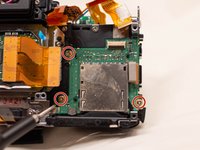
  20. Canon EOS Rebel T5 SD Card Board Replacement: step 20, image 1 of 2 Canon EOS Rebel T5 SD Card Board Replacement: step 20, image 2 of 2
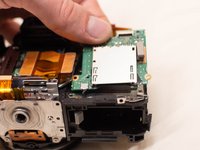
    • Remove the three 3mm JIS #000 screws connecting the SD card reader to the back of the device.

    • Carefully lift the SD card board out of the camera.

    Ask FixBot
Conclusion

To reassemble your device, follow these instructions in reverse order.

7 other people completed this guide.

Tyler Brown

Member since: 09/22/14

921 Reputation

2 Guides authored

Team

USF Tampa, Team 16-4, Wollert Fall 2015 Member of USF Tampa, Team 16-4, Wollert Fall 2015

USFT-WOLLERT-F15S16G4

4 Members

18 Guides authored

5 Guide Comments

Very comprehensive tutorial but 2 screws forgotten (on both sides of the viewfinder) and the adjustment thumb knob withdrawal before removing the top panel of the device. Good job anyway, tks

igloo - Reply Share

Is there a video of this?

Hubzilla - Reply Share

Removal of the sensor is NOT required to take the SD board out of the camera. The sensor needs to be fitted back to exactly the same height, otherwise you WILL not retain autofocus. Why was there no mention of this during the steps above?

Lee Gartside - Reply Share

Bonjour , ou peut on acheter le lecteur de carte sd , merci , cordialement

d007 Éric d007 - Reply Share

Step 19 and 20 are only for modifiing or replacing the image sensor

And is not recommended because AF doesn't work without further adjustment

Tom Oos Oss - Reply Share

Add Comment

View Statistics:

Past 24 Hours: 2

Past 7 Days: 17

Past 30 Days: 115

All Time: 11,447