
Canon EOS Rebel G Back Panel Replacement

Last updated on May 7, 2024
Views: 2.6K
View statistics:
- Past 24 Hours:
- 3
- Past 7 Days:
- 18
- Past 30 Days:
- 86
- All Time:
- 2,628
Comments: 0
No one has left comments on this guide. Will you be first?
Go to guide commentsCompleted: 0 1
No one has marked this guide "completed." Will you be the first?
1 person has marked this guide "completed." It's you — great job!
Favorites: 0 1
No one has favorited (and subscribed to) this guide. Will you be the first?
1 person has favorited (and subscribed to) this guide — and that's you!
Featured Guide
This guide has been found to be exceptionally cool by the iFixit staff.
Introduction
Go to step 1 ↓This guide will instruct you how to remove the back panel of your camera.
What you need
Tools


-
-
-
Using a #00 Phillips screw driver, remove three 4.4 mm Phillips screws as indicated by the red circles.
 Ask FixBot
-
-
-
Using your finger, peel back the textured grip so the components are separated.
-
-
-
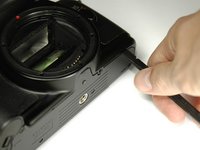
Using the flat end of a spudger, loosen the connection between the front panel and the device.
-
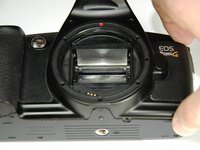
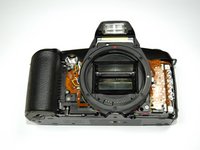
Remove the front panel using your hands.
-
-
-
-
-
Turn Camera over.
-
Using a #00 Phillips screw driver, unscrew the two 4.9 mm Phillips screws located on either side of the viewfinder.
-
-
-
Using a #00 Phillips screw driver, unscrew the one 5.7 mm Phillips screw located next to the LCD screen.
-
-
-
Lay the camera on its back.
-
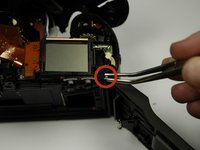
Unsolder the flash connection from the motherboard as noted by the blue circle.
-
-
-
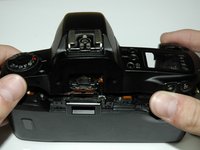
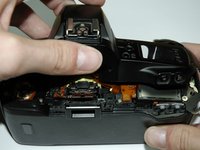
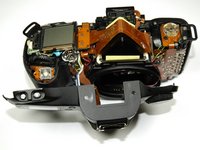
Remove the top panel by lifting it from the back, pushing it forward over the camera and letting it rotate down in front of the camera.
-
-
-
-
-
-
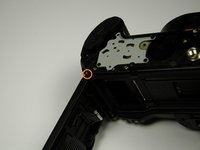
Using a #00 Philllips screw driver, unscrew the 6.8 mm Phillips screw that holds the strap anchor noted by the red circle.
-
Remove the strap anchor.
-
-
-
Unlatch the back panel.
-
Using a #00 Phillips screw driver, unscrew the six screws on the bottom of the camera.
-
One 7.4 mm Phillips screw
-
Two 6.0 mm Phillips screws
-
Two 4.4 mm Phillips screws
-
One 3.9 mm Phillips screw
-
-
Tool used on this step:Tweezers$4.99
-
From the bottom of the camera push the hinge rod in with your finger.
-
Return the camera to its upright position.
-
Use pliers (or tweezers) to pull the rod out from the top.
-
-






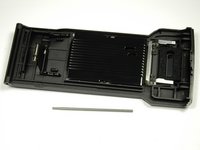
To reassemble your device, follow these instructions in reverse order.

Team

Cal Poly, Team 14-9, Forte Spring 2012 Member of Cal Poly, Team 14-9, Forte Spring 2012
CPSU-FORTE-S12S14G9
5 Members
144 Guides authored
