Introduction
Removing the back cover can be useful if you need to replace it if the screen is broken or if there is some other issue with it. The back cover can also be broken down further, allowing replacement of individual parts found on the back cover assembly if you are able to find individual replacement parts. This guide will not cover disassembly of the back cover itself however, and will only show you how to remove the back cover from the camera.
Note that the Phillips #000 screwdriver is marked as an optional tool as you can always use the JIS #000 screwdriver in its place (JIS screwdrivers won't damage Phillips head screws).
What you need
-
-
Before beginning, remove the battery and SD card from the camera.
-
Remove the eyepiece.
-
Using a pair of tweezers, unclip each side of the eyepiece from the bottom while providing light pressure upwards on the eyepiece with your thumb.
-
Remove the battery door.
-
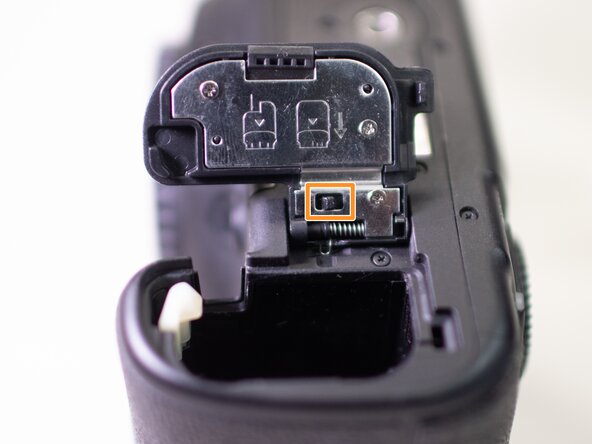
Open the battery door and disengage the hinge spring.
-
While holding the spring back, pull off the battery door.
 Ask FixBot
-
-
-
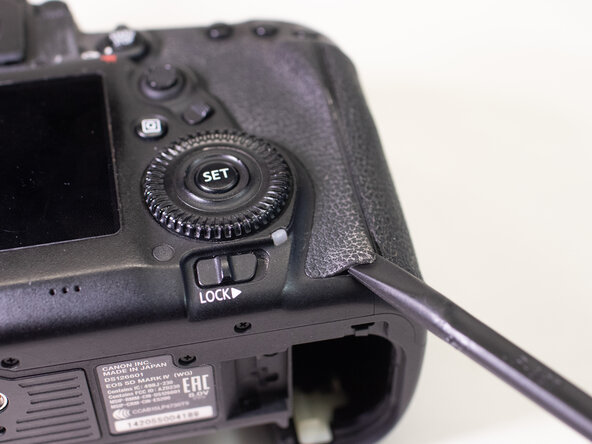
Using a plastic spudger tool, peel off the rubber grip on the left side of the camera.
-
On the Left side of the camera, underneath where the rubber grip was, remove the following screws:
-
Two M1.7x5.0mm Phillips #000 screws.
-
One M1.7x5.0mm Phillips #000 screw.
-
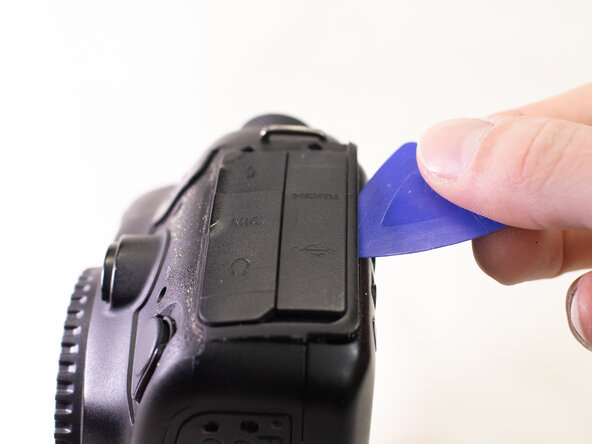
Pry off the plastic interface cover.
-
-
-
-
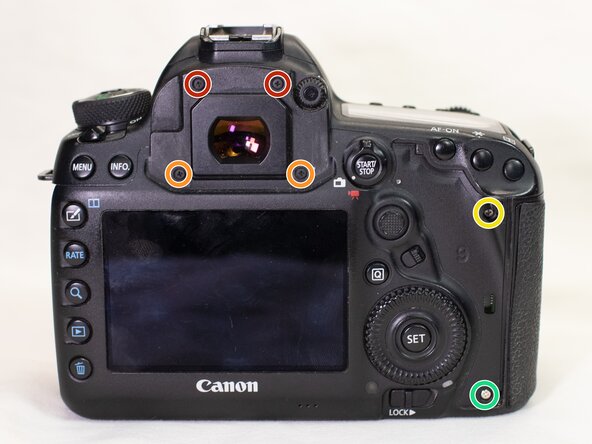
With a plastic spudger tool, peel off the rubber grip on the backside of the camera.
-
On the backside of the camera, remove the following screws:
-
Two M1.7x4.5mm JIS #000 screws.
-
Two M1.7x6.0mm JIS #000 screws.
-
One M1.7x9.0 JIS #000 screw.
-
One M1.7x4.5mm Phillips #000 screw.
-
-
-
On the bottom of the camera, remove the following screws:
-
Three M1.7x2.5mm JIS #000 screws.
-
Slightly lift up the back cover from the camera, using a plastic spudger or opening tool as needed.
-
Carefully pry up the ribbon cable attaching the screen to the main PCB board using a plastic spudger.
-
With the cable disconnected, you can finish lifting off the back cover from the camera.
-







To reassemble your device, follow these instructions in reverse order.
Attached Documents

