
Canon EOS 5D Mark II LCD Replacement

Mike Seed and one other contributor
Last updated on Jan 9, 2015
Views: 13K
View statistics:
- Past 24 Hours:
- 2
- Past 7 Days:
- 26
- Past 30 Days:
- 148
- All Time:
- 12,788
Comments: 12
7 comments on steps, 5 guide comments.
Go to guide commentsCompleted: 11 12
11 people have marked this guide "completed." Will you be next?
12 people have marked this guide "completed." Including you — great job!
Favorites: 2 3
2 people have favorited (and subscribed to) this guide. Will you be next?
3 people have favorited (and subscribed to) this guide — including you!
Introduction
Go to step 1 ↓Follow this guide to replace the LCD.
What you need
Tools

-
-
-
-
Peel back the rubber cover above the in/out ports to reveal two screw heads.
-
-
-
Lift the in/out port plastic covering from the bottom where the backup battery used to be.
-
-
-
Remove each 6.3 mm screw on either side of the viewfinder using a Phillips #0 screwdriver.
-
-
-
Remove the three 4.8 mm screws on the bottom of the back plate using a Phillips #0.
-
-
-
Peel back the rubber covering next to the menu dial to access the screw.
-
Remove the single 3.4 mm screw using a Phillips #0.
-
-
-
-
The back panel can now fall off easily by turning the device upside down. Be sure to catch it so the data ribbons do not tear or tug.
-
-
-
Remove each data ribbon cable from the motherboard by applying pressure down towards the motherboard and gently sliding your thumb upwards on the slot where the cable meets the motherboard. This will raise a very small clip that locks the cable in place.
-
The back panel is now free from the rest of the device.
-
-
-
-
-
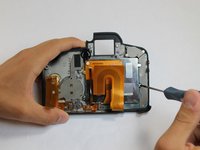
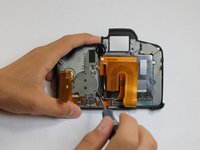
Remove each of the 3.4 mm screws holding in the LCD using a Phillips #0.
-
-
-
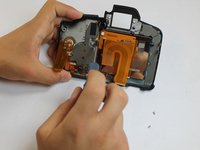
Grip the wire attaching the speaker to the data ribbon cable and pull it out.
-
The LCD is now free from the back panel.
-
-

 Ask FixBot



To reassemble your device, follow these instructions in reverse order.
Cancel: I did not complete this guide.
11 other people completed this guide.

Team

USF Tampa, Team 1-6, Hickman Fall 2014 Member of USF Tampa, Team 1-6, Hickman Fall 2014
USFT-HICKMAN-F14S1G6
3 Members
96 Guides authored
5 Guide Comments
Step 8: Missing indication to remove also the third screw on the left, just next to the connector cover
where can get the lcd screen? thanks for the guide!!
Big thank you! This walkthrough really helped ;) fortunatelly only one of the connecting cables slided out of the socket that caused the lcd dead. Cam is back in business in 15 minutes ;)
Also....the last step should mention unclipping the ribbon cables in the same manner as before from the small circuit board that resides on the rear of the LCD, and the LCD has a metal frame that will need to be removed and installed on the replacement LCD before installing it. It is held in place via strong double sided tape. A little heat may need to be applied to separate it.
