Free Shipping on Domestic Orders $75+

Canon EOS 300 Front Panel Replacement

Views: 1.7K

View statistics:

Past 24 Hours:
4
Past 7 Days:
24
Past 30 Days:
107
All Time:
1,695
Comments: 1

1 comment on steps.

Completed: 1

1 person has marked this guide "completed." Will you be next?

Favorites: 0

No one has favorited (and subscribed to) this guide. Will you be the first?

Time Required: 5 minutes
Difficulty: Easy
Canon EOS 300 Front Panel Replacement

Introduction

Go to step 1 ↓

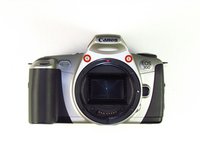
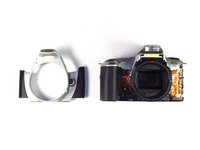
The front panel will be removed in order to access other areas of the camera such as the battery door and top panel

What you need

Tools

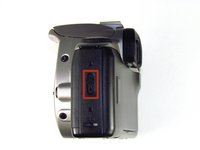
    1. Canon EOS 300 Front Panel Replacement, Batteries: step 1, image 1 of 3 Canon EOS 300 Front Panel Replacement, Batteries: step 1, image 2 of 3 Canon EOS 300 Front Panel Replacement, Batteries: step 1, image 3 of 3
      • Open up the battery door.

      Ask FixBot

      Add Comment

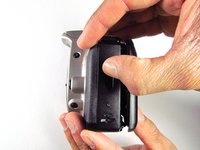
    2. Canon EOS 300 Front Panel Replacement: step 2, image 1 of 2 Canon EOS 300 Front Panel Replacement: step 2, image 2 of 2
      • Remove the batteries from the camera by sliding them out into your palm.

      Ask FixBot

      Add Comment

    1. Canon EOS 300 Front Panel Replacement, Side Panel with Lever: step 3, image 1 of 2 Canon EOS 300 Front Panel Replacement, Side Panel with Lever: step 3, image 2 of 2
      • Release the side latch to open the back panel.

      Ask FixBot

      Add Comment

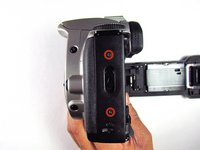
    2. Canon EOS 300 Front Panel Replacement: step 4, image 1 of 2 Canon EOS 300 Front Panel Replacement: step 4, image 2 of 2
      • Remove the two black 4.5mm screws above and below the latch.

      Ask FixBot

      Add Comment

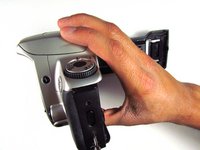
    3. Canon EOS 300 Front Panel Replacement: step 5, image 1 of 2 Canon EOS 300 Front Panel Replacement: step 5, image 2 of 2
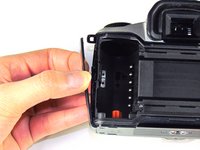
      • Using your finger, carefully pry open the side panel from the top of camera.

      • Pull panel downwards to remove.

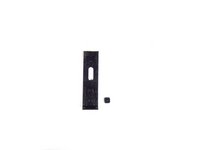
      • Make sure to keep track of the small black piece of rubber under the latch.

      Ask FixBot

      Add Comment

    1. Canon EOS 300 Front Panel Replacement, Front Panel: step 6, image 1 of 2 Canon EOS 300 Front Panel Replacement, Front Panel: step 6, image 2 of 2
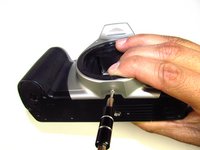
      • Remove the two silver 6mm Phillips #1 screws.

      Ask FixBot

      Add Comment

    2. Canon EOS 300 Front Panel Replacement: step 7, image 1 of 2 Canon EOS 300 Front Panel Replacement: step 7, image 2 of 2
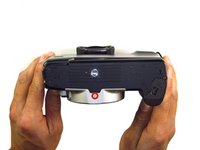
      • Flip camera over to the bottom.

      • Remove the one 5mm Phillips #1 silver screw.

      Ask FixBot

      Add Comment

    3. Canon EOS 300 Front Panel Replacement: step 8, image 1 of 2 Canon EOS 300 Front Panel Replacement: step 8, image 2 of 2
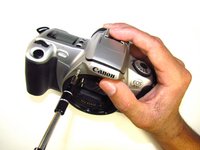
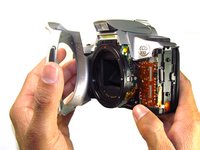
      • Remove the front panel by pulling away from the side with the lever.

      Ask FixBot

      Add Comment

Conclusion

To reassemble your device, follow these instructions in reverse order.

Cancel: I did not complete this guide.

One other person completed this guide.

Jordan Tang

Member since: 01/24/14

608 Reputation

5 Guides authored

Team

Cal Poly, Team 6-20, Maness Winter 2014 Member of Cal Poly, Team 6-20, Maness Winter 2014

CPSU-MANESS-W14S6G20

4 Members

132 Guides authored

0 Guide Comments

Add Comment

View Statistics:

Past 24 Hours: 4

Past 7 Days: 24

Past 30 Days: 107

All Time: 1,695