Free Shipping on Domestic Orders $75+

Canon EOS 30 Battery Door Replacement

What you need

  1. Canon EOS 30 Battery Door Replacement, Front Panel: step 1, image 1 of 1
    • Remove the two 4.8 mm black screws above the lens on the front of the camera.

    Ask FixBot

    Add Comment

  2. Canon EOS 30 Battery Door Replacement: step 2, image 1 of 1
    • Remove the 4.3 mm black screw under the lens ring, and the 4.8 mm black screw under the camera.

    Ask FixBot

    Add Comment

  3. Canon EOS 30 Battery Door Replacement: step 3, image 1 of 1
    • Remove the 4.8 mm black screw on the left side of the camera.

    Ask FixBot

    Add Comment

  4. Canon EOS 30 Battery Door Replacement: step 4, image 1 of 1
    • Remove the front panel by lifting it away from the camera's body.

    Ask FixBot

    Add Comment

  5. Canon EOS 30 Battery Door Replacement, Bottom Panel: step 5, image 1 of 1
    • Remove seven 4.25 mm black screws on the bottom panel.

    Ask FixBot

    Add Comment

  6. Canon EOS 30 Battery Door Replacement: step 6, image 1 of 1
    • Remove the bottom panel.

    Ask FixBot

    Add Comment

  7. Canon EOS 30 Battery Door Replacement, Side Panel With Remote Control Socket: step 7, image 1 of 1
    • Remove two 6.5 mm black screws from the panel.

    Ask FixBot

    Add Comment

  8. Canon EOS 30 Battery Door Replacement: step 8, image 1 of 1
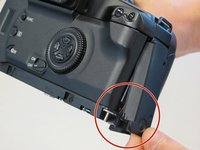
    • Remove the plastic remote control socket cap by pulling it straight out.

    Ask FixBot

    Add Comment

  9. Canon EOS 30 Battery Door Replacement: step 9, image 1 of 2 Canon EOS 30 Battery Door Replacement: step 9, image 2 of 2
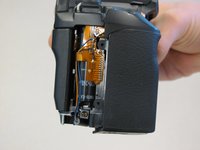
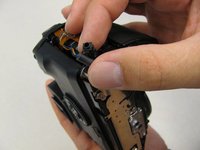
    • Slide the panel toward the bottom of the camera to remove.

    Ask FixBot

    Add Comment

  10. Canon EOS 30 Battery Door Replacement: step 10, image 1 of 1
    • Remove the single 4.8 silver screw from the control socket.

    Ask FixBot

    Add Comment

  11. Canon EOS 30 Battery Door Replacement: step 11, image 1 of 2 Canon EOS 30 Battery Door Replacement: step 11, image 2 of 2
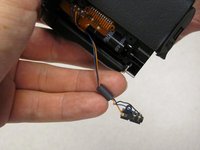
    • The control socket is now secure by three wires.

    • Desolder connections to replace the remote control socket.

    Ask FixBot

    Add Comment

  12. Canon EOS 30 Battery Door Replacement, Top Panel: step 12, image 1 of 1
    • Slide the outer eyepiece upward to remove it.

    Ask FixBot

    Add Comment

  13. Canon EOS 30 Battery Door Replacement: step 13, image 1 of 1
    • Remove the two 4.75 mm black screws located on the top of the camera.

    Ask FixBot

    Add Comment

  14. Canon EOS 30 Battery Door Replacement: step 14, image 1 of 1
    • Remove the four 4.3 mm black screws near the bottom corners of the eyepiece at the back of the camera.

    Ask FixBot

    Add Comment

  15. Canon EOS 30 Battery Door Replacement: step 15, image 1 of 2 Canon EOS 30 Battery Door Replacement: step 15, image 2 of 2
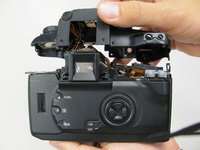
    • Slowly separate the top panel from the camera by pushing it upward.

    • Separating the top panel too far or quickly can damage the ribbon cable and connecting wires that are still attached to the top panel of the camera.

    Ask FixBot

    Add Comment

  16. Canon EOS 30 Battery Door Replacement, Grip: step 16, image 1 of 1
    • Remove the two 5.5 mm screws from front of camera.

    Ask FixBot

    Add Comment

  17. Canon EOS 30 Battery Door Replacement: step 17, image 1 of 1
    • Remove grip panel.

    Ask FixBot

    Add Comment

  18. Canon EOS 30 Battery Door Replacement, Battery Door: step 18, image 1 of 1
    • Remove one black screw from battery door on underside of grip.

    Ask FixBot

    Add Comment

  19. Canon EOS 30 Battery Door Replacement: step 19, image 1 of 1
    • Remove battery door.

    Ask FixBot

    Add Comment

Conclusion

To reassemble your device, follow these instructions in reverse order.

Cancel: I did not complete this guide.

One other person completed this guide.

Jackie

Member since: 04/17/11

257 Reputation

3 Guides authored

Team

Cal Poly, Team 8-8, Regan Spring 2011 Member of Cal Poly, Team 8-8, Regan Spring 2011

CPSU-REGAN-S11S8G8

5 Members

22 Guides authored

1 Guide Comment

I was able to complete this by going from step 9 to 15. Oddly, I only had one screw to remove in step 15 but the grip piece easily slid out without needing to remove the top of the camera.

Alan - Reply Share

Add Comment

View Statistics:

Past 24 Hours: 2

Past 7 Days: 15

Past 30 Days: 54

All Time: 5,079