Free Shipping on Domestic Orders $75+

CR-10S PRO Y Axis Linear Rail Kit Installation

What you need

  1. CR-10S PRO Y Axis Linear Rail Kit Installation, Machine Prep for linear rail kit: step 1, image 1 of 1
    • Remove Bed leveling knobs

    • Be careful when lifting the bed off the Y Carriage. The springs may fall when lifting the bed up.

    • Lift bed and set to the back left side of the printer

    Ask FixBot

    Add Comment

  2. CR-10S PRO Y Axis Linear Rail Kit Installation, Frame Bolts Swap: step 2, image 1 of 3 CR-10S PRO Y Axis Linear Rail Kit Installation, Frame Bolts Swap: step 2, image 2 of 3 CR-10S PRO Y Axis Linear Rail Kit Installation, Frame Bolts Swap: step 2, image 3 of 3
    • Note: uses the stock CR10S Pro Y carriage with Vslot wheels assembly to keep the rails aligned while replacing the frame bolts

    • Remove with M5X30 SHCS one at a time

    • Replace with M5X30 BHCS

    • Slide Y carriage off from the front of the machine

    Ask FixBot

    Add Comment

  3. CR-10S PRO Y Axis Linear Rail Kit Installation, Rail Prep Instructions: step 3, image 1 of 1
    • Remove from packaging

    • Note, do not touch the rail directly with your hands.

    • Wipe down rail with a lint free cloth

    • Add grease to the grease port on each side of the rail

    Ask FixBot

    Add Comment

  4. CR-10S PRO Y Axis Linear Rail Kit Installation: step 4, image 1 of 3 CR-10S PRO Y Axis Linear Rail Kit Installation: step 4, image 2 of 3 CR-10S PRO Y Axis Linear Rail Kit Installation: step 4, image 3 of 3
    • Pre-insert Spring loaded and use an Allen wrench or screwdriver to help align

    • M3 Spring loaded T-nut

    • Use the circled Rail mounting positions

    • 16x M3x8 SHCS

    • Picture with MGN guide on rail

    Ask FixBot

    Add Comment

  5. CR-10S PRO Y Axis Linear Rail Kit Installation, Rail Adapter Plate install: step 5, image 1 of 2 CR-10S PRO Y Axis Linear Rail Kit Installation, Rail Adapter Plate install: step 5, image 2 of 2
    • Tighten the screws evenly in an X shape

    • 4x Adapter Plate

    • 16x M3x6 FHCS

    Ask FixBot

    Add Comment

  6. CR-10S PRO Y Axis Linear Rail Kit Installation, Stock Y carriage Plate Prep: step 6, image 1 of 3 CR-10S PRO Y Axis Linear Rail Kit Installation, Stock Y carriage Plate Prep: step 6, image 2 of 3 CR-10S PRO Y Axis Linear Rail Kit Installation, Stock Y carriage Plate Prep: step 6, image 3 of 3
    • Remove all Vslot wheels and bolts

    • Install endstop Trigger at this location

    • Picture 2 shows endstop Trigger install

    • M5x35 SHCS

    • 3x Stock Vslot wheel spacers

    • M5 Nylon Ring Lock Nut

    Ask FixBot

    Add Comment

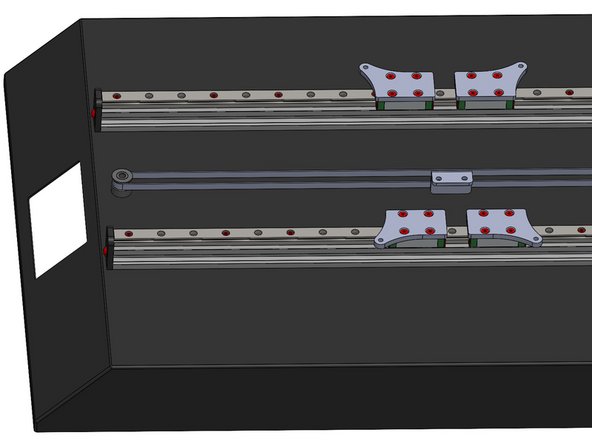
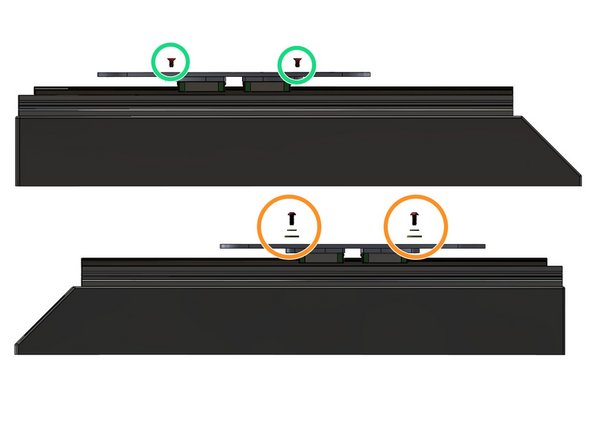
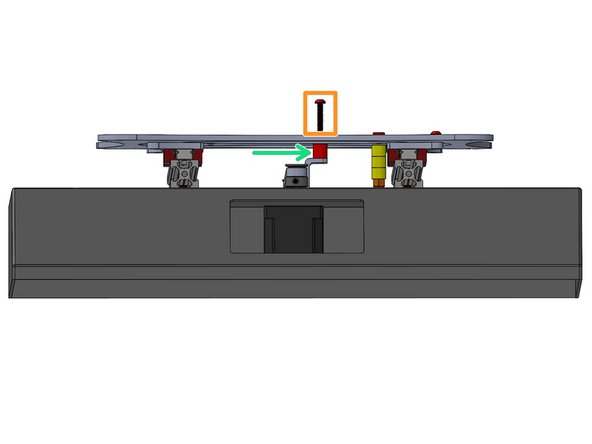
  7. CR-10S PRO Y Axis Linear Rail Kit Installation, Y Carriage Plate install: step 7, image 1 of 3 CR-10S PRO Y Axis Linear Rail Kit Installation, Y Carriage Plate install: step 7, image 2 of 3 CR-10S PRO Y Axis Linear Rail Kit Installation, Y Carriage Plate install: step 7, image 3 of 3
    • Belt mounting holes goes on the right side of the priter

    • Left side screws

    • Some early kits are drilled and taped for M5 Screws. The M4x8 FHCS is substituted for a M5x10 FHCS and the M4x10 BHCS substituted for M5x10 BHCS.

    • 2x M4x8 FHCS

    • Right screw stack order

    • M4x10 BHCS - M4 washer - M4 Large OD washer
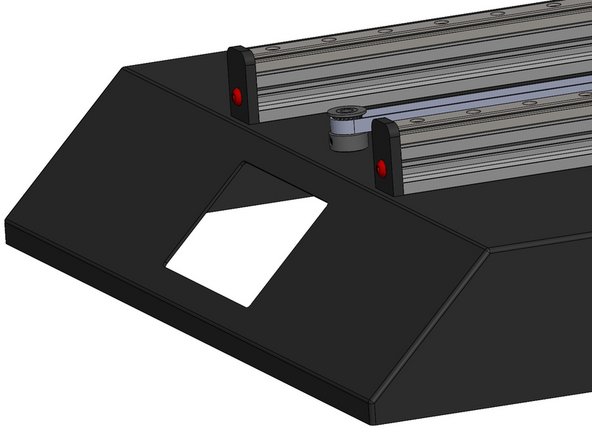
    • Tightened the left side screws first

    Ask FixBot

    Add Comment

  8. CR-10S PRO Y Axis Linear Rail Kit Installation, Belt spacer install: step 8, image 1 of 3 CR-10S PRO Y Axis Linear Rail Kit Installation, Belt spacer install: step 8, image 2 of 3 CR-10S PRO Y Axis Linear Rail Kit Installation, Belt spacer install: step 8, image 3 of 3
    • Belt Bracket Spacer

    • 2x M4x20 SHCS

    Ask FixBot

    Add Comment

  9. CR-10S PRO Y Axis Linear Rail Kit Installation, Endstop Braket mounting hardware Change: step 9, image 1 of 1
    • Remove the stock endstop bracket screw

    • Replace endstop bracket mount screw with:

    • M3x10 SHCS, M3 Washer and M3 Sliding tnut

    Ask FixBot

    Add Comment

  10. CR-10S PRO Y Axis Linear Rail Kit Installation, Rail stopper install: step 10, image 1 of 2 CR-10S PRO Y Axis Linear Rail Kit Installation, Rail stopper install: step 10, image 2 of 2
    • M5*10 BHCS

    • Acrylic stopper

    Ask FixBot

    Add Comment

  11. CR-10S PRO Y Axis Linear Rail Kit Installation, EndStop adjustment: step 11, image 1 of 1
    • Adjust the Endstop position by sliding the endstop back until the nozzle tip lines up with the front edge of the bed when the endstop triggers.

    Ask FixBot

    Add Comment

Finish Line

Cancel: I did not complete this guide.

3 other people completed this guide.

AJ Pereira

Member since: 05/29/20

2,744 Reputation

16 Guides authored

Team

Tiny Machines 3D Member of Tiny Machines 3D

Community

5 Members

41 Guides authored

0 Guide Comments

Add Comment

View Statistics:

Past 24 Hours: 5

Past 7 Days: 19

Past 30 Days: 68

All Time: 5,337