Free Shipping on Domestic Orders $75+

CHI Original Circuit Board Replacement

What you need

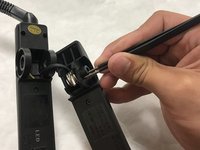
  1. CHI Original Circuit Board Replacement, Hinge Spring: step 1, image 1 of 2 CHI Original Circuit Board Replacement, Hinge Spring: step 1, image 2 of 2
    • Insert a nylon or metal spudger under the plastic CHI spring covers. Pry them up to pop them off. Do this for each side.

    Ask FixBot

    Add Comment

  2. CHI Original Circuit Board Replacement: step 2, image 1 of 1
    • Remove the .53" long screw from the hinge pin.

    Ask FixBot

    Add Comment

  3. CHI Original Circuit Board Replacement: step 3, image 1 of 1
    • Remove the hinge pin.

    Ask FixBot

    Add Comment

  4. CHI Original Circuit Board Replacement: step 4, image 1 of 1
    • Separate the two halves of the CHI Original.

    Ask FixBot

    Add Comment

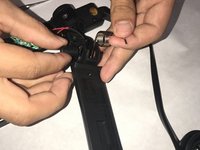
  5. CHI Original Circuit Board Replacement: step 5, image 1 of 2 CHI Original Circuit Board Replacement: step 5, image 2 of 2
    Tool used on this step:
    Tweezers
    $4.99
    Buy
    • Remove the spring pin with a pair of pliers or tweezers.

    • Remove the spring.

    Ask FixBot

    Add Comment

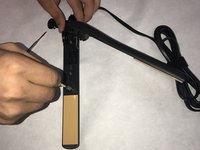
  6. CHI Original Circuit Board Replacement, Power Cord: step 6, image 1 of 2 CHI Original Circuit Board Replacement, Power Cord: step 6, image 2 of 2
    • Remove (2) .31" Phillips head screws from back cover.

    • Remove cover.

    Ask FixBot

    Add Comment

  7. CHI Original Circuit Board Replacement: step 7, image 1 of 1
    • Gently pull upwards on the connection point and disconnect the power cord.

    Ask FixBot

    Add Comment

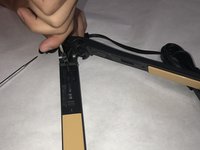
  8. CHI Original Circuit Board Replacement, Circuit Board: step 8, image 1 of 3 CHI Original Circuit Board Replacement, Circuit Board: step 8, image 2 of 3 CHI Original Circuit Board Replacement, Circuit Board: step 8, image 3 of 3
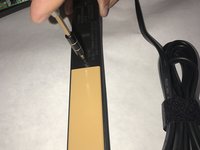
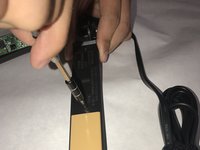
    • Remove the (2) .27" Phillips head screws on each half of the CHI Original.

    Ask FixBot

    Add Comment

  9. CHI Original Circuit Board Replacement: step 9, image 1 of 3 CHI Original Circuit Board Replacement: step 9, image 2 of 3 CHI Original Circuit Board Replacement: step 9, image 3 of 3
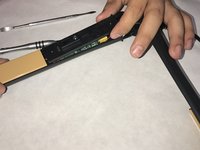
    • Remove the covers on both halves.

    Ask FixBot

    Add Comment

  10. CHI Original Circuit Board Replacement: step 10, image 1 of 1
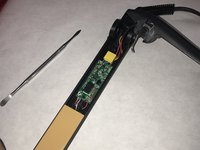
    • Remove (2) .15" Phillips screws from the circuit board.

    Ask FixBot

    Add Comment

  11. CHI Original Circuit Board Replacement: step 11, image 1 of 2 CHI Original Circuit Board Replacement: step 11, image 2 of 2
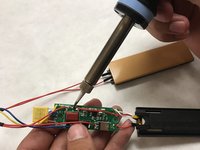
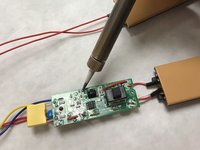
    • Desolder all points of contact between the circuit board and wires on the ceramic heating elements.

    Ask FixBot

    Add Comment

Conclusion

To reassemble your device, follow these instructions in reverse order.

Cancel: I did not complete this guide.

3 other people completed this guide.

Eric Knigga

Member since: 08/23/17

248 Reputation

2 Guides authored

Team

IUPUI, Team S1-G2, Freund Fall 2017 Member of IUPUI, Team S1-G2, Freund Fall 2017

IUPUI-FREUND-F17S1G2

4 Members

5 Guides authored

1 Guide Comment

I used most of this guide through step 10 after dropping this in water; I didn't take out the power cord. I left the partially disassembled straightener in a container with desiccant overnight to remove the moisture. There was some corrosion on the switch that prevented the device from turning off that I cleaned up with isopropyl alcohol . I confirmed the switch behavior before and after cleaning with a multimeter to check continuity. On my device, the contact closest to the heating element was supposed to be disconnected from the other two contacts when off; when on, they were all showing contact. Before cleaning, there was continuity between all contacts. Thanks for the guide.

bnh8 - Reply Share

Add Comment

View Statistics:

Past 24 Hours: 5

Past 7 Days: 11

Past 30 Days: 61

All Time: 4,414