Introduction
Setting a snowboard up in an improper manner can result in many things, your boot flying off the board, catching a heel or toe edge, but the scariest of them all is injuring yourself. But worry not, in this guide, you will learn how to replace your snowboard bindings on a snowboard that has a 3D burton mounting set up.
It is also important to note that you should not use a power drill. It is something that is tempting to use but in doing so you, you could do irreparable damage to the screw holes resulting in the need of a new board.
What you need
-
-
-
Use a screwdriver to remove all screws from the old snowboard setup by turning them counterclockwise.
-
Repeat this process for the second binding.
 Ask FixBot
-
-
-
Wipe your new snowboard using a wet wipe to get rid of any dust/residue.
-
Repeat this on the second binding once done with the first one.
-
-
-
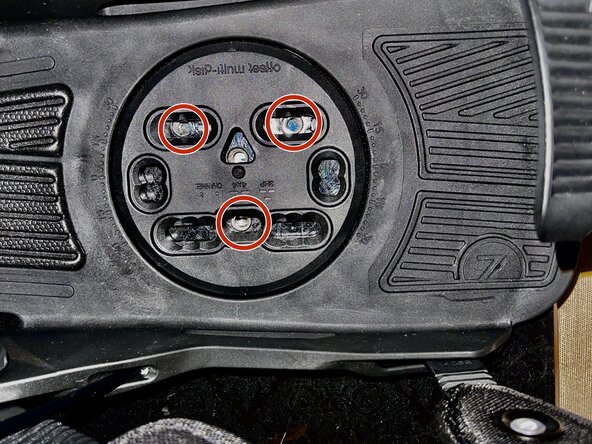
Align the multi-disk plate so only the three screw holes are visible, then secure it in place.
-
Repeat this step for the second binding.
-
-
-
-
Adjust the multi-disk angles to your preferred riding stance.
-
Rotating the binding toward the nose creates a positive angle, while rotating it toward the tail creates a negative angle.
-
Set both bindings to ensure consistent comfort and control while riding.
-
-
-
Loosely screw in all three screws into the binding once all multi-disk adjustments have been completed.
-
Repeat this on the second binding once done with the first one.
-
-
-
Insert your boot into your binding and see if you either have too much toe or heel drag.
-
If you do, you could move your binding either backwards if you have toe drag or forwards if you have heel drag.
-
Repeat this on the second binding once done with the first one.
-
-
-
With the boot still inside the binding, adjust both the toe strap and heel strap so that the top sleeve of the binding sits in the center of the biding.
-
This must be done in order to ensure proper tightening when using the ratchet straps.
-
The heel strap is the strap closer to the base of your foot.
-
The toe strap is the one closest to your toes.
-
Once done repeat on the second binding and boot.
-
-
-
This setup uses Nidecker Flow Nexus bindings, which allow you to remove the snowboard boot by pulling down the back strap.
-
Repeat the process for the second binding.
-
-
-
With the boots removed, firmly screw in the three binding screws by hand.
-
Check that each binding is secure by gently wiggling it—if it moves, retighten the screws.
-
Repeat for the second binding.
-
-


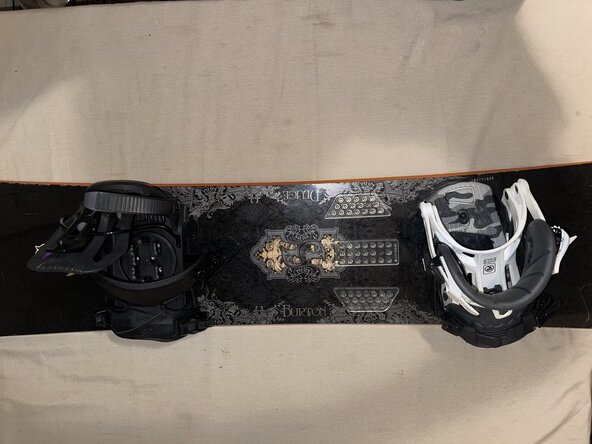


Once everything is fully secured you are now ready to head out to the mountains and get to shredding!

Team

CSU Los Angeles, Team 8-10, Grodsky Spring 2025 Member of CSU Los Angeles, Team 8-10, Grodsky Spring 2025
CSULA-GRODSKY-S25S8G10
1 Member
12 Guides authored
