
Free Shipping on Domestic Orders $75+

Brother PT-210 Back Case Opening

What you need

  1. Brother PT-210 Back Case Opening, Back Cover: step 1, image 1 of 3 Brother PT-210 Back Case Opening, Back Cover: step 1, image 2 of 3 Brother PT-210 Back Case Opening, Back Cover: step 1, image 3 of 3
    • Use the tab to open the back cover of your machine.

  2. Brother PT-210 Back Case Opening, Tape: step 2, image 1 of 2 Brother PT-210 Back Case Opening, Tape: step 2, image 2 of 2
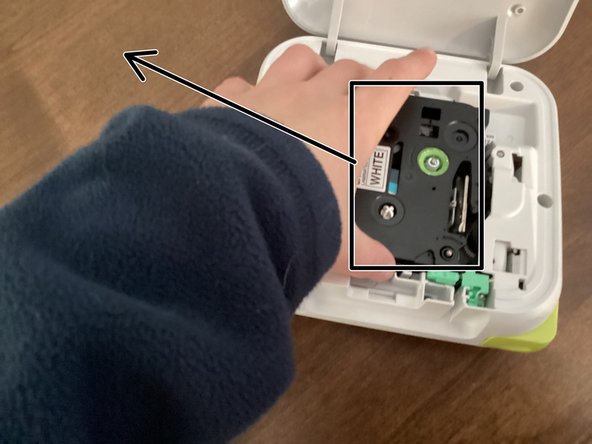
    • Remove the tape by grabbing the tape and pulling it up & out of your machine.

  3. Brother PT-210 Back Case Opening, New Tape: step 3, image 1 of 1
    • If you are going to use a new tape, you have to turn the green knob counterclockwise a few times to get the tape ready to use.

  4. Brother PT-210 Back Case Opening, Batteries: step 4, image 1 of 3 Brother PT-210 Back Case Opening, Batteries: step 4, image 2 of 3 Brother PT-210 Back Case Opening, Batteries: step 4, image 3 of 3
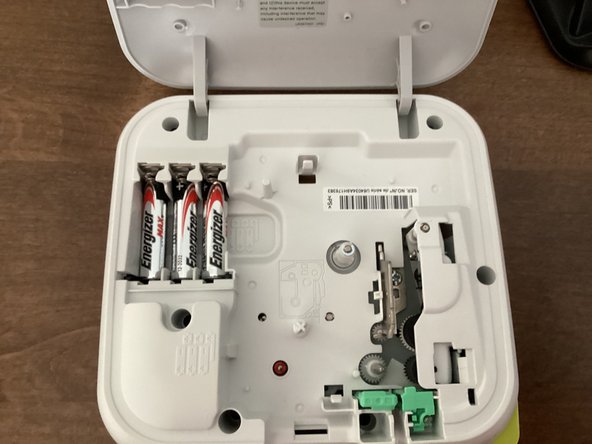
    • Remove all 6 batteries from your machine.

    • When you put the batteries back in, keep in mind that the polarity of them matter. Your machine won't work if the polarities of the batteries are messed up.

    • Do not mix new and old batteries!

    • It might be helpful to take the tape out of your machine. This guide shows you how to.

  5. Brother PT-210 Back Case Opening, Remove Screws: step 5, image 1 of 1
    Tool used on this step:
    Phillips #00 Screwdriver
    $5.49
    Buy
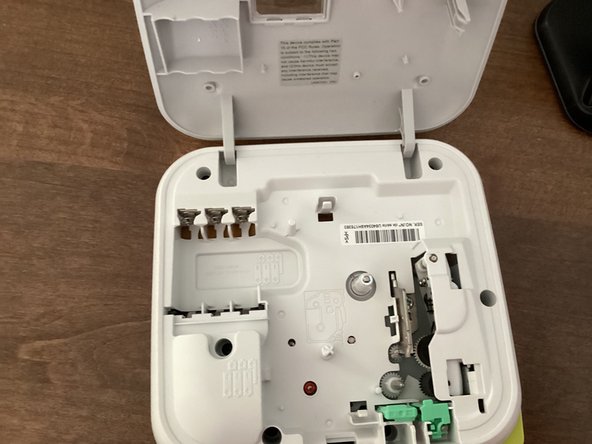
    • Remove these screws with a Phillips #00 Screwdriver.

    • Don't forget the sneaky ones!

    • When you are opening it, make sure to not damage any of the electronics inside.

Conclusion

To reassemble your device, follow these instructions in reverse order.

TheMasterG

Member since: 07/19/24

1,406 Reputation

12 Guides authored

0 Guide Comments

Add Comment

View Statistics:

Past 24 Hours: 0

Past 7 Days: 2

Past 30 Days: 8

All Time: 90