
Brother CS6000i LCD Screen Replacement

Wasim Benbrahim and 3 other contributors
Last updated on Dec 31, 2024
Views: 563
View statistics:
- Past 24 Hours:
- 2
- Past 7 Days:
- 13
- Past 30 Days:
- 73
- All Time:
- 563
Comments: 0
No one has left comments on this guide. Will you be first?
Go to guide commentsCompleted: 1 2
1 person has marked this guide "completed." Will you be next?
2 people have marked this guide "completed." Including you — great job!
Favorites: 0 1
No one has favorited (and subscribed to) this guide. Will you be the first?
1 person has favorited (and subscribed to) this guide — and that's you!
Featured Student Guide
This guide has been the hard work of our awesome students and is found to be exceptionally cool by the iFixit staff.
Introduction
Go to step 1 ↓This guide will be showing you how to replace the LCD screen on a Brother CS6000i sewing machine. The LCD screen helps the user identify what sewing mode and speed they are working with. Some common symptoms particularly related to a faulty LCD screen would be faulty diodes or a blank screen while the machine is in operation.
Before beginning make sure power is disconnected and needle is removed from machine to prevent injury from electrical shock and or sharp objects.
What you need
Tools

-
-
-
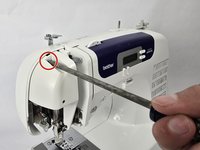
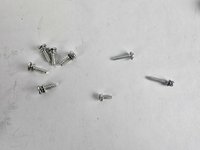
Remove the five 20 mm Phillips #2 screws on the back of the device.
-
Remove the single 28 mm Phillips #2 screw on the back of the device.
-
Remove the single 23 mm Phillips #2 screw on the back of the device.
 Ask FixBot
-
-
-
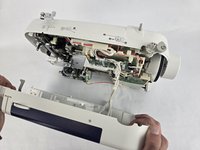
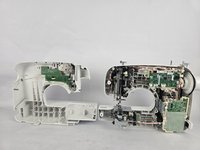
Slightly pull apart the two halves of the machine, taking care not to strain the attached cables.
-
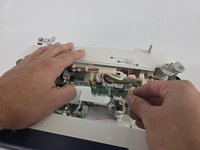
Unhook the white wires that are connected to the motherboard.
-
Fully separate the two halves.
-
-
-
-
-
-
Remove the two 10 mm Philips #2 screws that secure the screen.
-
Unplug the ribbon cable located at the top of the circuit board, then gently remove the LCD screen.
-
-





To reassemble your device, follow these instructions in reverse order.
Cancel: I did not complete this guide.
One other person completed this guide.

Team

Cuesta, Team 20-1, Krynen Fall 2024 Member of Cuesta, Team 20-1, Krynen Fall 2024
CUESTA-KRYNEN-F24S20G1
5 Members
96 Guides authored
