Introduction
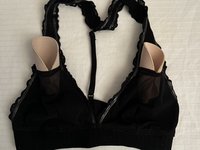
Most bralettes have foam inserts to provide support and shape. Over time, the use of the bralette will cause the foam inserts to be worn out and reshaped. We must replace the old insert with the new ones to gain back the support and shape it once gave.
What you need
-
-
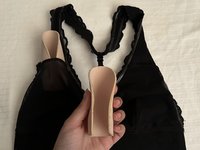
Take out the existing foam inserts by carefully pulling them from their pockets.
-
-
-
-
Select the right roam inserts that have the perfect size and thickness for the bralette.
-
-
-
Once inserted, make sure the foam inserts are in the correct place and give the ideal shape and support.
-
-
-
Put the bralette on to check the shape and support of the replacement foam inserts.
-
Make any improvements if required.
-


You did it! You have replaced your old foam inserts to revamp your favourite bralette.

Team

York University, Team 1-8, O'Regan Summer 2024 Member of York University, Team 1-8, O'Regan Summer 2024
YORK-O'REGAN-SU24S1G8
1 Member
2 Guides authored