
Blue Yeti USB component replacement

XKali and one other contributor
Last updated on Sep 2, 2026
Views: 4.5K
View statistics:
- Past 24 Hours:
- 6
- Past 7 Days:
- 61
- Past 30 Days:
- 243
- All Time:
- 4,535
Comments: 12
11 comments on steps, 1 guide comment.
Go to guide commentsCompleted: 1 2
1 person has marked this guide "completed." Will you be next?
2 people have marked this guide "completed." Including you — great job!
Favorites: 1 2
1 person has favorited (and subscribed to) this guide. Will you be next?
2 people have favorited (and subscribed to) this guide — including you!
Community-Contributed Guide
An awesome member of our community made this guide. It was not created by iFixit staff.
Introduction
Go to step 1 ↓Is your Blue Yeti is tired, the USB is sometimes capricious, or it simply turns on but is not recognized by the computer? Here is surely the solution to your problem.
What you need


-
-
Tool used on this step:Tweezers$4.99
-
First remove the Rubber inside the screwable mount area. This can easily be done with a small screw driver tip or Tweezers. From here you can remove the 3 screws using a #1 Phillips head.
 Ask FixBot
-
-
-
The 4 exterior buttons can be removed with any force such as fingers or any form of pliers. I used my fingers to remove and pull the buttons from their button placement. You will notice there is a lot of give from the mesh and the body.
-
-
-
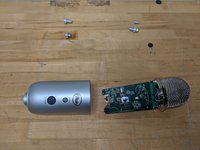
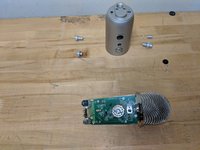
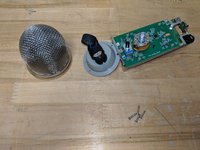
On this step, you can easily and carefully pull the entire mic mechanism from the protective housing. On the bottom you will see where the Audio port and USB port are if you need to replace them.
-
-
-
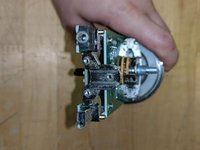
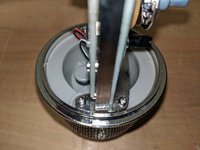
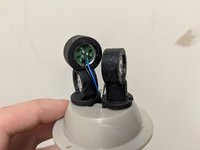
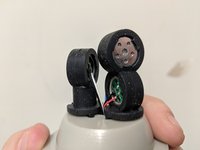
If you look toward the mesh and the circuits you will see that it is held by 4x #0 Phillips screws. Carefully remove these and the entire cap will come from the board. There are 3 sets of wires, 1 per condenser. You will notice that they are pointed sideways, making this microphone a side condenser, not a face-pointed one.
-
-
-
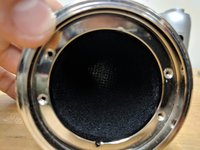
As seen in the picture, this Microphone cap comes with a internal foam guard to protect the three internal mic condensers. These point outward to the side of the mic making this mic more useful from the side and not pointed at the users itself.
-
-
-
-
If you need to disconnect the microphone cap from the board, pay close attention to the connections.
-
There are 3 condenser, therefore 3 pairs of wires connect to the board, each with their own wire color (black & white, black & red and black & blue)
-
-
-
-
-
Defective part to be replaced
-
Just test it with a multimeter in sound mode.
-
If the beep is continuous, the problem lies elsewhere.
-
If the multimeter does not beep, or jerks, the component should be changed.
-
-








To reassemble your device, follow the instructions in reverse order.
Cancel: I did not complete this guide.
One other person completed this guide.
Special thanks to these translators:
100%

Corbanizer is helping us fix the world! Want to contribute?
Start translating ›

