Free Shipping on Domestic Orders $75+

Blackview BV9800 Pro Screen Replacement

What you need

  1. Blackview BV9800 Pro Screen Replacement, Removing back cover 1/2: step 1, image 1 of 3 Blackview BV9800 Pro Screen Replacement, Removing back cover 1/2: step 1, image 2 of 3 Blackview BV9800 Pro Screen Replacement, Removing back cover 1/2: step 1, image 3 of 3
    • Flip the phone over.

    • Remove the four T5 screws.

    • Remove the single T5 screw from the bottom, next to the charging port.

    Ask FixBot

    Add Comment

  2. Blackview BV9800 Pro Screen Replacement, Removing back cover 2/2: step 2, image 1 of 3 Blackview BV9800 Pro Screen Replacement, Removing back cover 2/2: step 2, image 2 of 3 Blackview BV9800 Pro Screen Replacement, Removing back cover 2/2: step 2, image 3 of 3
    • Remove the screws from the sides.

    • Remove the screws holding the camera frame.

    Ask FixBot

    Add Comment

  3. Blackview BV9800 Pro Screen Replacement, Removing side bezels: step 3, image 1 of 3 Blackview BV9800 Pro Screen Replacement, Removing side bezels: step 3, image 2 of 3 Blackview BV9800 Pro Screen Replacement, Removing side bezels: step 3, image 3 of 3
    • Pry out the sim car holder

    • It has a dual sim card holder, but to remove the second tray you need a pin or an iphone sim card opener to push it out.

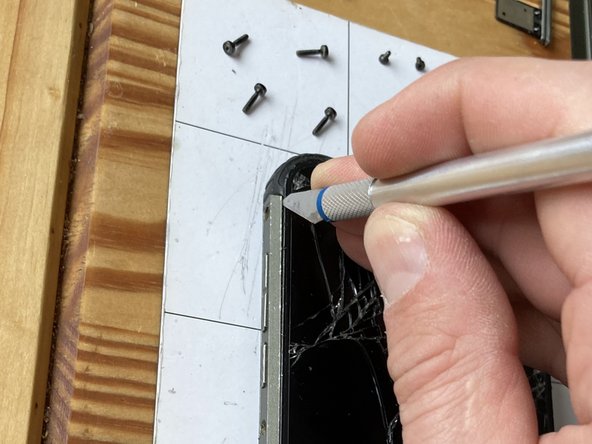
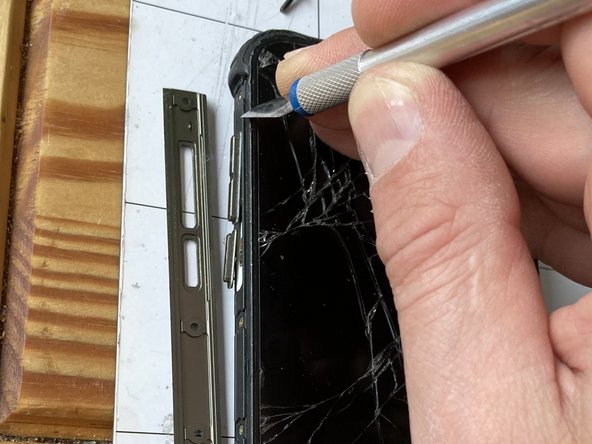
    • Use a spudger or a utility knife to pry off the side bezels.

    Ask FixBot

    Add Comment

  4. Blackview BV9800 Pro Screen Replacement, Separate the back cover: step 4, image 1 of 2 Blackview BV9800 Pro Screen Replacement, Separate the back cover: step 4, image 2 of 2
    • Pry in one corner and separate the back.

    Ask FixBot

    Add Comment

  5. Blackview BV9800 Pro Screen Replacement, Disconnect connetctors: step 5, image 1 of 3 Blackview BV9800 Pro Screen Replacement, Disconnect connetctors: step 5, image 2 of 3 Blackview BV9800 Pro Screen Replacement, Disconnect connetctors: step 5, image 3 of 3
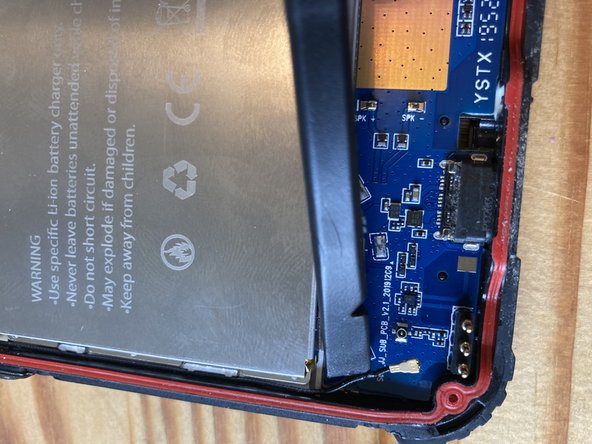
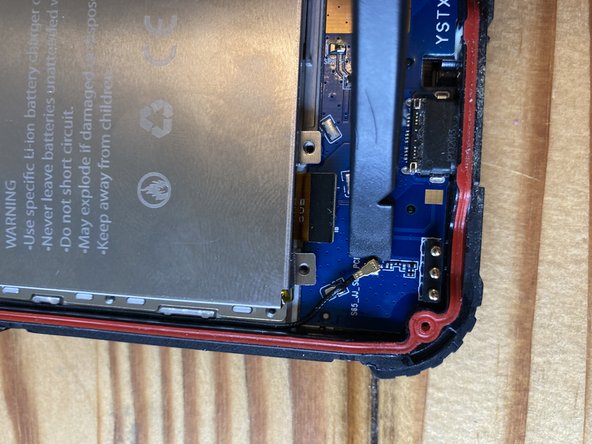
    • Use a plastic spudger to disconnect the flex connectors.

    Ask FixBot

    Add Comment

  6. Blackview BV9800 Pro Screen Replacement, Disconnect flex and antenna: step 6, image 1 of 3 Blackview BV9800 Pro Screen Replacement, Disconnect flex and antenna: step 6, image 2 of 3 Blackview BV9800 Pro Screen Replacement, Disconnect flex and antenna: step 6, image 3 of 3
    • Use a plastic spudger to disconnect the flex connector and the antenna

    Ask FixBot

    Add Comment

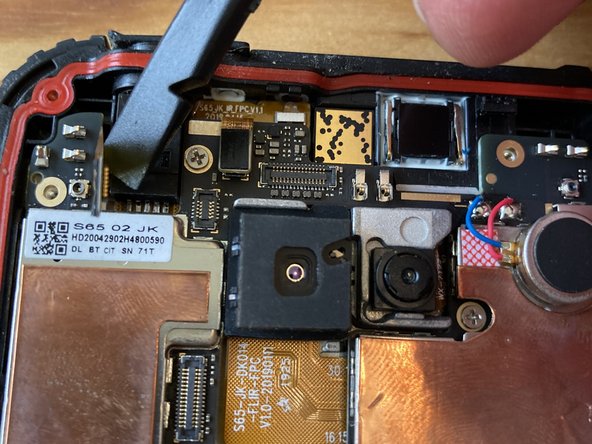
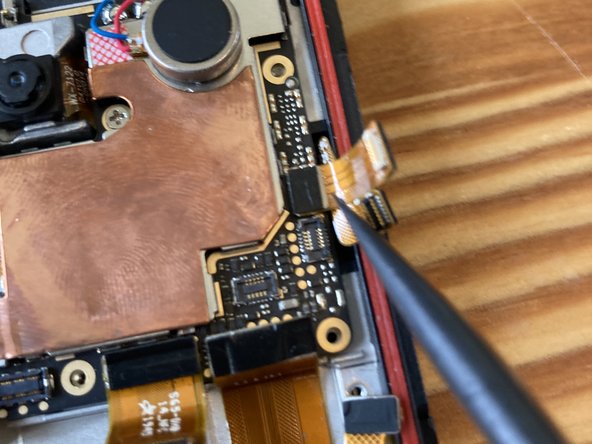
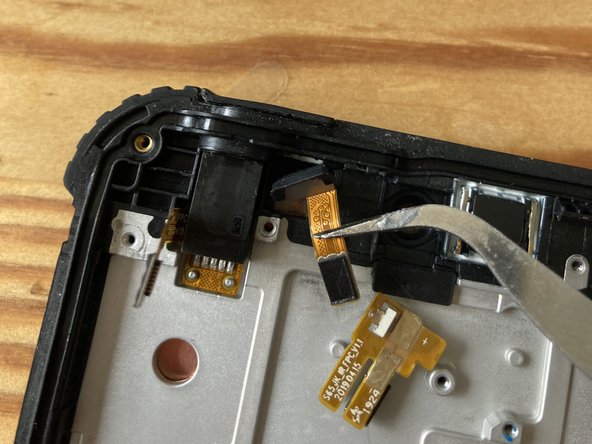
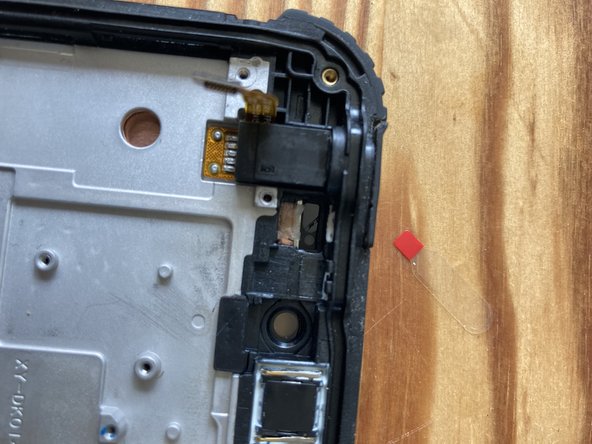
  7. Blackview BV9800 Pro Screen Replacement, Remove top PCB and plastic enclosure: step 7, image 1 of 3 Blackview BV9800 Pro Screen Replacement, Remove top PCB and plastic enclosure: step 7, image 2 of 3 Blackview BV9800 Pro Screen Replacement, Remove top PCB and plastic enclosure: step 7, image 3 of 3
    Tool used on this step:
    Tweezers
    $4.99
    Buy
    • Heat up this PCB with either iOpener or a heat gun on low temp (100-120 Celsius) to loosen the adhesive and pry it off from the side.

    • Remove the screws.

    • The last screw is under a tamper-proof sticker

    • Use plastic spudger or tweezers to disconnect the camera flex cable from the top

    • Gently lift up the plasctic cover from the right side. It is still connected to the board below!

    • Disconnect the flex cable

    • Disconnect the antenna

    Ask FixBot

    Add Comment

  8. Blackview BV9800 Pro Screen Replacement, Unscrew battery shield and peel flex cable: step 8, image 1 of 3 Blackview BV9800 Pro Screen Replacement, Unscrew battery shield and peel flex cable: step 8, image 2 of 3 Blackview BV9800 Pro Screen Replacement, Unscrew battery shield and peel flex cable: step 8, image 3 of 3
    • Remove the screws from the battery cover

    • Carefully release the ribbon cable from the battery shield. It is stuck down at two points.

    Ask FixBot

    Add Comment

  9. Blackview BV9800 Pro Screen Replacement, Disconnect connectors: step 9, image 1 of 3 Blackview BV9800 Pro Screen Replacement, Disconnect connectors: step 9, image 2 of 3 Blackview BV9800 Pro Screen Replacement, Disconnect connectors: step 9, image 3 of 3
    • Disconnect the flex connectors and remove the battery

    Ask FixBot

    Add Comment

  10. Blackview BV9800 Pro Screen Replacement, Motherboard disassembly: step 10, image 1 of 3 Blackview BV9800 Pro Screen Replacement, Motherboard disassembly: step 10, image 2 of 3 Blackview BV9800 Pro Screen Replacement, Motherboard disassembly: step 10, image 3 of 3
    • Remove two J000 screws

    • Carefully pry up the camera. Heat from the glass side if necessary.

    • Unscrew and remove the camera assembly

    Ask FixBot

    Add Comment

  11. Blackview BV9800 Pro Screen Replacement, Remove light sensor: step 11, image 1 of 3 Blackview BV9800 Pro Screen Replacement, Remove light sensor: step 11, image 2 of 3 Blackview BV9800 Pro Screen Replacement, Remove light sensor: step 11, image 3 of 3
    • Heat the light sensor from both sides to loosen the adhesive and gently pry them out of their sockets

    • Using tweezers slowly and carefully lift out the light sensor

    Ask FixBot

    Add Comment

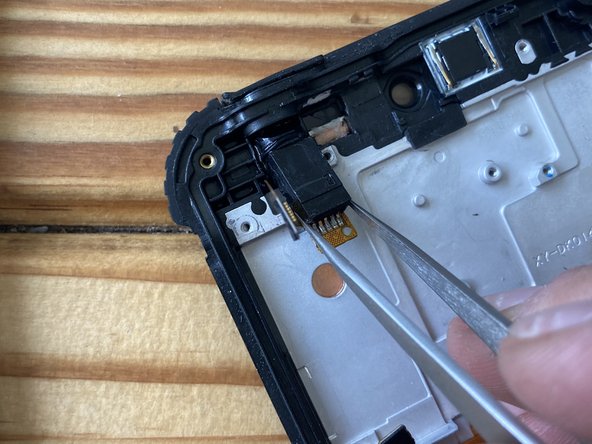
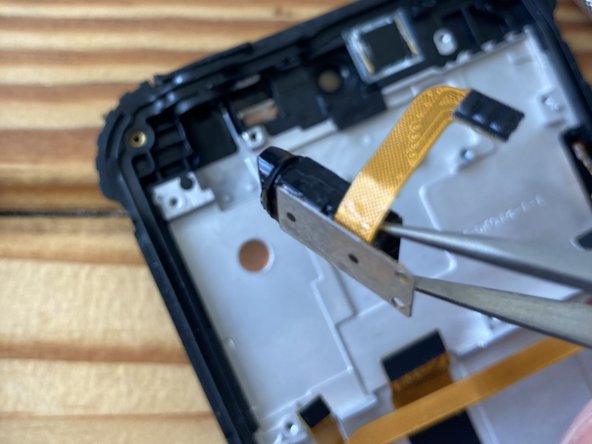
  12. Blackview BV9800 Pro Screen Replacement, Remove audio jack: step 12, image 1 of 3 Blackview BV9800 Pro Screen Replacement, Remove audio jack: step 12, image 2 of 3 Blackview BV9800 Pro Screen Replacement, Remove audio jack: step 12, image 3 of 3
    • Use some isopropyl alcohol if necessary to loosen the glue further on the audio jack

    • Grab it with strong tweezers and wiggle from side to side and upwards until it comes out. Heat further if necessary.

    • Lift it out and transfer to the new screen.

    Ask FixBot

    Add Comment

  13. Blackview BV9800 Pro Screen Replacement, Remove ribbon cable and charging port: step 13, image 1 of 2 Blackview BV9800 Pro Screen Replacement, Remove ribbon cable and charging port: step 13, image 2 of 2
    • Gently peel the flex cable u p and transfer to the new assembly.

    • Heat it up if the adhesive is too strong.

    • Heat up and pry up the bottom PCB (charging port) and transfer to the new screen.

    Ask FixBot

    Add Comment

Conclusion

To reassemble your device, follow these instructions in reverse order.

Cancel: I did not complete this guide.

10 other people completed this guide.

honakrisi

Member since: 01/28/20

4,143 Reputation

8 Guides authored

3 Guide Comments

You saved my mobile phone. Even I did not replace the screen, I just replace the battery. I forgot some connectors but your post remind me and the mobile back to work!

Colin Wen - Reply Share

I’m glad that you managed to save your device!

honakrisi - Reply Share

Where can I get black view repair shop in Ghana and their number

Emmanuel offei - Reply Share

Add Comment

View Statistics:

Past 24 Hours: 0

Past 7 Days: 26

Past 30 Days: 100

All Time: 6,250