
BlackBerry KeyONE partial Disassembly

raven and 2 other contributors
Last updated on Jun 24, 2019
Views: 11K
View statistics:
- Past 24 Hours:
- 2
- Past 7 Days:
- 35
- Past 30 Days:
- 125
- All Time:
- 11,204
Comments: 0
No one has left comments on this guide. Will you be first?
Go to guide commentsCompleted: 15 16
15 people have marked this guide "completed." Will you be next?
16 people have marked this guide "completed." Including you — great job!
Favorites: 1 2
1 person has favorited (and subscribed to) this guide. Will you be next?
2 people have favorited (and subscribed to) this guide — including you!
Community-Contributed Guide
An awesome member of our community made this guide. It was not created by iFixit staff.
What you need
Tools


-
-
-
Carefully remove the top plastic cover. It is held in place by adhesive.
 Ask FixBot
-
-
-
Remove the two Philipps #0 screws that hold in place the top of the phone frame and slide it off.
-
-
-
Remove the back cover. It mostly just clips off, but has some adhesive in the lower area.
-
-
-
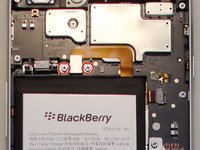
Remove the two Philipps #0 screws securing the battery connector and unplug the later.
-
-
-
Remove the 6 Philipps #0 screws securing the lower cover and remove it.
-
Remove the three Philipps #0 screws holding down the bar that secures the two main lego-style plugs and remove it.
-
-
-
-
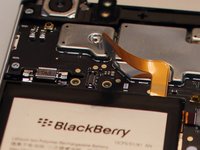
Remove the three Philipps #0 screws securing the upper cover and remove it.
-
-
-
Unplug the remaining ribbon cables
-
Remove the last three Philipps #0 screws securing the Motherbard.
-
Now you should be able to replace most components.
-
-




To reassemble your device, follow these instructions in reverse order.
Cancel: I did not complete this guide.
15 other people completed this guide.

