Free Shipping on Domestic Orders $75+

Black and Decker LI2000 Battery Replacement

What you need

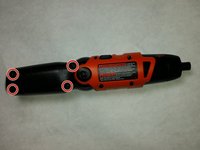
  1. Black and Decker LI2000 Battery Replacement, Orange Casing: step 1, image 1 of 3 Black and Decker LI2000 Battery Replacement, Orange Casing: step 1, image 2 of 3 Black and Decker LI2000 Battery Replacement, Orange Casing: step 1, image 3 of 3
    • Remove the following five screws

    • Three 20 mm Phillips #1 screws

    • One 10 mm #000 Phillips screw

    • One 13 mm Phillips 31 screw

    • When you remove the 13 mm screw, the spring may pop out of the screwdriver. Point the backside of the screwdriver away from your face and others.

    Ask FixBot

    Add Comment

  2. Black and Decker LI2000 Battery Replacement: step 2, image 1 of 1
    • Remove the black sticker with recycling information.

    Ask FixBot

    Add Comment

  3. Black and Decker LI2000 Battery Replacement: step 3, image 1 of 1
    • Use your fingers or a plastic opening tool to pry the casing apart.

    Ask FixBot

    Add Comment

  4. Black and Decker LI2000 Battery Replacement: step 4, image 1 of 1
    • Remove the plastic slider by picking it up off the screwdriver.

    • You may consider leaving half of the casing on the screwdriver to make handling the screwdriver easier.

    Ask FixBot

    Add Comment

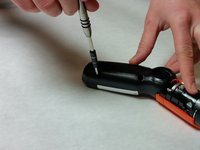
  5. Black and Decker LI2000 Battery Replacement, Handle: step 5, image 1 of 2 Black and Decker LI2000 Battery Replacement, Handle: step 5, image 2 of 2
    • Remove the four 15mm Phillips #1 screws.

    Ask FixBot

    Add Comment

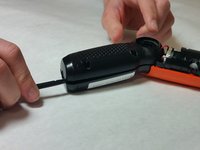
  6. Black and Decker LI2000 Battery Replacement: step 6, image 1 of 2 Black and Decker LI2000 Battery Replacement: step 6, image 2 of 2
    • Use a plastic opening tool to pry the casing apart.

    Ask FixBot

    Add Comment

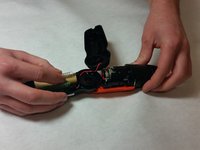
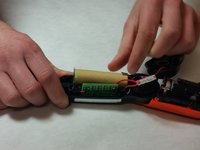
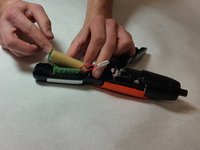
  7. Black and Decker LI2000 Battery Replacement, Battery: step 7, image 1 of 2 Black and Decker LI2000 Battery Replacement, Battery: step 7, image 2 of 2
    • Using pliers or your fingers, remove the leads off of the battery.

    Ask FixBot

    Add Comment

Conclusion

To reassemble your device, follow these instructions in reverse order.

Cancel: I did not complete this guide.

6 other people completed this guide.

Katherine Simmons

Member since: 02/08/16

753 Reputation

5 Guides authored

Team

IUPUI, Team 1-3, Baechle Spring 2016 Member of IUPUI, Team 1-3, Baechle Spring 2016

IUPUI-BAECHLE-S16S1G3

4 Members

10 Guides authored

3 Guide Comments

It would be great is you could discuss the 3.6v cell - Lithium Type -- Size? Is it an 18650?

William Tzouris - Reply Share

OK, so where can we get the battery!?

Mike Young - Reply Share

Check eBay for the 18650 with solder tabs already attached. I purchased a 4 pack of the batteries and used 1 for a LI3100. I needed a Dremel tool to remove some of the internal plastic battery supports to accommodate this battery. If the solder tabs had been oriented 180 degrees to each other, it would have been a drop in fit. Screwdriver works great now!

Jeff McDermaid - Reply Share

Add Comment

View Statistics:

Past 24 Hours: 3

Past 7 Days: 34

Past 30 Days: 106

All Time: 11,333