Introduction
This is a tutorial on how to replace a Bionaire BAP 600 Control Board.
What you need
-
-
Rotate the base counterclockwise, supporting the top with your opposite hand.
 Ask FixBot
-
-
-
Grab the edge of the filter housing and pull the filter away from the rest of the device.
-
-
-
Gently pull apart each fold of the filter to check for abrasions or other anomalies. Clean with a dust rag if necessary.
-
-
-
After the 6 screws are removed, remove the LED housing from the bottom of the device by lifting it off.
-
-
-
Using two fingers lift the translucent LED cover from the inside. Repeat this step for the second tab.
-
-
-
After lifting 45 degrees, pull the translucent tab away from thee housing. Repeat this step for the second LED cover.
-
-
-
-
Locate the tab about 1 inch below the top vent. Insert a flat tool laterally past the tab and press in toward the center of the device. As the tab is being held down, pull the two halves of the egg apart to keep the shell open.
-
-
-
Locate the second tab on the back of the device approximately 2 inches above the power cord.
-
Insert the flat tool at a slight angle toward the left of the power cord. Depress the tab and pull the two halves of the shell apart.
-
-
-
Locate the bottom tab on the front side at the same height as the bottom tab on the back side.
-
Depress the tab using a flat tool at a slight angle and pull the halves apart.
-
-
-
Locate the last tab about one inch below the top on the front side.
-
Depress the tab using the flat tool at a slight angle and finish pulling the removable half of the shell off.
-
-
-
Locate the screw housing opposite of the control board, and remove the screw.
-
-
-
Locate the control board and grab it by the top and bottom firmly. Pull the board straight out being careful not to flex the circuit while removing.
-
-
-
Locate the screw that was being hidden by the control board and remove it to release the second half of the shell.
-
-
-
Remove the released half of the shell to finish removing the entire outer shell of the device.
-
-
-
Unplug the rest of the pin connections.
-
Remove the neutral and hot wires by pulling out the two black wires.
-
-
-
Unscrew the two screws.
-
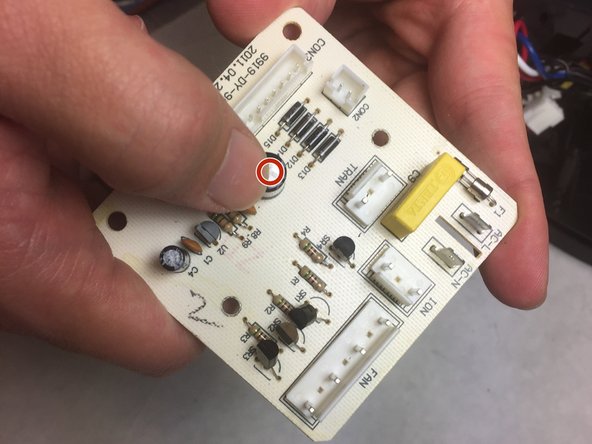
Inspect the capacitor for any bulges, as this is a sign that the capacitor must be replaced.
-
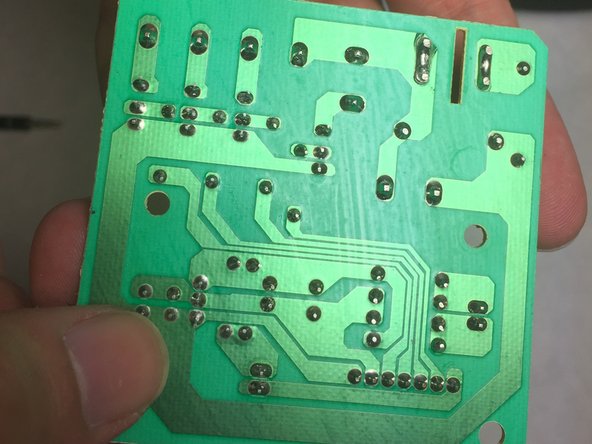
Look out for burnt solder on the back of the circuit board.
-


To reassemble your device, follow these instructions in reverse order.
Cancel: I did not complete this guide.
2 other people completed this guide.
Team

IUPUI, Team 4-4, Baechle Fall 2016 Member of IUPUI, Team 4-4, Baechle Fall 2016
IUPUI-BAECHLE-F16S4G4
5 Members
7 Guides authored
1 Guide Comment
I knew there were tabs because I could see one but I didn’t know where the others were so I just waited, found your guide, and studied it carefully. Thanks Alexander!