
Bella 1.5 QT Slow Cooker Disassembly

Calvin Guswa and 2 other contributors
Last updated on Jan 6, 2026
Views: 385
View statistics:
- Past 24 Hours:
- 2
- Past 7 Days:
- 16
- Past 30 Days:
- 80
- All Time:
- 385
Comments: 0
No one has left comments on this guide. Will you be first?
Go to guide commentsCompleted: 1 2
1 person has marked this guide "completed." Will you be next?
2 people have marked this guide "completed." Including you — great job!
Favorites: 0 1
No one has favorited (and subscribed to) this guide. Will you be the first?
1 person has favorited (and subscribed to) this guide — and that's you!
Introduction
Go to step 1 ↓If you run into an issue with your Bella 1.5 QT Slow Cooker and aren’t sure what’s causing the malfunction, you may consider disassembling it to see what’s going on inside.
The Bella 1.5 QT Slow Cooker (Model number: WJ-1500) is a compact electric cooker designed for preparing small meals and side dishes. It is sometimes sold under different models such as Bella Mini Slow Cooker or Bella Quart Slow Cooker.
This guide provides step-by-step instructions on how to disassemble the Bella 1.5 QT Slow Cooker down to its heating element and dial switch. Disassembly may also be useful if you want to inspect wiring connections inside the base of the cooker, check how the internal parts are connected, examine the heating element, or test the dial from the inside. You may also find this guide helpful if you are documenting appliance design.
Hazards:
The heating element and switch are connected directly to household AC mains. Never attempt disassembly while the unit is plugged in.
Unplug the slow cooker and allow it to cool fully before starting. The heating element stays hot long after the cooker is switched off.
What you need
Tools

-
-
-
Remove the dial, and unscrew the nut connecting the switch to the casing of the slow cooker.
-
-
-
Remove the silver lining from the black casing.
-
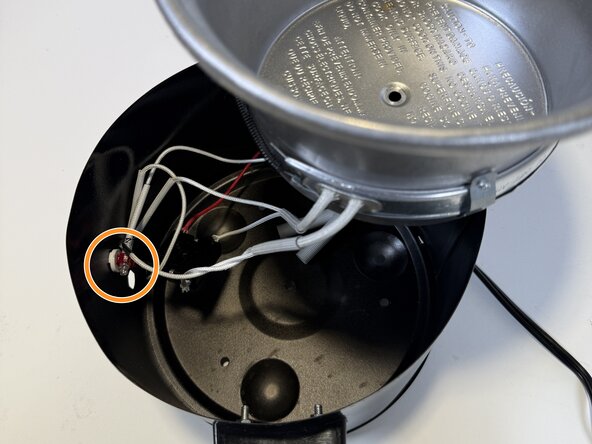
Detach the bulb from the device.
-
-
-
-
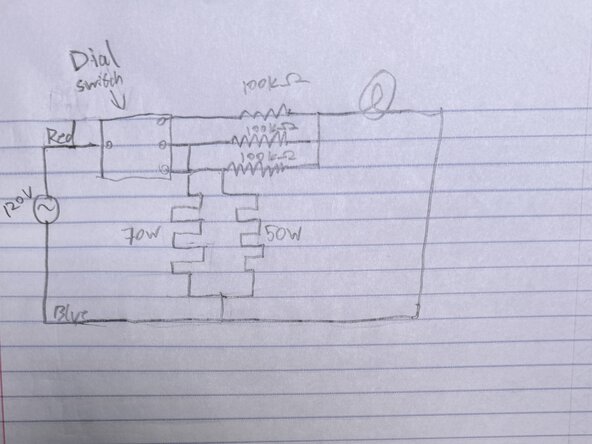
The text boxed on the device reads: "1.5qt 120V 120 70 50W." The 120W 70W 50W refers to the power in cooking modes high, low, and warm, respectively.
-


 Ask FixBot






To reassemble your device, follow these instructions in reverse order.
Cancel: I did not complete this guide.
One other person completed this guide.
Team

Tufts University School of Engineering, Team 1-7, Bell Fall 2025 Member of Tufts University School of Engineering, Team 1-7, Bell Fall 2025
TUFTS-BELL-F25S1G7
2 Members
12 Guides authored
