Free Shipping on Domestic Orders $75+

BLU Dash JR D140 Digitizer Replacement

What you need

    1. BLU Dash JR D140 Digitizer Replacement, Battery: step 1, image 1 of 1
      • Turn off the phone first. Press the power button continuously for 2-3 seconds to shut down the phone.

      • Using a plastic opening tool, pry open the back cover from the slit on the bottom right corner of the phone.

      Ask FixBot

      Add Comment

    2. BLU Dash JR D140 Digitizer Replacement: step 2, image 1 of 1
      • Using a plastic opening tool or finger, pull out the battery.

      Ask FixBot

      Add Comment

    1. BLU Dash JR D140 Digitizer Replacement, Digitizer: step 3, image 1 of 1
      • Remove the four 4.0mm Phillips #1 screws.

      Ask FixBot

      Add Comment

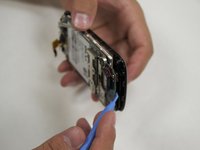
    2. BLU Dash JR D140 Digitizer Replacement: step 4, image 1 of 1
      • Starting from a corner, separate the panel from the frame using the plastic opening tool.

      • The volume button will pop out.

      Ask FixBot

      Add Comment

    3. BLU Dash JR D140 Digitizer Replacement: step 5, image 1 of 1
      • Unscrew the 3.6mm Phillips #0 screw from the motherboard.

      Ask FixBot

      Add Comment

    4. BLU Dash JR D140 Digitizer Replacement: step 6, image 1 of 1
      • Using a spudger, lift the black ZIF connector at the top left corner of the phone.

      Ask FixBot

      Add Comment

    5. BLU Dash JR D140 Digitizer Replacement: step 7, image 1 of 1
      • Pull the ribbon cable out of the ZIF connector.

      Ask FixBot

      Add Comment

    6. BLU Dash JR D140 Digitizer Replacement: step 8, image 1 of 1
      • When the ribbon cable is removed from the ZIF connector, peel off the power, sticky button using a plastic opening tool.

      Ask FixBot

      Add Comment

    7. BLU Dash JR D140 Digitizer Replacement: step 9, image 1 of 1
      • Peel off the volume sticky button.

      Ask FixBot

      Add Comment

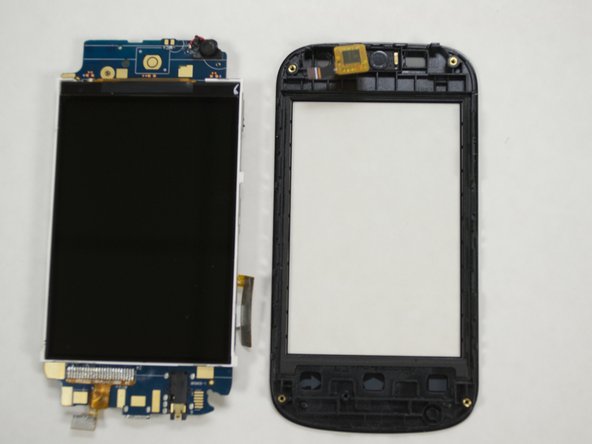
    8. BLU Dash JR D140 Digitizer Replacement: step 10, image 1 of 2 BLU Dash JR D140 Digitizer Replacement: step 10, image 2 of 2
      • Separate the screen cover from the motherboard using the plastic opening tool. And don't forget that your phone can mess up if u separate the motherboard from the screen cover

      • Make sure that the LCD screen stays attached to the motherboard while doing this.

      Ask FixBot

      Add Comment

Conclusion

To reassemble your device, follow these instructions in reverse order.

Cancel: I did not complete this guide.

5 other people completed this guide.

Nathanael

Member since: 07/23/15

233 Reputation

1 Guide authored

0 Guide Comments

Add Comment

View Statistics:

Past 24 Hours: 0

Past 7 Days: 6

Past 30 Days: 28

All Time: 1,507