Introduction
Introduction
Has your gain or output knobs developed hissing, bad contact or noise when turning. Do the output has uneven channel levels?
Then you can try cleaning the potentiometers! Hiss, bad connection and noise when turning can be caused by debris and dust getting caught in the potentiometer housing.
This cleaning guide will work for any none sealed potentiometer!
—————————————————————————————————————————————
Guide Notes
This is a potential cheap fix. There is no guarantee that this will work.
If this does not work then it is likely that the potentiometer is worn out, and then it needs to be replaced!
Potentiometer Lubrication
Any special made potentiometer lubricant spray (e.g. Caig DeoxIT F5) or any pure silicon spray will work for lubricating the potentiometers.
—————————————————————————————————————————————
Warning
The factory resistant or "heavy feel" of turning the potentiometer will disappear if one uses excess electrical contact cleaner!
It is not uncommon for this "heavy feel" to disappear when cleaning the potentiometers, and then coming back in a little while, if all the lubricant were not washed away.
Always have the unit unplugged when working with electrical contact cleaners! The solvents (which evaporates) are electrically conductive!
What you need
-
-
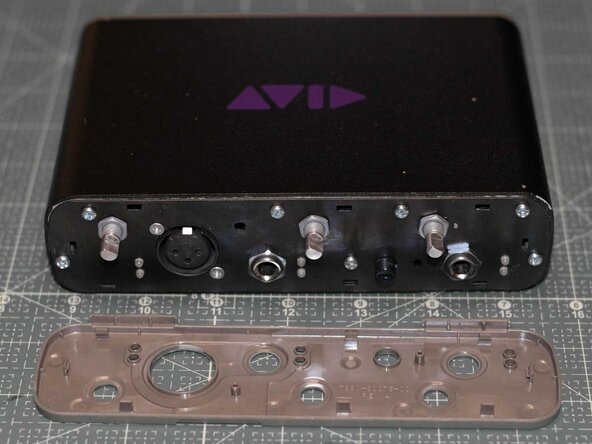
Remove all three knobs on the front by pulling them straight out.
-
-
-
Turn the unit upside down.
-
Insert an iFixit pick in the ridge between the body and the front plate, start in front of the feet pads and work around the unit.
-
Carefully pry of the front plate.
-
-
-
Use pliers to loosen the washers on the three potentiometer stems. The washers can then be unscrewed by hand.
-
Use pliers to loosen the washers on the two 6.3 mm jacks. The washers can then be unscrewed by hand.
-
-
-
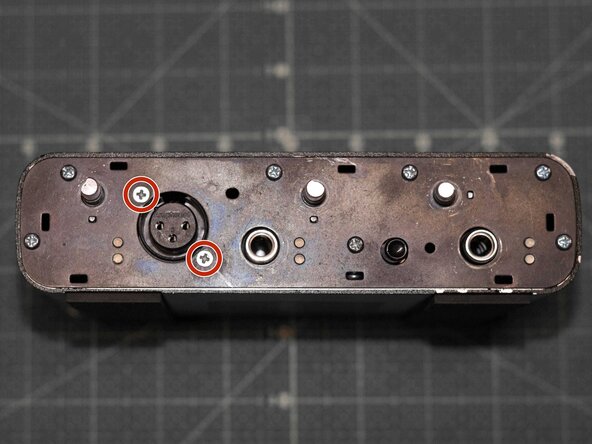
Unscrew all the screws fitted on the front plate, in the following order:
-
Use a PH1 screwdriver to remove the two PH1 screws securing the XLR jack.
-
Use a PH2 screwdriver to remove the remaining PH2 screws securing the front metal plate to the chassis.
-
-
-
-
One stereo 20K ohm linear potentiometer (B20K).
-
Two mono 10K ohm logarithmic potentiometers (A20K).
-
See next step for the cleaning instructions per type of potentiometer.
-
-
-
To clean the stereo potentiometer, spray 2 to 3 sprays of electric cleaner in the following openings:
-
Spray electrical cleaner through both of the bottom openings between the wire contacts.
-
(Optional) Spray electrical cleaner through the "side window opening".
-
Rotate the potentiometer shaft back and forth 20 times.
-
-
-
To clean the mono potentiometer, spray 2 to 3 sprays of electric cleaner in the following openings:
-
Spray electrical cleaner through the bottom opening next to the wire contacts.
-
(Optional) Spray electrical cleaner through the "side window opening".
-
Rotate the potentiometer shaft back and forth 20 times.
-
Repeat for the other mono potentiometer if necessary.
-
-
-
To lubricate the stereo potentiometer, spray of 2 to 3 short sprays of potentiometer lubricant through both of the bottom openings between the wire contacts.
-
Rotate the potentiometer shaft back and forth 20 times.
-
-
-
To lubricate the mono potentiometer, spray of 2 to 3 short sprays of potentiometer lubricant through the bottom opening next to the wire contacts.
-
Rotate the potentiometer shaft back and forth 20 times.
-
Repeat for the other mono potentiometer if necessary.
-
-
-
Insert the three potentiometers into the front plate.
-
Each potentiometer has a small prong that is to be fitted through the front plate, either to the right or below the potentiometer stem.
-
Reattach and tighten the washers for the potentiometers.
-
-
-
Reinsert and tighten all screws into the front plate, in the following order:
-
Reinsert and tighten all PH2 screws securing the front plate to the chassis.
-
Reinsert and tighten the two PH1 screws securing the XLR jack into the front plate.
-
Reattach and tighten the washers for the two 6.3 mm jacks.
-
Use pliers to make sure the washers for the potentiometers and the 6.3 mm jacks all are tight and secured.
-
-
-
Reattach the plastic front cover by pressing it on. Put pressure on the sides, and work around the edges of the unit.
-
-
-
Attach all three knobs to the potentiometer stems by pressing them straight on. They are interchangeable and the knobs will only fit in one orientation on the stems.
-


Wait at least 15 minutes for all contact cleaner to evaporate before powering on the device!
Done! You've now cleaned your units' potentiometers!