
Audiovox T752 Camera Replacement

Logan and 2 other contributors
Last updated on Aug 9, 2019
Views: 649
View statistics:
- Past 24 Hours:
- 2
- Past 7 Days:
- 18
- Past 30 Days:
- 94
- All Time:
- 649
Comments: 0
No one has left comments on this guide. Will you be first?
Go to guide commentsCompleted: 0 1
No one has marked this guide "completed." Will you be the first?
1 person has marked this guide "completed." It's you — great job!
Favorites: 1 2
1 person has favorited (and subscribed to) this guide. Will you be next?
2 people have favorited (and subscribed to) this guide — including you!
Incorrect Tools
Help make this guide better by using the correct tools in images and/or text.
Needs More Images
A few more images would make this guide's procedures crystal clear.
Introduction
Go to step 1 ↓This is an in-depth guide on how to replace the camera in your Audiovox T752. The guide includes step-by-step instructions and pictures to help you through the process.
What you need
Tools


-
-
-
Find a good spot to fit the pry bar between the back cover and tablet. Slowly drag the pry bar along the sides of the cover.
-
NOTE: some force will need to be used to remove the cover. Avoid excessive force.
 Ask FixBot
-
-
-
-
-
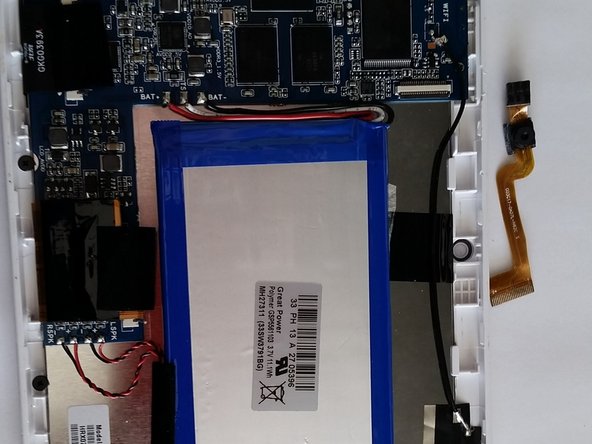
Remove the pink and aluminum protective cover. Be sure to also remove any tape holding it in place.
-
-
-
-
Insert new camera strip and place the pink and aluminum protective cover back in the device.
-
NOTE: camera strip may be loose when reconnected. Use of electrical tape may be required.
-
-




To reassemble your device, follow these instructions in reverse order.

Team

Penn State, Team 2-42, Kaschak Winter 2015 Member of Penn State, Team 2-42, Kaschak Winter 2015
PSU-KASCHAK-W15S2G42
4 Members
36 Guides authored
