Free Shipping on Domestic Orders $75+

Audio Technica ATH-AD500 Driver Replacement

What you need

  1. Audio Technica ATH-AD500 Driver Replacement, Speaker Assembly: step 1, image 1 of 1
    • Remove the ear pads by peeling them away from the grill.

    Ask FixBot

    Add Comment

  2. Audio Technica ATH-AD500 Driver Replacement: step 2, image 1 of 1
    • Remove all four 1cm screws on the inside of the headphone using a #1 Phillips head.

    Ask FixBot

    Add Comment

  3. Audio Technica ATH-AD500 Driver Replacement: step 3, image 1 of 1
    • Remove the speaker from the grill by pulling it out.

    • Remove the speaker carefully so you do not rip the wires out.

    Ask FixBot

    Add Comment

  4. Audio Technica ATH-AD500 Driver Replacement, Driver: step 4, image 1 of 1
    • With a #0 phillips head, unscrew the three, 1 cm screws which are holding the driver (red wafer) in its bracket.

    Ask FixBot

    Add Comment

  5. Audio Technica ATH-AD500 Driver Replacement: step 5, image 1 of 1
    • Pull the driver out of its bracket.

    Ask FixBot

    Add Comment

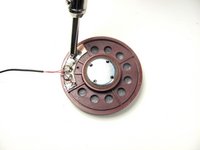
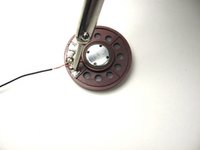
  6. Audio Technica ATH-AD500 Driver Replacement: step 6, image 1 of 2 Audio Technica ATH-AD500 Driver Replacement: step 6, image 2 of 2
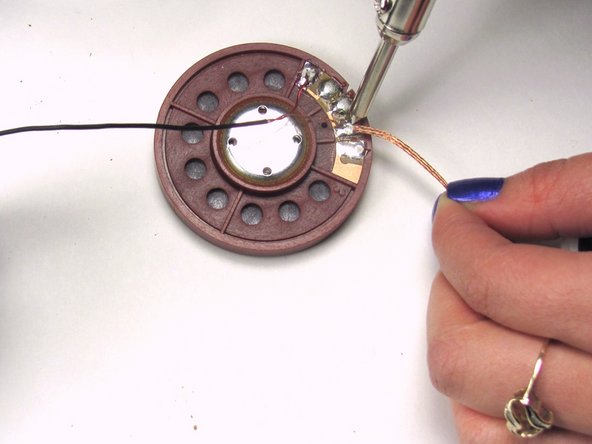
    • Remove the two wires, red and yellow, by de-soldering them from the driver using a soldering iron and desoldering wick. Reference How To Solder and Desolder Connections.

    • The areas where you solder will be hot so wait until the solder joints are cool before handling the wires again.

    Ask FixBot

    Add Comment

  7. Audio Technica ATH-AD500 Driver Replacement: step 7, image 1 of 2 Audio Technica ATH-AD500 Driver Replacement: step 7, image 2 of 2
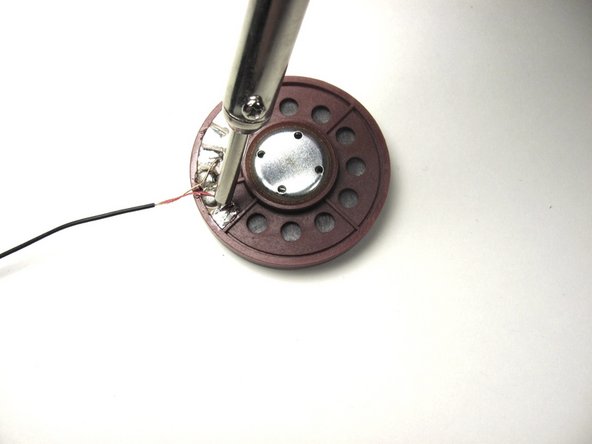
    • Connect the existing wires to the new driver by re-soldering the wires using the soldering iron.

    • Using the copper as a reference, re-solder the yellow wire to the top left solder joint and the red to the bottom left solder joint.

    • The areas where you solder will be hot so wait until the solder joints are cool before handling the wires again.

    Ask FixBot

    Add Comment

Conclusion

To reassemble your device, follow these instructions in reverse order.

Cancel: I did not complete this guide.

2 other people completed this guide.

Nick Levy

Member since: 01/13/13

183 Reputation

1 Guide authored

Team

Cal Poly, Team 17-19, Forte Winter 2013 Member of Cal Poly, Team 17-19, Forte Winter 2013

CPSU-FORTE-W13S17G19

6 Members

17 Guides authored

2 Guide Comments

where can i buy a replacement driver?

acidxgangster - Reply Share

You can order parts directly from PARTS@ATUS.COM

Nick Levy - Reply Share

Add Comment

View Statistics:

Past 24 Hours: 3

Past 7 Days: 13

Past 30 Days: 50

All Time: 11,745