Free Shipping on Domestic Orders $75+

Atari 5200 Number Pad Cleaning or Replacement

What you need

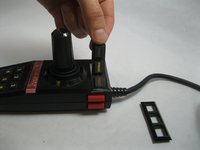
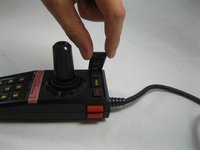
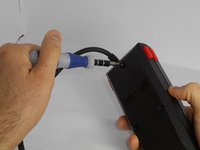
  1. Atari 5200 Number Pad Cleaning or Replacement, Open the controller: step 1, image 1 of 3 Atari 5200 Number Pad Cleaning or Replacement, Open the controller: step 1, image 2 of 3 Atari 5200 Number Pad Cleaning or Replacement, Open the controller: step 1, image 3 of 3
    • Turn the controller over.

    • Remove the three 6mm screws from the back.

    • Carefully slide and pull the two parts of the controller shell apart, exposing the innards.

    • Do not move the joystick when reassembling. This will break your alignment. The less the joystick is moved, the easier it will be to realign the joystick.

    Ask FixBot

    Add Comment

  2. Atari 5200 Number Pad Cleaning or Replacement, Cleaning/Reseating (number pad front and back): step 2, image 1 of 3 Atari 5200 Number Pad Cleaning or Replacement, Cleaning/Reseating (number pad front and back): step 2, image 2 of 3 Atari 5200 Number Pad Cleaning or Replacement, Cleaning/Reseating (number pad front and back): step 2, image 3 of 3
    • Take out the rubber button module of the number pad.

    • Blow out dust on the number pad sensors with compressed air.

    • Wipe the sensors clean with a cloth dabbed with alcohol.

    Ask FixBot

    Add Comment

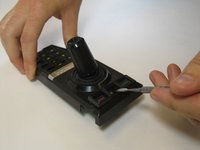
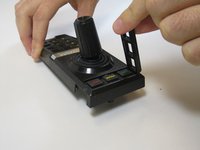
  3. Atari 5200 Number Pad Cleaning or Replacement, Reassembly Part 1: step 3, image 1 of 2 Atari 5200 Number Pad Cleaning or Replacement, Reassembly Part 1: step 3, image 2 of 2
    • Use a spudger to remove the top frame.

    • Take off the plate.

    • Remove the rubber buttons.

    Ask FixBot

    Add Comment

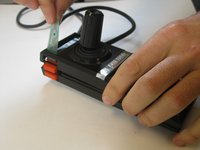
  4. Atari 5200 Number Pad Cleaning or Replacement, Reassembly Part 2: step 4, image 1 of 2 Atari 5200 Number Pad Cleaning or Replacement, Reassembly Part 2: step 4, image 2 of 2
    • Pull the circuit strip through the new space.

    • Realign the top and bottom of the controller.

    Ask FixBot

    Add Comment

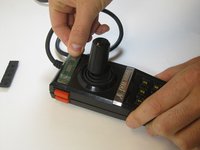
  5. Atari 5200 Number Pad Cleaning or Replacement, Reassembly Part 3: step 5, image 1 of 3 Atari 5200 Number Pad Cleaning or Replacement, Reassembly Part 3: step 5, image 2 of 3 Atari 5200 Number Pad Cleaning or Replacement, Reassembly Part 3: step 5, image 3 of 3
    • Return the buttons to the top of the controller.

    • Snap the frame back into place.

    • Screw the screws back into place.

    Ask FixBot

    Add Comment

Conclusion

To reassemble your device, follow these instructions in reverse order.

Cancel: I did not complete this guide.

One other person completed this guide.

Alan Abelson

Member since: 09/26/14

233 Reputation

5 Guides authored

Team

USF Tampa, Team 13-1, Staggers Fall 2014 Member of USF Tampa, Team 13-1, Staggers Fall 2014

USFT-STAGGERS-F14S13G1

5 Members

17 Guides authored

0 Guide Comments

Add Comment

View Statistics:

Past 24 Hours: 0

Past 7 Days: 4

Past 30 Days: 41

All Time: 1,098