
Asus ZenWatch 2 Motherboard Replacement

Andrew and 4 other contributors
Last updated on May 7, 2024
Views: 3.3K
View statistics:
- Past 24 Hours:
- 1
- Past 7 Days:
- 15
- Past 30 Days:
- 84
- All Time:
- 3,309
Comments: 6
6 guide comments.
Go to guide commentsCompleted: 1 2
1 person has marked this guide "completed." Will you be next?
2 people have marked this guide "completed." Including you — great job!
Favorites: 1 2
1 person has favorited (and subscribed to) this guide. Will you be next?
2 people have favorited (and subscribed to) this guide — including you!
Introduction
Go to step 1 ↓The motherboard housed within the Asus ZenWatch 2 serves as the primary root of function for the entire device. It connects many of the hardware components and allows the installed software to function properly. Any damage sustained to the part will likely result in the device's inability to operate as intended. If damage to the motherboard occurs, replacing it is a simple process involving only a few tools.
What you need


-
-
-
Remove the four 3.5mm screws using a T5 screwdriver to open the faceplate.
 Ask FixBot
-
-
-
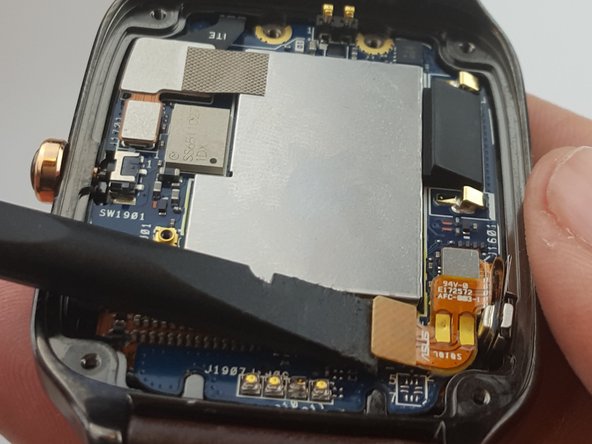
Slide the spudger under the gold-plated connection ribbon and lift to disconnect from the motherboard.
-
-
-
Tool used on this step:Tweezers$4.99
-
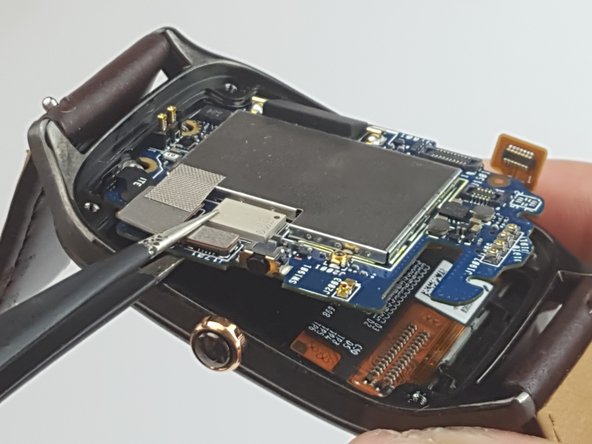
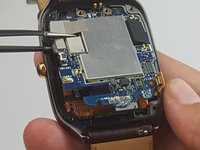
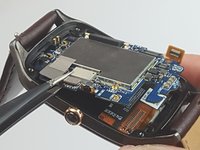
Pull up on the motherboard using tweezers to detach it from the watch.
-
-



To reassemble your device, follow these instructions in reverse order.
Cancel: I did not complete this guide.
One other person completed this guide.

Team

USF Tampa, Team S1-G1, Leahy Spring 2017 Member of USF Tampa, Team S1-G1, Leahy Spring 2017
USFT-LEAHY-S17S1G1
3 Members
60 Guides authored
6 Guide Comments
Out of curiosity, I don’t see the battery hiding in any of the pictures. Is it glued or otherwise attached to the backplate of the watch, and since you’re focused on the mainboard, we’re not seeing it for that reason? Thanks!
Battery is actually stuck to the bottom side of the case. It looks to be pretty easy to replace. Connection is done with 4 sets of pins (at least 2 for battery)
Where can you purchase a replacement motherboard?
