
Free Shipping on Domestic Orders $75+

Asus X751MA-DH01TQ Screen Replacement

What you need

  1. Asus X751MA-DH01TQ Screen Replacement, Screen: step 1, image 1 of 2 Asus X751MA-DH01TQ Screen Replacement, Screen: step 1, image 2 of 2
    • Turn the laptop upside down.

    • Unscrew the 10 screws on the bottom of the laptop using a PH00 screwdriver bit.

    Ask FixBot

    Add Comment

  2. Asus X751MA-DH01TQ Screen Replacement: step 2, image 1 of 3 Asus X751MA-DH01TQ Screen Replacement: step 2, image 2 of 3 Asus X751MA-DH01TQ Screen Replacement: step 2, image 3 of 3
    • Use a plastic opening tool to detach and take off the keyboard.

    Ask FixBot

    Add Comment

  3. Asus X751MA-DH01TQ Screen Replacement: step 3, image 1 of 3 Asus X751MA-DH01TQ Screen Replacement: step 3, image 2 of 3 Asus X751MA-DH01TQ Screen Replacement: step 3, image 3 of 3
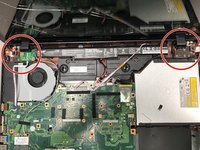
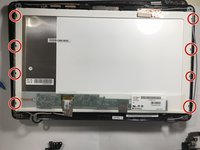
    • Remove the eight 5.5 Phillips #00 screws located at the top right and left hand side of panel.

    • There are four screws on each side.

    Ask FixBot

    Add Comment

  4. Asus X751MA-DH01TQ Screen Replacement: step 4, image 1 of 3 Asus X751MA-DH01TQ Screen Replacement: step 4, image 2 of 3 Asus X751MA-DH01TQ Screen Replacement: step 4, image 3 of 3
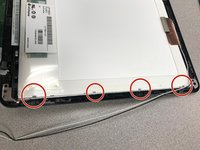
    • Remove the four 4mm Phillips #00 screws on the bottom left and right of the screen.

    • There are two screws on each side.

    Ask FixBot

    Add Comment

  5. Asus X751MA-DH01TQ Screen Replacement: step 5, image 1 of 1
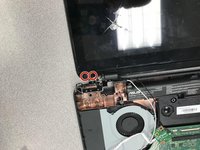
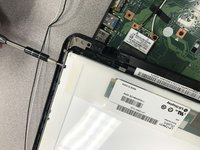
    • Insert the plastic opening tool on the side of the screen and slide it all the way around to open the screen up.

    Ask FixBot

    Add Comment

  6. Asus X751MA-DH01TQ Screen Replacement: step 6, image 1 of 3 Asus X751MA-DH01TQ Screen Replacement: step 6, image 2 of 3 Asus X751MA-DH01TQ Screen Replacement: step 6, image 3 of 3
    • Remove the cords on the left and right side of the screen.

    Ask FixBot

    Add Comment

  7. Asus X751MA-DH01TQ Screen Replacement: step 7, image 1 of 3 Asus X751MA-DH01TQ Screen Replacement: step 7, image 2 of 3 Asus X751MA-DH01TQ Screen Replacement: step 7, image 3 of 3
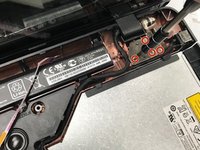
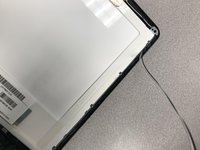
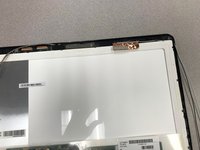
    • Remove the eight total screws (4 on each side) that are on the side of the white part on the back of the screen.

    Ask FixBot

    Add Comment

  8. Asus X751MA-DH01TQ Screen Replacement: step 8, image 1 of 3 Asus X751MA-DH01TQ Screen Replacement: step 8, image 2 of 3 Asus X751MA-DH01TQ Screen Replacement: step 8, image 3 of 3
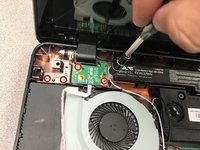
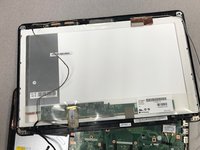
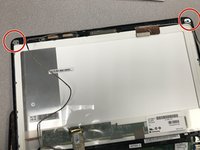
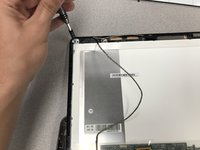
    • Remove the two 4mm Phillips #00 screws on the top corners of the back of the screen.

    • Remove the metal bars that you have just unscrewed.

    Ask FixBot

    Add Comment

  9. Asus X751MA-DH01TQ Screen Replacement: step 9, image 1 of 2 Asus X751MA-DH01TQ Screen Replacement: step 9, image 2 of 2
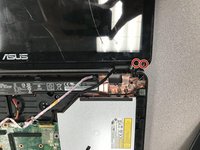
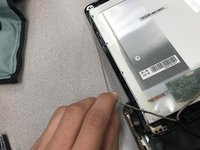
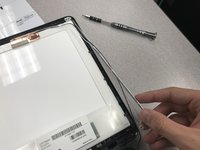
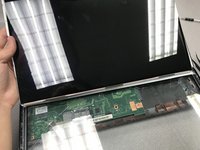
    • Peel back the bronze sticker that is connecting the white border piece to the outside edge of the screen.

    Ask FixBot

    Add Comment

  10. Asus X751MA-DH01TQ Screen Replacement: step 10, image 1 of 1
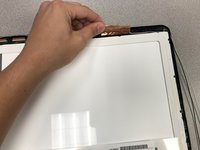
    • Use the plastic opening tool to pry open the white part away from the screen.

    Ask FixBot

    Add Comment

  11. Asus X751MA-DH01TQ Screen Replacement: step 11, image 1 of 2 Asus X751MA-DH01TQ Screen Replacement: step 11, image 2 of 2
    • Pull the white part out and pull out the rest of the screen.

    Ask FixBot

    Add Comment

Conclusion

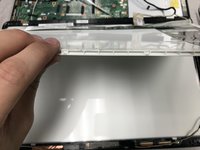
To reassemble your device, follow these instructions in reverse order.

Cancel: I did not complete this guide.

Collen Bleigh

Member since: 09/18/18

198 Reputation

1 Guide authored

0 Guide Comments

Add Comment

View Statistics:

Past 24 Hours: 3

Past 7 Days: 10

Past 30 Days: 34

All Time: 808