Free Shipping on Domestic Orders $75+

Asus X54C-RB92 Hard Drive Replacement

What you need

    1. Asus X54C-RB92 Hard Drive Replacement, Hard Drive: step 1, image 1 of 1
      • Hold laptop upright using both hands.

      Ask FixBot

      Add Comment

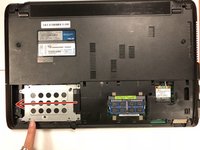
    2. Asus X54C-RB92 Hard Drive Replacement: step 2, image 1 of 3 Asus X54C-RB92 Hard Drive Replacement: step 2, image 2 of 3 Asus X54C-RB92 Hard Drive Replacement: step 2, image 3 of 3
      • Unscrew the two 12 mm screws shown in the image for access to the hard drive.

      • Remove the base of the laptop for access to the hard drive.

      Ask FixBot

      Add Comment

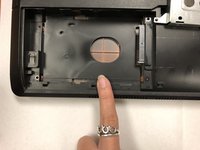
    3. Asus X54C-RB92 Hard Drive Replacement: step 3, image 1 of 1
      • Remove the four 12 mm hard drive bracket screws.

      • Remove the one 7 mm screw.

      Ask FixBot

      Add Comment

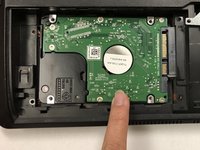
    4. Asus X54C-RB92 Hard Drive Replacement: step 4, image 1 of 2 Asus X54C-RB92 Hard Drive Replacement: step 4, image 2 of 2
      • Remove the silver hard drive cover by sliding it left to reveal the green hard drive.

      Ask FixBot

      Add Comment

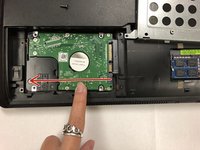
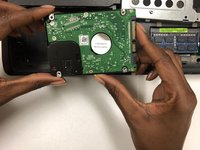
    5. Asus X54C-RB92 Hard Drive Replacement: step 5, image 1 of 3 Asus X54C-RB92 Hard Drive Replacement: step 5, image 2 of 3 Asus X54C-RB92 Hard Drive Replacement: step 5, image 3 of 3
      • Detach the hard drive by sliding it to the left.

      Ask FixBot

      Add Comment

Conclusion

To reassemble your device, follow these instructions in reverse order.

Cancel: I did not complete this guide.

Julia Huang

Member since: 11/08/17

355 Reputation

3 Guides authored

Team

Baylor, Team S1-G3, Johnson Fall 2017 Member of Baylor, Team S1-G3, Johnson Fall 2017

BU-JOHNSON-F17S1G3

2 Members

36 Guides authored

0 Guide Comments

Add Comment

View Statistics:

Past 24 Hours: 1

Past 7 Days: 9

Past 30 Days: 31

All Time: 2,667