Introduction
You may need to replace your SSD card if you are running out of storage space, want to boost system performance, or if your current drive is showing signs of failure, such as frequent crashes, file corruption, or a "read-only" status. This guide will walk you through safely removing the back panel, removing the SSD card, and installing a replacement.
Please ensure the laptop is turned off before beginning.
What you need
-
-
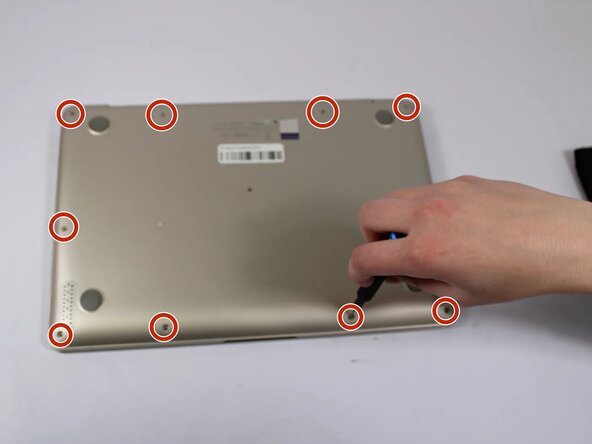
Remove all eleven 5 mm screws on the back panel with a Phillips #0 screwdriver.
-
Insert an iFixit opening tool between the back panel and the chassis. Carefully pry around the edges until the plastic clips release.
-
Lift the back panel off the laptop.
-
-


To reassemble your device, follow the above steps in reverse order.
Take your e-waste to an R2 or e-Stewards certified recycler.
Repair didn’t go as planned? Try some basic troubleshooting or ask our Answers community for help.

Team

UW Tacoma, Team E-3, Rose Winter 2026 Member of UW Tacoma, Team E-3, Rose Winter 2026
UWT-ROSE-W26SEG3
4 Members
4 Guides authored