
Asus Q551L Repair Hard Drive Replacement

Wesam Badughaysh and 2 other contributors
Last updated on Jun 13, 2018
Views: 4.5K
View statistics:
- Past 24 Hours:
- 2
- Past 7 Days:
- 25
- Past 30 Days:
- 92
- All Time:
- 4,456
Comments: 0
No one has left comments on this guide. Will you be first?
Go to guide commentsCompleted: 6 7
6 people have marked this guide "completed." Will you be next?
7 people have marked this guide "completed." Including you — great job!
Favorites: 0 1
No one has favorited (and subscribed to) this guide. Will you be the first?
1 person has favorited (and subscribed to) this guide — and that's you!
Introduction
Go to step 1 ↓These steps will show you how to remove the hard drive from you computer.
You will need to do that if the hard drive is in a good condition but the computer is not, replace it to a new one to increase the speed and capacity, or the hard drive has experienced a hardware failure.
What you need


-
-
-
Unscrew the 10 screws around the edge of the back panel. Eight of the screws are 0.0793mm T5 , two of them are 0.0793 JIS #0.
 Ask FixBot
-
-
-
Use the plastic opening tool to pry the back panel off the base of the laptop.
-
-
-
-
-
-
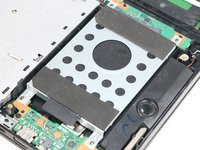
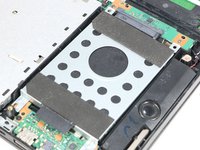
After removing the four screws, gently push the hard drive downward as shown.
-



To reassemble your device, follow these instructions in reverse order.
Cancel: I did not complete this guide.
6 other people completed this guide.

Team

Eastern Washington University, Team S3-G3, Rowley Spring 2018 Member of Eastern Washington University, Team S3-G3, Rowley Spring 2018
EWU-ROWLEY-S18S3G3
6 Members
72 Guides authored
