Free Shipping on Domestic Orders $75+

Asus Q534U CPU Fan/Heat Sink Replacement

What you need

    1. Asus Q534U CPU Fan/Heat Sink Replacement, Back Case Removal: step 1, image 1 of 1
      • Make sure the device is turned off and unplugged from the charger.

      • Use a T5 screwdriver to remove all 10 screws that secure the bottom cover.

      • Pull off the back cover of the laptop.

      • A pry tool may be needed to pull off the back cover.

      Ask FixBot

      Add Comment

    2. Asus Q534U CPU Fan/Heat Sink Replacement: step 2, image 1 of 2 Asus Q534U CPU Fan/Heat Sink Replacement: step 2, image 2 of 2
      • Wedge an opening tool under the battery's bundled cable connector, and gently pry the connector up and to disconnect the battery.

      Ask FixBot

      Add Comment

    3. Asus Q534U CPU Fan/Heat Sink Replacement: step 3, image 1 of 2 Asus Q534U CPU Fan/Heat Sink Replacement: step 3, image 2 of 2
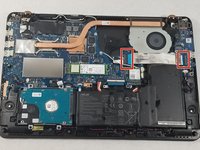
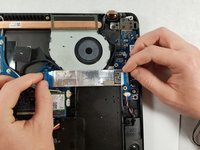
      • Lift up the black tab next to the silver ribbon cable.

      • Pull lightly on the blue tabs until the silver cable is free.

      Ask FixBot

      Add Comment

    4. Asus Q534U CPU Fan/Heat Sink Replacement: step 4, image 1 of 1
      • Use a Phillips #00 screwdriver to remove the 5 marked screws.

      • Gently remove the battery.

      • Do not bend or puncture the laptop's lithium-polymer pattery.

      Ask FixBot

      Add Comment

    1. Asus Q534U CPU Fan/Heat Sink Replacement, CPU Fan/Heat Sink: step 5, image 1 of 2 Asus Q534U CPU Fan/Heat Sink Replacement, CPU Fan/Heat Sink: step 5, image 2 of 2
      • Using the iFixit opening tool, gently pry the CPU fan connector out of the socket.

      Ask FixBot

      Add Comment

    2. Asus Q534U CPU Fan/Heat Sink Replacement: step 6, image 1 of 2 Asus Q534U CPU Fan/Heat Sink Replacement: step 6, image 2 of 2
      • Move the black cable located around the CPU fan out of the holder.

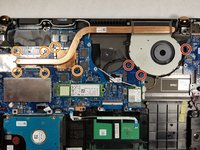
      • Remove the following 9 screws:

      • Three Phillips screws

      • Six Phillips screws

      • Make sure not to mix up both types of screws.

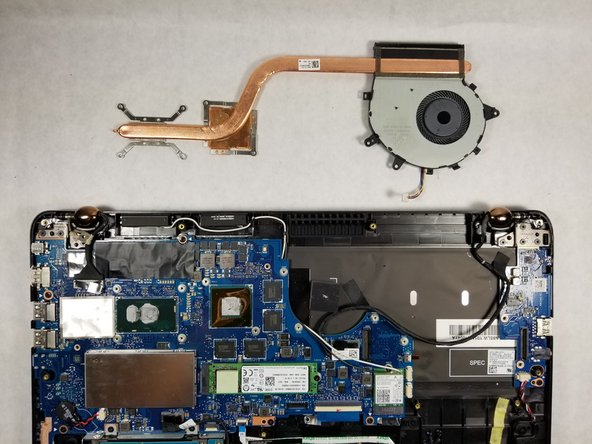
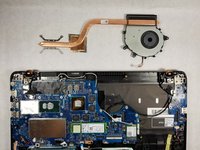
      • Gently pull vertically on the CPU fan/ heat sink assembly until it is free.

      • Before placing a new CPU fan/heat sink assembly, the CPU and GPU surfaces must be cleaned off and thermal compound must be reapplied.

      Ask FixBot

      Add Comment

Conclusion

To reassemble your device, follow these instructions in reverse order.

Cancel: I did not complete this guide.

4 other people completed this guide.

mmedina

Member since: 04/07/16

827 Reputation

2 Guides authored

1 Guide Comment

Is it possible to replace the fan only without removing the full heatsink or is it fused together as one unit?

Bork Bois - Reply Share

Add Comment

View Statistics:

Past 24 Hours: 0

Past 7 Days: 8

Past 30 Days: 84

All Time: 3,567