Free Shipping on Domestic Orders $75+

Asus Q525U RAM Replacement

What you need

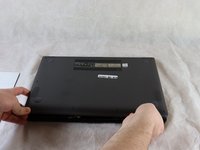
    1. Asus Q525U RAM Replacement, Back Cover: step 1, image 1 of 3 Asus Q525U RAM Replacement, Back Cover: step 1, image 2 of 3 Asus Q525U RAM Replacement, Back Cover: step 1, image 3 of 3
      • Begin by powering off the device and flipping the device over.

      • Carefully remove the two longer 9.5 mm screws on the corners with a Phillips #1 screwdriver.

      • Remove the eight 7.5 mm Phillips #1 screws on the back of the device.

      Ask FixBot

      Add Comment

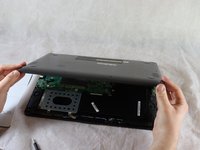
    2. Asus Q525U RAM Replacement: step 2, image 1 of 3 Asus Q525U RAM Replacement: step 2, image 2 of 3 Asus Q525U RAM Replacement: step 2, image 3 of 3
      • Use an opening pick to separate the back cover from the device.

      • For easiest removal, begin by prying at one of the front corners and sliding the tool under the cover in a counter-clockwise motion (to the left) toward the laptop hinge.

      Ask FixBot

      Add Comment

    3. Asus Q525U RAM Replacement: step 3, image 1 of 3 Asus Q525U RAM Replacement: step 3, image 2 of 3 Asus Q525U RAM Replacement: step 3, image 3 of 3
      • Once the cover has been separated from the device, carefully lift the back cover off the device (begin by lifting from the front of the cover first).

      • The back cover should be easily removable, allowing full access to all of the internal components.

      Ask FixBot

      Add Comment

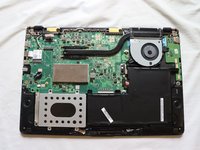
    1. Asus Q525U RAM Replacement, RAM: step 4, image 1 of 1
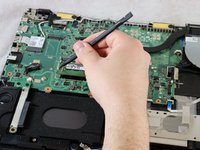
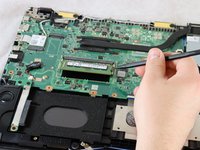
      • Position the flat end of the Spudger under one of the corners on the RAM cover and pry it up slightly.

      • Move the spudger around the periphery of the cover to lift the cover up.

      Ask FixBot

      Add Comment

    2. Asus Q525U RAM Replacement: step 5, image 1 of 1
      • Lift the RAM cover off.

      • The RAM should now be fully exposed.

      Ask FixBot

      Add Comment

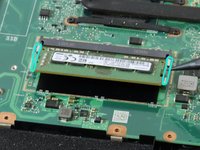
    3. Asus Q525U RAM Replacement: step 6, image 1 of 3 Asus Q525U RAM Replacement: step 6, image 2 of 3 Asus Q525U RAM Replacement: step 6, image 3 of 3
      • Using a spudger or your fingers, gently pull the metal brackets away from the RAM.

      • After pulling both brackets away from the component, the RAM should release at an upward angle (allowing for removal and replacement).

      Ask FixBot

      Add Comment

    4. Asus Q525U RAM Replacement: step 7, image 1 of 1
      • Slide the RAM stick out of the socket.

      Ask FixBot

      Add Comment

Conclusion

To reassemble your device, follow these instructions in reverse order.

Cancel: I did not complete this guide.

One other person completed this guide.

Stewart Crandall

Member since: 02/22/22

634 Reputation

5 Guides authored

Team

Clemson, Team 2-5, Hunter Spring 2022 Member of Clemson, Team 2-5, Hunter Spring 2022

CLEM-HUNTER-S22S2G5

4 Members

72 Guides authored

0 Guide Comments

Add Comment

View Statistics:

Past 24 Hours: 0

Past 7 Days: 9

Past 30 Days: 31

All Time: 1,623