Free Shipping on Domestic Orders $75+

Asus Q502LA-BSI5T14 Keyboard Replacement

What you need

    1. Asus Q502LA-BSI5T14 Keyboard Replacement, Battery: step 1, image 1 of 1
      • Ensure your device is powered off before starting.

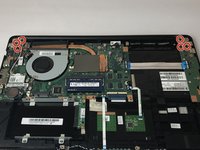
      • Flip the laptop over and remove the ten 10 mm Phillips #1 screws securing the back panel.

      Ask FixBot

      Add Comment

    2. Asus Q502LA-BSI5T14 Keyboard Replacement: step 2, image 1 of 1
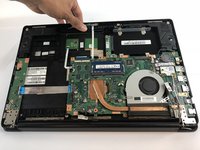
      • Carefully insert a plastic opening tool under one corner of the back panel.

      • Slide the tool along the seam to gently pry the panel up and away from the device.

      Ask FixBot

      Add Comment

    3. Asus Q502LA-BSI5T14 Keyboard Replacement: step 3, image 1 of 2 Asus Q502LA-BSI5T14 Keyboard Replacement: step 3, image 2 of 2
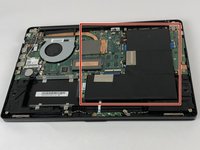
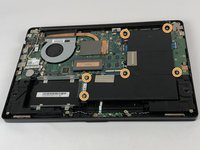
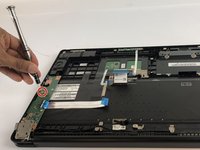
      • The battery is the large L-shaped block.

      • Remove the five 5.5 mm Phillips #1 screws securing it.

      Ask FixBot

      Add Comment

    4. Asus Q502LA-BSI5T14 Keyboard Replacement: step 4, image 1 of 2 Asus Q502LA-BSI5T14 Keyboard Replacement: step 4, image 2 of 2
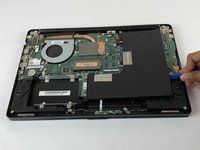
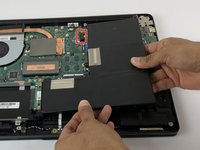
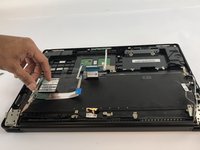
      • Using a plastic opening tool, lift the battery straight upward to remove it.

      • There are a series of eight small wires connecting the battery to the motherboard. Make sure you gently lift the battery straight up to disconnect these wires and prevent damage.

      Ask FixBot

      Add Comment

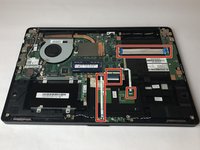
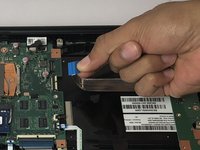
    1. Asus Q502LA-BSI5T14 Keyboard Replacement, Motherboard: step 5, image 1 of 2 Asus Q502LA-BSI5T14 Keyboard Replacement, Motherboard: step 5, image 2 of 2
      • Remove the four ribbons connected to the motherboard.

      Ask FixBot

      Add Comment

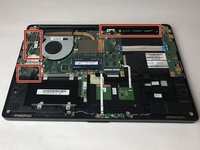
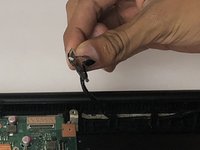
    2. Asus Q502LA-BSI5T14 Keyboard Replacement: step 6, image 1 of 2 Asus Q502LA-BSI5T14 Keyboard Replacement: step 6, image 2 of 2
      • Disconnect the five wires attached to the motherboard by pulling gently. There are three thin wires in the upper left corner.

      Ask FixBot

      Add Comment

    3. Asus Q502LA-BSI5T14 Keyboard Replacement: step 7, image 1 of 1
      • Remove the two 5 mm Phillips #1 screws attaching the stabilizer to the motherboard

      Ask FixBot

      Add Comment

    4. Asus Q502LA-BSI5T14 Keyboard Replacement: step 8, image 1 of 1
      • Remove the four 5 mm Phillips #1 screws around the perimeter of the motherboard.

      Ask FixBot

      Add Comment

    5. Asus Q502LA-BSI5T14 Keyboard Replacement: step 9, image 1 of 2 Asus Q502LA-BSI5T14 Keyboard Replacement: step 9, image 2 of 2
      • Remove the six 5 mm Phillips #1 screws securing the silver plates to the motherboard.

      • Open the laptop approximately 1/2" to loosen the hinge and release the motherboard.

      Ask FixBot

      Add Comment

    6. Asus Q502LA-BSI5T14 Keyboard Replacement: step 10, image 1 of 1
      • Gently lift the motherboard out and away from the laptop.

      Ask FixBot

      Add Comment

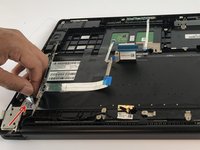
    1. Asus Q502LA-BSI5T14 Keyboard Replacement, Keyboard: step 11, image 1 of 2 Asus Q502LA-BSI5T14 Keyboard Replacement, Keyboard: step 11, image 2 of 2
      • Remove the one 5 mm Phillips #1 screw.

      • Pull out the green plastic in order to free the keyboard underneath.

      • It is not necessary to unattach the green plastic completely .

      Ask FixBot

      Add Comment

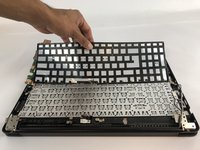
    2. Asus Q502LA-BSI5T14 Keyboard Replacement: step 12, image 1 of 2 Asus Q502LA-BSI5T14 Keyboard Replacement: step 12, image 2 of 2
      • Start peeling the black cover from the bottom left corner gently.

      • Continue until the black cover is fully removed.

      Ask FixBot

      Add Comment

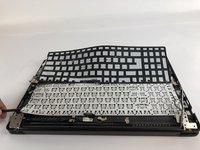
    3. Asus Q502LA-BSI5T14 Keyboard Replacement: step 13, image 1 of 2 Asus Q502LA-BSI5T14 Keyboard Replacement: step 13, image 2 of 2
      • Insert black Spudger in bottom left corner and lift the keyboard up.

      • Slide the black Spudger underneath the keyboard to loosen it.

      • Little black pieces that hold the keyboard in place will pop out while you lift the keyboard up.

      • This part is difficult and requires a gentle but forceful movement.

      Ask FixBot

      Add Comment

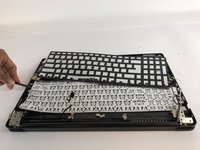
    4. Asus Q502LA-BSI5T14 Keyboard Replacement: step 14, image 1 of 1
      • Lift up the keyboard once it is loosened to remove it.

      Ask FixBot

      Add Comment

Conclusion

To reassemble your device, follow these instructions in reverse order.

Cancel: I did not complete this guide.

One other person completed this guide.

Mary Kounelas

Member since: 09/25/17

772 Reputation

5 Guides authored

Team

USF Tampa, Team S4-G1, Eyestone Fall 2017 Member of USF Tampa, Team S4-G1, Eyestone Fall 2017

USFT-EYESTONE-F17S4G1

4 Members

58 Guides authored

1 Guide Comment

Step 4 was misleading. It should have unplugged the cable before lifting the battery. I broke my battery connector off the mobo by following these directions. Lift straight up? That’s silly given how short the battery connection cable is.

Stevo Dumpert - Reply Share

Add Comment

View Statistics:

Past 24 Hours: 3

Past 7 Days: 12

Past 30 Days: 42

All Time: 1,403