
Asus F555LA-AB31 Hard Drive Replacement

JC Chavez and 5 other contributors
Last updated on Nov 17, 2022
Views: 2.8K
View statistics:
- Past 24 Hours:
- 3
- Past 7 Days:
- 17
- Past 30 Days:
- 75
- All Time:
- 2,839
Comments: 1
1 guide comment.
Go to guide commentsCompleted: 1 2
1 person has marked this guide "completed." Will you be next?
2 people have marked this guide "completed." Including you — great job!
Favorites: 0 1
No one has favorited (and subscribed to) this guide. Will you be the first?
1 person has favorited (and subscribed to) this guide — and that's you!
Introduction
Go to step 1 ↓In this guide we will show you how to properly remove and replace the hard drive in your Asus F555LA-AB31 laptop..
Hard drive replacements are needed when old drives begin to die or fail altogether. You’ll notice a hard drive beginning to fail when your laptop crashes during booting, or when it takes a lot longer for a file to open. You may also be replacing the hard drive with one that has increased storage. In either case, you’ll want to follow our instructions.
It is recommended that you know how to operate a screwdriver to easily open up the laptop as well as have an anti-static wristband to prevent damage to the internals of your laptop from any built up static charges.
What you need
Fix Kit
This kit contains all the parts and tools needed to complete this guide.

Parts


Tools

-
-
-
Remove ten 18mm Phillips #0 screws from the backside of the device.
 Ask FixBot
-
-
-
Carefully fold the device open.
-
Begin to pry upward on the edges of the faceplate in order to separate the keyboard and trackpad from the rest of the device.
-
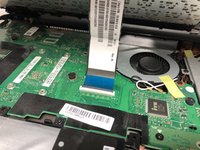
To remove the ZIF connector, gently lift upward on the blue tab to disconnect it from the motherboard.
-
-
-
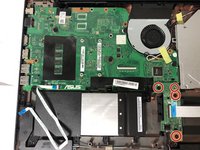
Fold the keyboard section of the laptop up towards the screen to fully expose the inside of the device.
-
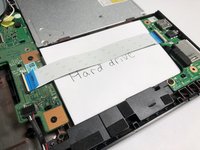
Unscrew the four 4mm Phillips #0 screws holding down the hard drive.
-
-
-



To reassemble your device, follow these instructions in reverse order.
Cancel: I did not complete this guide.
One other person completed this guide.

Team

Oregon Institute of Technology, Team S1-G1, Lancaster Spring 2019 Member of Oregon Institute of Technology, Team S1-G1, Lancaster Spring 2019
OIT-LANCASTER-S19S1G1
4 Members
72 Guides authored
1 Guide Comment
Boo, 10 screws in first step are not all the same length, 4 screws in third step are not correctly indicated in the image (nor are they all in view in said image). Finally, there’s a hard drive bracket that is not included in the guide which is important to note how it is positioned to reinstall correctly.
