Introduction
Replace a cracked or malfunctioning Asus Chromebook C425TA-DH384 display to restore a clear, fully visible screen. This guide explains how to safely power down the device, remove the display, disconnect the internal screen panel, and install a replacement. If your Chromebook's display shows flickering, discoloration, or physical damage, this repair can resolve the issue. Before beginning, disconnect all power sources and work on a nonconductive surface, handling internal components carefully to avoid damage."
What you need
-
-
Unscrew and remove the 10 Phillips screws securing the lower case:
-
Two M2 x 6 mm screws
-
Eight M2 x 5 mm screws
-
Insert an opening pick into the seam between the lower case and chassis, and pry around the entire perimeter until the lower case fully releases.
-
Remove the lower case.
 Ask FixBot
-
-
-
Using tweezers, carefully disconnect the battery by lifting the white connector straight out from its socket.
-
-
-
-
Flip up the golden locking flap securing the display connector.
-
Disconnect the display connector.
-
-
-
Open the laptop lid and position the screen to face you.
-
Carefully wedge an opening pick between the screen and the bezel.
-
Pry around the entire perimeter until the bezel fully releases.
-
Remove the bezel.
-
-
-
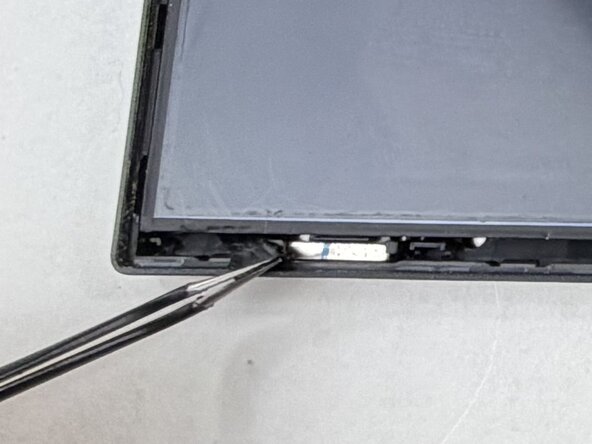
Pull the black adhesive on top of the screen.
-
Using tweezers, gently pull the adhesive out, then toward you until it comes out on both side.
-
Lift the screen out.
-
-
-
Remove the tape behind the display to thats on the connector.
-
Lift up the locking flap securing the display cable.
-
Disconnect the display cable.
-
Remove the display.
-




To reassemble your device, follow the above steps in reverse order.
Take your e-waste to an R2 or e-Stewards certified recycler.
Repair didn’t go as planned? Try some basic troubleshooting or ask our Answers community for help.
Cancel: I did not complete this guide.
One other person completed this guide.

Team

UMass Dartmouth, Team 2-2, Biswokarma Spring 2026 Member of UMass Dartmouth, Team 2-2, Biswokarma Spring 2026
UMASSD-BISWOKARMA-S26S2G2
4 Members
5 Guides authored
