
Asus Chromebook C213SA-YS02 Keyboard Replacement

nathan and 4 other contributors
Last updated on May 7, 2024
Views: 1K
View statistics:
- Past 24 Hours:
- 1
- Past 7 Days:
- 13
- Past 30 Days:
- 65
- All Time:
- 1,000
Comments: 0
No one has left comments on this guide. Will you be first?
Go to guide commentsCompleted: 0 1
No one has marked this guide "completed." Will you be the first?
1 person has marked this guide "completed." It's you — great job!
Favorites: 0 1
No one has favorited (and subscribed to) this guide. Will you be the first?
1 person has favorited (and subscribed to) this guide — and that's you!
Introduction
Go to step 1 ↓This Asus Chromebook C213SA-YS02 guide is for when troubleshooting has failed and the keyboard remains nonfunctional. This could be due to things such as broken keys and/or broken signal connections that can not be fixed. A purchase of the compatible keyboards and a few minutes of installation can get the laptop running again.
What you need
Tools


-
-
-
Power off the device by pressing and holding the power button on the side of the device.
-
Remove the power cable from the back of the device (if applicable).
 Ask FixBot
-
-
-
Place the closed device on the table so that the back cover is facing up.
-
Remove the one black 4mm Phillips #00 screw on the back cover.
-
Place the iFixit opening tool in the slot and lift up the cover.
-
Slide the iFixit opening tool around the outside of the cover to remove it.
-
-
Tool used on this step:Tweezers$4.99
-
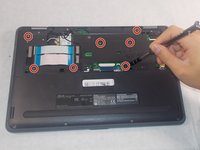
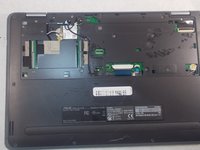
Remove the seven black 4mm Phillips screws underneath the back cover.
-
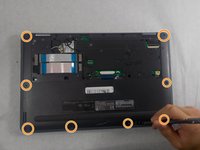
Remove the eight black 7mm Phillips #00 screws along the edge of the device.
-
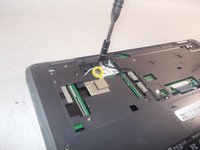
Remove the single silver 2mm Phillips #00 screw from the top of the Wi-Fi card.
-
Carefully pull the white and black wires out of the card using tweezers.
-
Remove the Wi-Fi card.
-
-
-
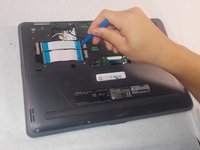
Unhook the two ribbon cables by using the iFixit opening tool to lift the black lock mechanisms up.
-
Slide the blue ribbon out of the lock mechanism.
-
Repeat these steps for both sides of each blue ribbon.
-
-
-
Using your iFixit opening tool, slide the black lock mechanism toward the serial label.
-
Repeat the step on the opposite side of the cable.
-
Slide the blue cable out of the port using a pair of tweezers.
-
-
-
Remove the touchpad cable by lifting the black lock mechanism up by using your iFixit opening tool.
-
Gently slide the cable out of its port.
-
-
-
Use the iFixit opening tool to release both ends of the double male end of the speaker cable.
-
Disconnect the speaker cable from the port.
-
-
-
-
Disconnect the black LCD cable directly above the hinges of the device by using an iFixit opening tool to lift up the black lock.
-
Slide the black LCD cable out of the connection port.
-
-
-
Disconnect the black camera cable between the keyboard cable and the two blue ribbons which have been disconnected.
-
Using the tweezers, grab the wire end of the cable and carefully pull it away from the connection port.
-
Loosely place the disconnected cable away from the connection port.
-
-
-
Flip the device over and open up the LCD screen.
-
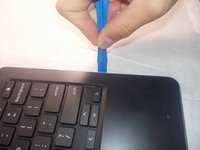
Using the iFixit opening tool, gently place the tool in between the back-plate and the keyboard and lift up.
-
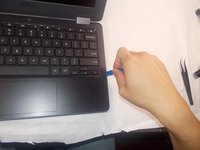
Slide the tool around the outside of the keyboard and lift up the tool while moving it around the boundary of the keyboard.
-
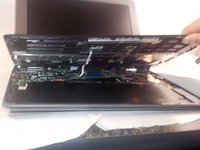
Pull the keyboard away from the back-plate. Be careful the keyboard cable is not caught on the back-plate while performing this maneuver.
-
-






To reassemble your device, follow these instructions in reverse order.

Team

UMass Dartmouth, Team S4-G7, Saloman Fall 2019 Member of UMass Dartmouth, Team S4-G7, Saloman Fall 2019
UMASSD-SALOMAN-F19S4G7
4 Members
48 Guides authored
