
Free Shipping on Domestic Orders $75+

Asus A4110 Disassembly

What you need

  1. Asus A4110 Disassembly, Open case: step 1, image 1 of 2 Asus A4110 Disassembly, Open case: step 1, image 2 of 2
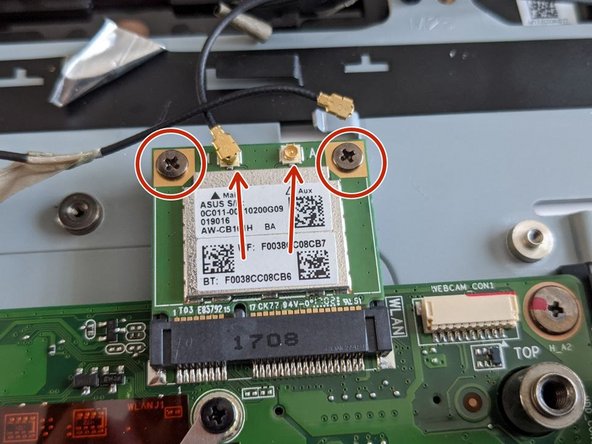
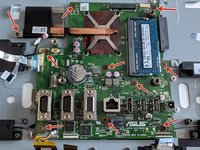
    • Remove screws at the circles

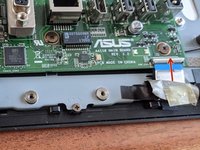
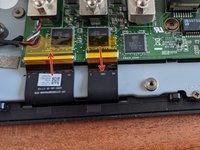
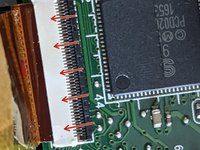
    • Remove gum strap and screw 5 screws out

    • Use a big screwdriver or some plastic to softly open the entire case around, starting at one down corner where your removed the screws before. The plastic clips will click a little. Don't be to hard.

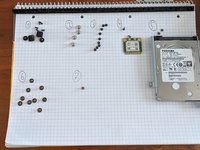
    • Then you can lay the back next to the front, see second picture.

  2. Asus A4110 Disassembly: step 2, image 1 of 1
    • You can now remove and/or replace harddrive easily. (This can be done in later steps, but will be necessary before attempting to move the motherboard)

    • If you're only replacing the drive, then you're done here. Retrace your steps to get the device back to and assembled product.

    • If you are replacing or fixing something else as well, please continue with the steps.

  3. Asus A4110 Disassembly: step 3, image 1 of 2 Asus A4110 Disassembly: step 3, image 2 of 2
    • Remove VESA mount by 4 screws

    • Remove mainboard blend by 9 screws afterwards.

  4. Asus A4110 Disassembly: step 4, image 1 of 1
    • If you brought one, use a marker and mark one of the cable to more easily distinguis them.

    • (Remember which goes where!)

    • Remove the antenna cables from the Wi-Fi Module.

    • Remove the 2 screws to unfasten the Wi-Fi Module, then angle it upwards and pull it out, away from the socket to continue disassembly.

  5. Asus A4110 Disassembly: step 5, image 1 of 3 Asus A4110 Disassembly: step 5, image 2 of 3 Asus A4110 Disassembly: step 5, image 3 of 3
    • Remove display cables by pulling the white plastic clip up from the cable side

    • Pull up the left clip same as the right one from first picture from cable side.

    • Then the touch connector (middle) must be opened from board side up, be patient and watch out for this, else your connector might brake!

  6. Asus A4110 Disassembly: step 6, image 1 of 1
    • This is how the connectors should now look like, see the marked position of the plastic strips.

  7. Asus A4110 Disassembly: step 7, image 1 of 1
    • Remove further connectors for USB, power, sound and keys.

  8. Asus A4110 Disassembly: step 8, image 1 of 2 Asus A4110 Disassembly: step 8, image 2 of 2
    • Now remove 9 screws and the cooling screw to remove the mainboard.

Conclusion

To reassemble your device, follow these instructions in reverse order.

One other person completed this guide.

Max

Member since: 06/03/21

175 Reputation

1 Guide authored

1 Guide Comment

grazie della spiegazione

Pierluigi Ricco - Reply Share

Add Comment

View Statistics:

Past 24 Hours: 4

Past 7 Days: 36

Past 30 Days: 109

All Time: 4,953