
Free Shipping on Domestic Orders $75+

Aquaris M5 Daughterboard Replacement

What you need

  1. Aquaris M5 Daughterboard Replacement, Back Cover: step 1, image 1 of 2 Aquaris M5 Daughterboard Replacement, Back Cover: step 1, image 2 of 2
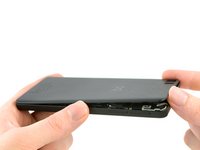
    • Insert the tip of an iFixit opening tool between the back cover and the mid frame of the phone.

    • Between the 2 SIM card slots is a good place to start.

    • Slide the opening tool to the bottom of the phone, to snap out the plastic clips, connecting the back cover and mid frame.

    Ask FixBot

    Add Comment

  2. Aquaris M5 Daughterboard Replacement: step 2, image 1 of 2 Aquaris M5 Daughterboard Replacement: step 2, image 2 of 2
    • Slide the opening tool back to the top of the phone, to disconnect all the clips on the edge.

    • Slide around the corner and along the top edge, to also disconnect these clips.

    Ask FixBot

    Add Comment

  3. Aquaris M5 Daughterboard Replacement: step 3, image 1 of 3 Aquaris M5 Daughterboard Replacement: step 3, image 2 of 3 Aquaris M5 Daughterboard Replacement: step 3, image 3 of 3
    • Be careful not to bend the back cover too hard to prevent some of the clips breaking.

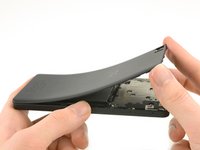
    • Grab the back cover by the loosened edge.

    • Gently bend and twist the flexible back cover a bit to disconnect the remaining clips.

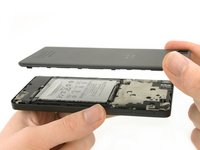
    • Take off the back cover.

    Ask FixBot

    Add Comment

  4. Aquaris M5 Daughterboard Replacement, Battery: step 4, image 1 of 1
    • Damaging the liquid indicator sticker, on the middle most screw, will void the warranty of the phone.

    • Unscrew the ten black 4mm Phillips #00 Screws from the mainboard shield.

    • Unscrew the golden 3.4mm Phillips #00 screw on the middle-right side of the mainboard shield.

    Ask FixBot

    Add Comment

  5. Aquaris M5 Daughterboard Replacement: step 5, image 1 of 3 Aquaris M5 Daughterboard Replacement: step 5, image 2 of 3 Aquaris M5 Daughterboard Replacement: step 5, image 3 of 3
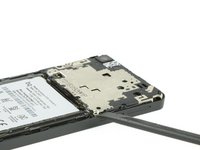
    • Insert the flat side of a spudger between the mainboard shield and the frame of the phone.

    • Twist the spudger to lift up the mainboard shield.

    • Remove the mainboard shield from the phone.

    Ask FixBot

    Add Comment

  6. Aquaris M5 Daughterboard Replacement: step 6, image 1 of 2 Aquaris M5 Daughterboard Replacement: step 6, image 2 of 2
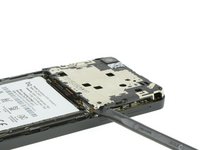
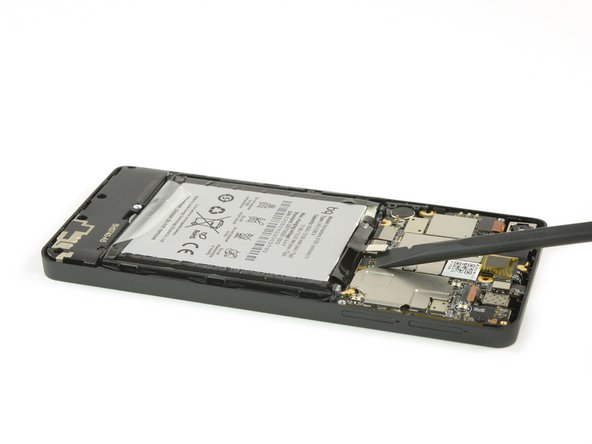
    • Use a spudger to disconnect the battery's flex cable from the mainboard.

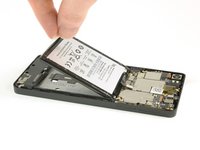
    • Pull of the sticker on the bottom side of the battery.

    • Grab the sticker and lift it up to take the battery out of the phone.

    Ask FixBot

    Add Comment

  7. Aquaris M5 Daughterboard Replacement, Loud Speaker: step 7, image 1 of 1
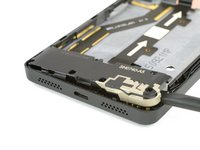
    • Take out the seven 4mm Phillips #00 screws, holding the loud speaker unit to the mid frame of the phone.

    Ask FixBot

    Add Comment

  8. Aquaris M5 Daughterboard Replacement: step 8, image 1 of 2 Aquaris M5 Daughterboard Replacement: step 8, image 2 of 2
    • Insert the flat side of a spudger into the gap on the right side of the loud speaker.

    • Lever the loud speaker up with the spudger.

    • Grab the loud speaker and take it out of the phone.

    Ask FixBot

    Add Comment

  9. Aquaris M5 Daughterboard Replacement, Daughterboard: step 9, image 1 of 3 Aquaris M5 Daughterboard Replacement, Daughterboard: step 9, image 2 of 3 Aquaris M5 Daughterboard Replacement, Daughterboard: step 9, image 3 of 3
    Tool used on this step:
    Tweezers
    $4.99
    Buy
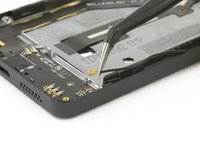
    • Use tweezers to disconnect the antenna cable from the daughterboard.

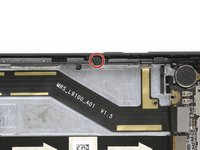
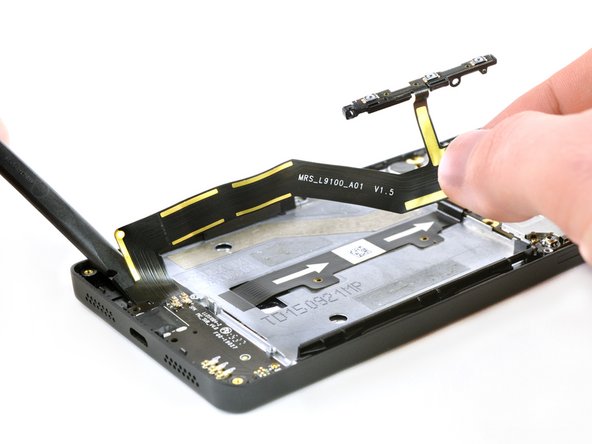
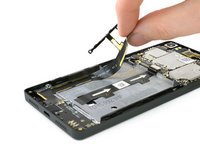
    • Unscrew the black Phillips #00 screw, that holds the power and volume buttons in place.

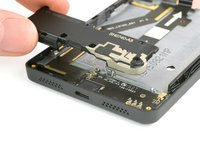
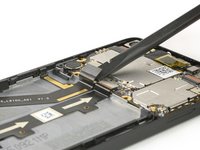
    • Use the flat end of a spudger to disconnect the flex cable from the mainboard.

    Ask FixBot

    Add Comment

  10. Aquaris M5 Daughterboard Replacement: step 10, image 1 of 3 Aquaris M5 Daughterboard Replacement: step 10, image 2 of 3 Aquaris M5 Daughterboard Replacement: step 10, image 3 of 3
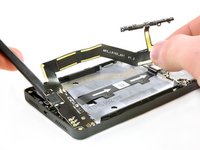
    • Grasp the flex cable by the connector and carefully peel it off.

    • You can use a spudger to loosen the adhesive with the other hand.

    • Use a spudger to lever out the daughterboard.

    • Remove the daughterboard.

    Ask FixBot

    Add Comment

Conclusion

To reassemble your device, follow these instructions in reverse order.

Cancel: I did not complete this guide.

One other person completed this guide.

Theo Mat

Member since: 11/12/17

13,017 Reputation

14 Guides authored

0 Guide Comments

Add Comment

View Statistics:

Past 24 Hours: 1

Past 7 Days: 4

Past 30 Days: 29

All Time: 941