Free Shipping on Domestic Orders $75+

Apple Watch - Series 10 (46mm) Screen Replacement

What you need

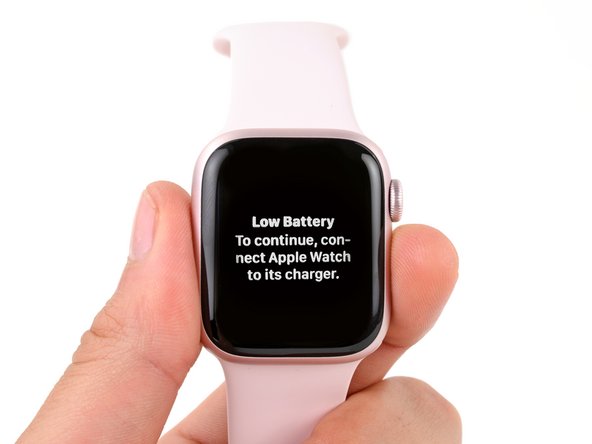
    1. Apple Watch - Series 10 (46mm) Screen Replacement, Prepare your watch for disassembly: step 1, image 1 of 2 Apple Watch - Series 10 (46mm) Screen Replacement, Prepare your watch for disassembly: step 1, image 2 of 2
      • Before starting this repair, remove your watch from the charger and let its battery drain completely—the watch should shut down from low battery. A charged lithium‑ion battery may catch fire if damaged.

      • Letting the battery drain completely also prevents accidentally turning your watch back on when gripping it during repair.

      Ask FixBot
      Add Comment

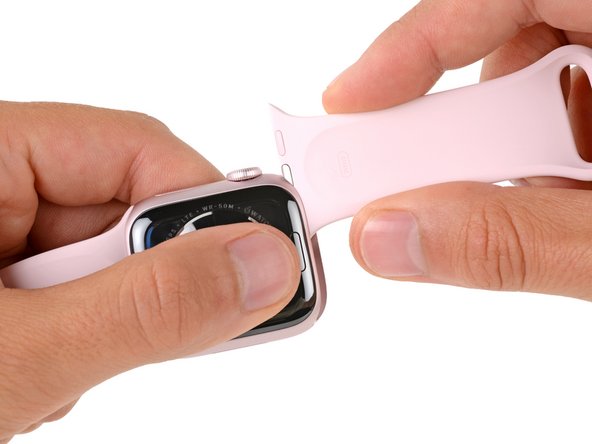
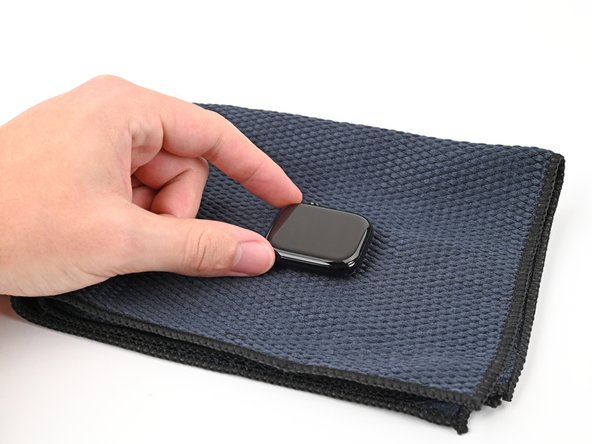
    2. Apple Watch - Series 10 (46mm) Screen Replacement, Disassembly information: step 2, image 1 of 3 Apple Watch - Series 10 (46mm) Screen Replacement, Disassembly information: step 2, image 2 of 3 Apple Watch - Series 10 (46mm) Screen Replacement, Disassembly information: step 2, image 3 of 3
      • Throughout the rest of your repair:

      • Attach and remove the watch bands as needed to get a better grip or stabilize your watch.

      • To remove a band, firmly press in the small, oval button on the underside of the watch and slide the band out of its groove.

      • Consider placing your watch on something soft like a clean cloth to help stabilize it and prevent damage.

      Ask FixBot
      Add Comment

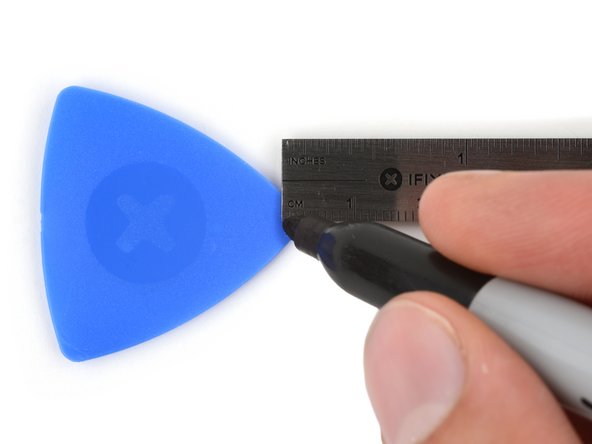
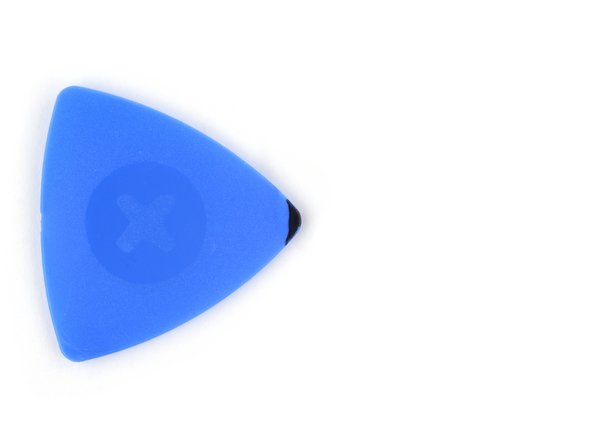
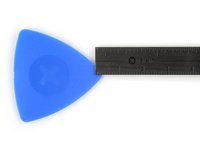
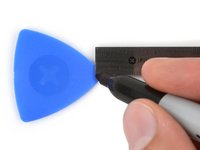
    3. Apple Watch - Series 10 (46mm) Screen Replacement, Mark your opening picks: step 3, image 1 of 3 Apple Watch - Series 10 (46mm) Screen Replacement, Mark your opening picks: step 3, image 2 of 3 Apple Watch - Series 10 (46mm) Screen Replacement, Mark your opening picks: step 3, image 3 of 3
      • If inserted too far, an opening pick can damage your watch. Follow this step to mark your pick and prevent damage.

      • Measure 3 mm from the tip and mark the opening pick with a permanent marker.

      • Alternatively, tape a coin to a pick 3 mm from the tip.

      Ask FixBot

      Add Comment

    4. Apple Watch - Series 10 (46mm) Screen Replacement, Heat the screen: step 4, image 1 of 1
      • Strong adhesive secures the perimeter of the screen to the frame. Heating the screen softens the adhesive, making it easier to separate.

      • Heat an iOpener and lay it on the screen for two minutes to soften its adhesive.

      • Alternatively, you can use a hair dryer or heat gun—but be careful as extreme heat can damage the screen and/or battery.

      Ask FixBot
      Add Comment

    5. Apple Watch - Series 10 (46mm) Screen Replacement, Insert an iFlex: step 5, image 1 of 3 Apple Watch - Series 10 (46mm) Screen Replacement, Insert an iFlex: step 5, image 2 of 3 Apple Watch - Series 10 (46mm) Screen Replacement, Insert an iFlex: step 5, image 3 of 3
      Tool used on this step:
      iFlex Opening Tool
      $11.99
      Buy
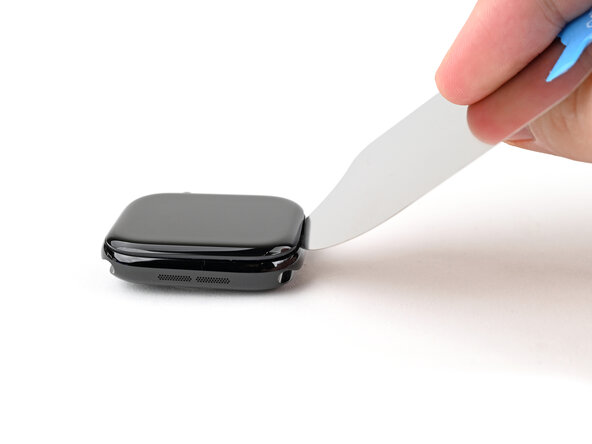
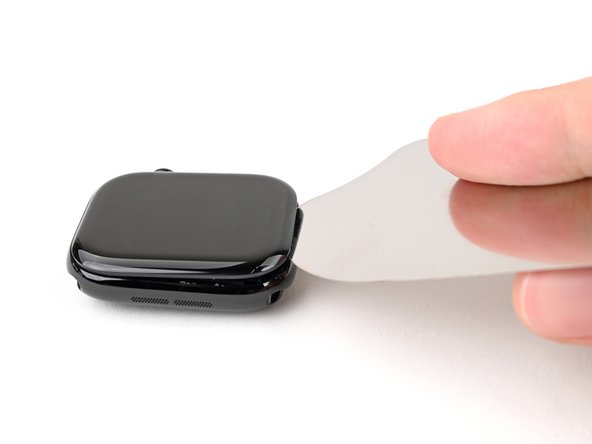
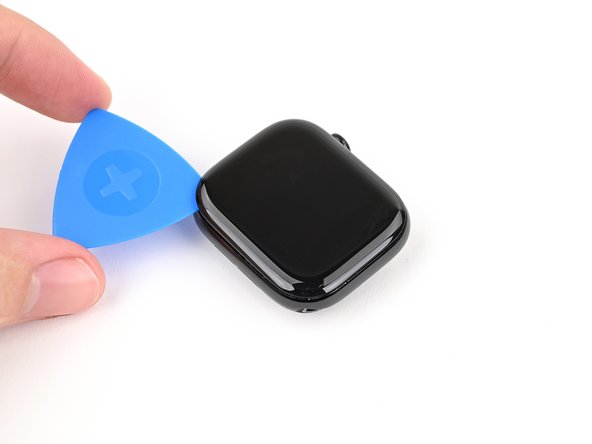
      • The gap between the screen and frame is extremely small. You'll need a thin tool such as an iFlex to create an initial gap.

      • Don't grip the iFlex or similar metal tools by the edges—they're very sharp. Consider wearing gloves to protect your hands.

      • Insert the iFlex at a downward angle between the bottom edge of the screen and frame.

      Ask FixBot
      Add Comment

    6. Apple Watch - Series 10 (46mm) Screen Replacement, Pry up the screen: step 6, image 1 of 2 Apple Watch - Series 10 (46mm) Screen Replacement, Pry up the screen: step 6, image 2 of 2
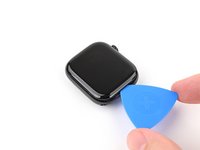
      • Prying up the screen may take multiple attempts. If you're having trouble, apply more heat and try again.

      • With one hand, push down firmly on the watch's frame to secure it in place.

      • With your free hand, hold the iFlex and push the edges up to make it more rigid.

      • The iFlex should be slightly "U" shaped.

      • Pry up the screen enough for the iFlex to lay flat on its own.

      • The iFlex doesn't need to be inserted far, as it can easily damage the screen cables near the bottom right corner of the watch.

      • Leave the iFlex inserted under the screen.

      Ask FixBot
      Add Comment

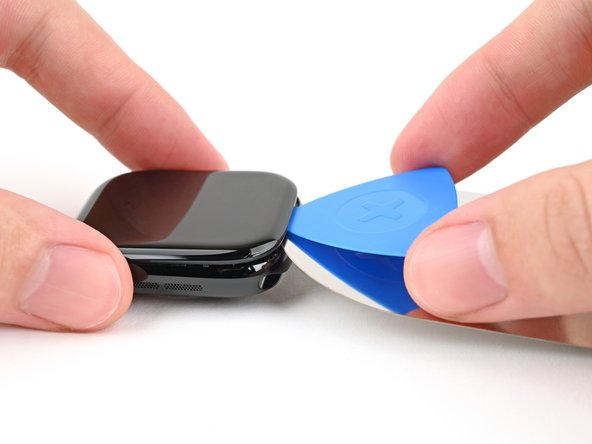
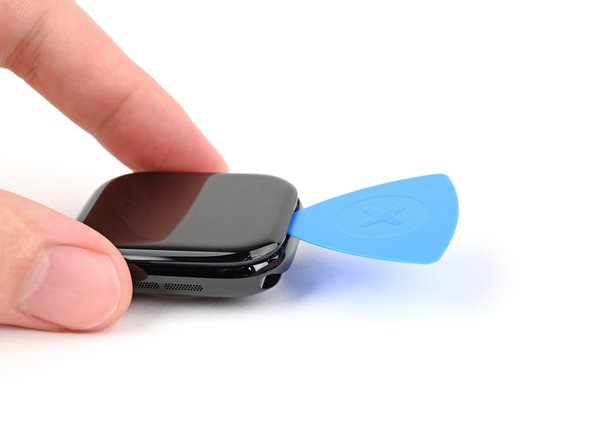
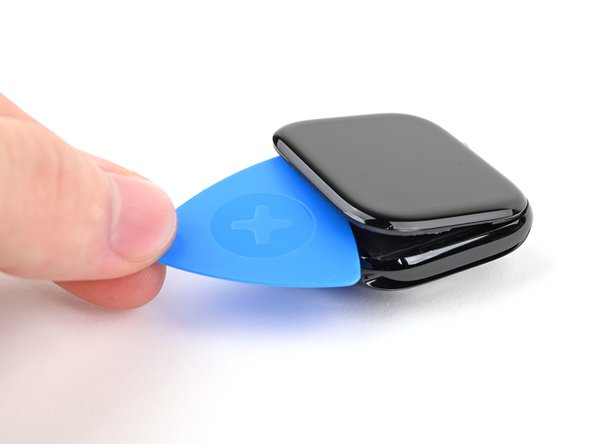
    7. Apple Watch - Series 10 (46mm) Screen Replacement, Insert an opening pick: step 7, image 1 of 3 Apple Watch - Series 10 (46mm) Screen Replacement, Insert an opening pick: step 7, image 2 of 3 Apple Watch - Series 10 (46mm) Screen Replacement, Insert an opening pick: step 7, image 3 of 3
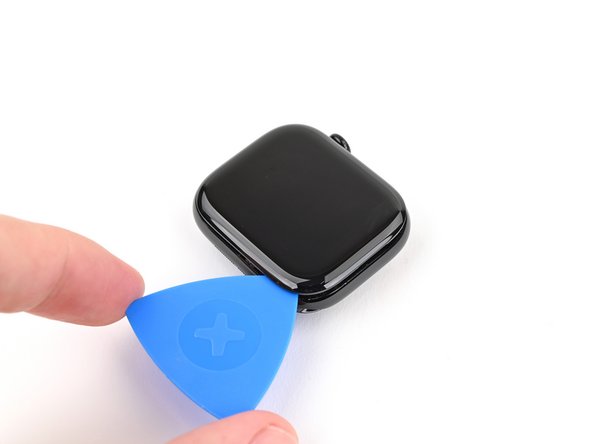
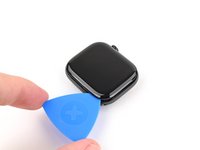
      • Do not insert your opening pick more than 3 mm under the screen when separating the adhesive, as you risk damaging your watches internals.

      • Keep the iFlex flat to maintain a gap between the screen and frame while inserting an opening pick.

      • Insert an opening pick between the screen and iFlex.

      • Remove the iFlex.

      Ask FixBot
      Add Comment

    8. Apple Watch - Series 10 (46mm) Screen Replacement, Separate the screen adhesive: step 8, image 1 of 3 Apple Watch - Series 10 (46mm) Screen Replacement, Separate the screen adhesive: step 8, image 2 of 3 Apple Watch - Series 10 (46mm) Screen Replacement, Separate the screen adhesive: step 8, image 3 of 3
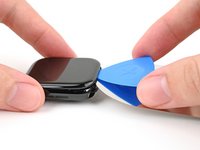
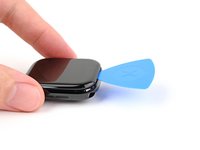
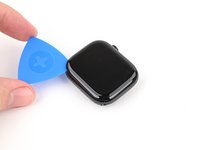
      • Slide the opening pick around the bottom left corner and up the left edge.

      Ask FixBot
      Add Comment

    9. Apple Watch - Series 10 (46mm) Screen Replacement: step 9, image 1 of 2 Apple Watch - Series 10 (46mm) Screen Replacement: step 9, image 2 of 2
      • Continue sliding your pick along the top edge and around the top right corner, stopping just after the digital crown.

      • Don't slide your pick past the digital crown—you risk damage to the screen cables.

      Ask FixBot

      Add Comment

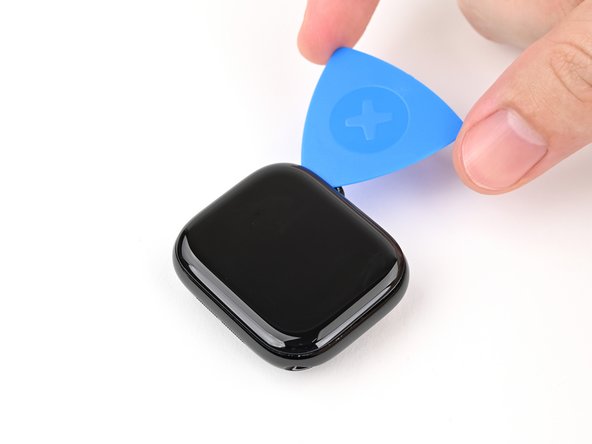
    10. Apple Watch - Series 10 (46mm) Screen Replacement, Separate the remaining adhesive: step 10, image 1 of 2 Apple Watch - Series 10 (46mm) Screen Replacement, Separate the remaining adhesive: step 10, image 2 of 2
      • Insert the long edge of an opening pick between the left edge of the screen and frame.

      • Twist the pick to lift the screen and separate any remaining adhesive.

      Ask FixBot
      Add Comment
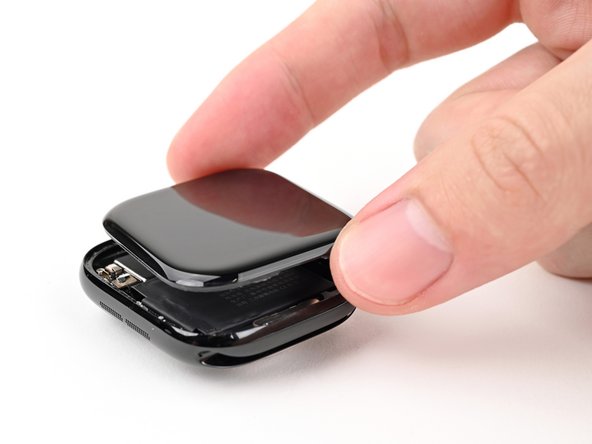
    11. Apple Watch - Series 10 (46mm) Screen Replacement, Swing open the screen: step 11, image 1 of 3 Apple Watch - Series 10 (46mm) Screen Replacement, Swing open the screen: step 11, image 2 of 3 Apple Watch - Series 10 (46mm) Screen Replacement, Swing open the screen: step 11, image 3 of 3
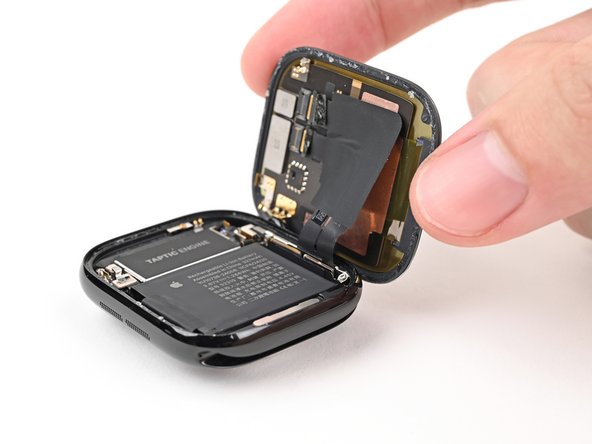
      • Pull the right edge of the screen over the digital crown.

      • If the screen feels stuck, go back around it with an opening pick to separate any adhesive.

      • Swing up the left edge of the screen so it's upright. The screen should be to the right of the digital crown.

      • During reassembly:

      • This is a good point to plug in your watch and test all functions before sealing it up. Be sure to power it back down completely before you continue working.

      • Follow this guide to apply new screen adhesive and reseal your watch.

      Ask FixBot

      Add Comment

    1. Apple Watch - Series 10 (46mm) Screen Replacement, Stand the watch up: step 12, image 1 of 1
      • Flip your watch so the screen is on your workspace and the frame is upright.

      • Keep the screen secured and the frame supported upright for the remaining steps.

      Ask FixBot

      Add Comment

    2. Apple Watch - Series 10 (46mm) Screen Replacement, Peel up the screen cable tape: step 13, image 1 of 3 Apple Watch - Series 10 (46mm) Screen Replacement, Peel up the screen cable tape: step 13, image 2 of 3 Apple Watch - Series 10 (46mm) Screen Replacement, Peel up the screen cable tape: step 13, image 3 of 3
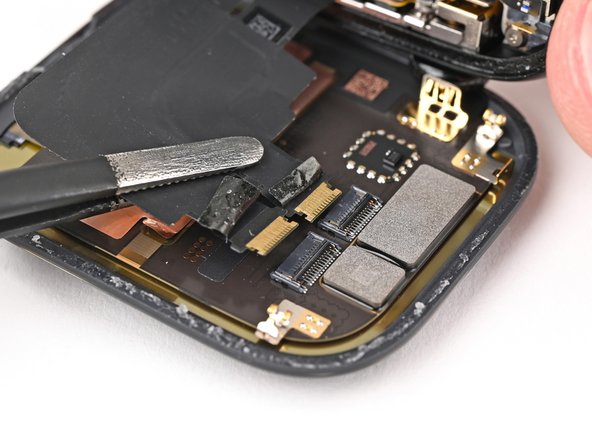
      • Use tweezers to peel up the tape covering the two screen cable ZIF connectors.

      Ask FixBot

      Add Comment

    3. Apple Watch - Series 10 (46mm) Screen Replacement, Flip up the locking flaps: step 14, image 1 of 3 Apple Watch - Series 10 (46mm) Screen Replacement, Flip up the locking flaps: step 14, image 2 of 3 Apple Watch - Series 10 (46mm) Screen Replacement, Flip up the locking flaps: step 14, image 3 of 3
      • Use the tip of an opening pick to pry up the small, hinged locking flaps on both screen cable ZIF connectors.

      Ask FixBot

      Add Comment

    4. Apple Watch - Series 10 (46mm) Screen Replacement, Heat the screen cable: step 15, image 1 of 1
      • Strong adhesive secures the screen cables. Heating the cables softens the adhesive, making them easier to separate.

      • Heat an iOpener and lay it on the screen cables for two minutes to soften the adhesive.

      • Alternatively, you can use a hair dryer or heat gun—but be careful as extreme heat can damage the screen and/or battery.

      Ask FixBot

      Add Comment

    5. Apple Watch - Series 10 (46mm) Screen Replacement, Separate the screen cable adhesive: step 16, image 1 of 2 Apple Watch - Series 10 (46mm) Screen Replacement, Separate the screen cable adhesive: step 16, image 2 of 2
      • Slide an opening pick under the screen cables to separate it from the screen.

      • If you're having trouble, apply more heat and try again. Don't use excessive force.

      Ask FixBot

      Add Comment

    6. Apple Watch - Series 10 (46mm) Screen Replacement, Disconnect the screen: step 17, image 1 of 2 Apple Watch - Series 10 (46mm) Screen Replacement, Disconnect the screen: step 17, image 2 of 2
      • Use tweezers to grip both cables and pull them out of their sockets at the same time.

      Ask FixBot

      Add Comment

    7. Apple Watch - Series 10 (46mm) Screen Replacement, Remove the screen: step 18, image 1 of 1
      • Remove the screen.

      Ask FixBot

      Add Comment

Conclusion

To reassemble your device, follow these instructions in reverse order.

Take your e-waste to an R2 or e-Stewards certified recycler.

Repair didn’t go as planned? Try some basic troubleshooting, or ask our Answers community for help.

Cancel: I did not complete this guide.

3 other people completed this guide.

Alex Diaz-Kokaisl

Member since: 01/16/22

247,410 Reputation

1,203 Guides authored

Team

iFixit Member of iFixit

Staff

123 Members

75,668 Guides authored

1 Guide Comment

Hallo , wo kann man den den Bildschirm Kaufen 46mm ?

Fabio - Reply Share

Add Comment

View Statistics:

Past 24 Hours: 28

Past 7 Days: 237

Past 30 Days: 976

All Time: 14,894