
Apple AirPort Extreme Model A1034 Internet Card Replacement

Michael Garcia and 5 other contributors
Last updated on Jan 28, 2014
Views: 5.9K
View statistics:
- Past 24 Hours:
- 2
- Past 7 Days:
- 23
- Past 30 Days:
- 103
- All Time:
- 5,864
Comments: 1
1 guide comment.
Go to guide commentsCompleted: 4 5
4 people have marked this guide "completed." Will you be next?
5 people have marked this guide "completed." Including you — great job!
Favorites: 4 5
4 people have favorited (and subscribed to) this guide. Will you be next?
5 people have favorited (and subscribed to) this guide — including you!
Action Shots
Be an action hero! This guide needs images that better demonstrate how to perform specific actions.
What you need
Tools

-
-
-
Remove the three 14.3mm T7 Torx screws from the bottom of AirPort.
 Ask FixBot
-
-
-
Remove the 5.1mm Phillips screw from the bottom of the AirPort. This screw is located under the identification sticker. You will have to remove the sticker or make a hole to remove it.
-
-
-
-
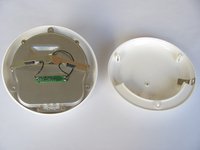
Lift the bottom and top casing straight apart and then lift metal casing straight up from the bottom plastic casing.
-
-
-
Unplug the black connector on the top of the metal casing by gently pulling horizontally.
-
-
-
-
-
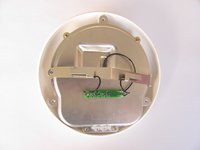
Separate the top and bottom of the metal casing. You will now expose the motherboard and AirPort card.
-
To remove the AirPort card, gently pull the plastic tab horizontally.
-




To reassemble your device, follow these instructions in reverse order.
Cancel: I did not complete this guide.
4 other people completed this guide.

Team

Cal Poly, Team 17-15, Regan Fall 2011 Member of Cal Poly, Team 17-15, Regan Fall 2011
CPSU-REGAN-F11S17G15
3 Members
84 Guides authored
1 Guide Comment
Thank you so much for your guide! I was challenging myself to do it without cheating, but couldn't figure out how to release the bottom plastic layer from the main unit inside after I undid the 3 Torx screws. Thankfully you avoided me having to break the whole unit by showing where the central screw hidden beneath the S/N 3 barcode sticker was and that it was Philips not Torx, and I can now pinch the A1027 wifi card and use it in my G5, instead of relying on ageing ethernet! Bless you kind folks!
