
Android tablet Nobis NB09 Screen Replacement

Enea Osmann and 6 other contributors
Last updated on Jan 3, 2024
Views: 2K
View statistics:
- Past 24 Hours:
- 2
- Past 7 Days:
- 16
- Past 30 Days:
- 86
- All Time:
- 2,000
Comments: 2
2 guide comments.
Go to guide commentsCompleted: 4 5
4 people have marked this guide "completed." Will you be next?
5 people have marked this guide "completed." Including you — great job!
Favorites: 0 1
No one has favorited (and subscribed to) this guide. Will you be the first?
1 person has favorited (and subscribed to) this guide — and that's you!
Action Shots
Be an action hero! This guide needs images that better demonstrate how to perform specific actions.
Incorrect Tools
Help make this guide better by using the correct tools in images and/or text.
Introduction
Go to step 1 ↓This is a guide on how to perform a screen replacement on a Nobis NB09 tablet. The screen is the most important part of the device when it comes to interacting with the tablet and users operating it in the first place. If the screen doesn’t work properly, then it becomes almost impossible to use the device at all.
It is advised to be cautious of possible shattered glass, and to use ESD-safe tools, as well as knowing how to properly use an anti-static mat and wristband.
What you need
Tools
-
Spudger4.9
-
-
×2


-
-
-
Remove the two 00 Phillips screws located on the right side of the tablet.
-
Use the plastic opening tools to loosen and then pry the back if the tablet off.
 Ask FixBot
-
-
-
Remove the electrical tape covering the motherboard.
-
Remove the four 4.0 mm T4 Torx screws holding the motherboard to the front half of the tablet.
-
Remove any remaining adhesive tape on the exposed area.
-
Disconnect the ribbon cable attachments by lightly pushing up the locking arm (black tab) on each then gently detaching the pin connectors.
-
-
-
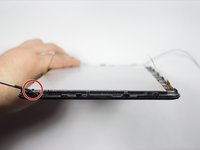
Find the notch on the digitzer, located on the left side of the device.
-
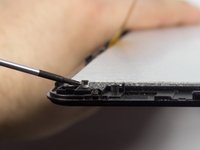
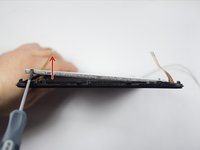
Use the Phillips Screwdriver to gently push the notch and lift the digitizer from the screen.
-
-
-
-
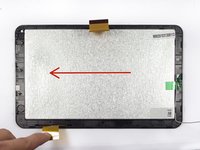
Gently slide the digitizer from its clasps to remove it from the screen.
-
The digitizer should now be removed separately from the screen.
-
-




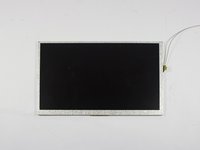
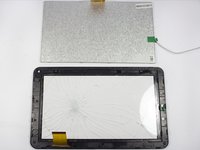
To reassemble your device, follow these instructions in reverse order.
Cancel: I did not complete this guide.
4 other people completed this guide.

Team

UMass Dartmouth, Team 7-1, Cichon Spring 2015 Member of UMass Dartmouth, Team 7-1, Cichon Spring 2015
UMASSD-CICHON-S15S7G1
4 Members
72 Guides authored
2 Guide Comments
The digitizer replacement instructions was great. Thanks
My screen is busted that has the sensor in it do I have to buy a screen or can I use a keyboard?
