Introduction
The motherboard in the Anbernic RG35xx is responsible in powering the device and various components. If your motherboard isn't functioning properly, this guide demonstrates how to disassembly the device in order to get to the motherboard.
What you need
-
-
Remove the SD card located on the right side of the device by pushing into the SD card slot and pulling the card out.
-
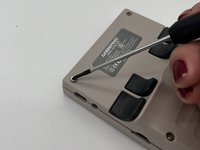
Remove the six 1.2 mm screws that secure the back case with a 1.5 Hex Bit screwdriver.
 Ask FixBot
-
-
-
Insert an opening tool into the MicroSD card slot and twist it clockwise to begin releasing the rear case.
-
Pry around the entire perimeter until the rear case fully releases.
-
Remove the rear case.
-
-
-
-
Use your fingernails or tweezers to gently remove the battery connector from its socket.
-
-
-
Disconnect the red audio cable from its motherboard port by carefully pulling the connector with your index finger and thumb or with fine tip tweezers.
-
-
-
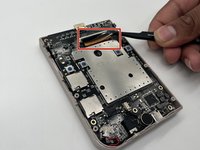
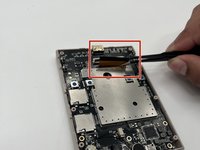
Flip up the black ZIF locking flap that secures the bronze ribbon cable.
-
Gently disconnect the bronze ribbon cable.
-
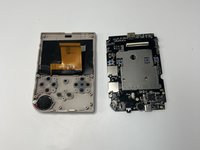
Lift the motherboard up and out the chassis.
-




To reassemble your device, follow the above steps in reverse order.
Take your e-waste to an R2 or e-Stewards certified recycler.
Repair didn’t go as planned? Try some basic troubleshooting or ask our Answers community for help.

Team

University of North Texas, Team 6-16, Kilpatrick Fall 2024 Member of University of North Texas, Team 6-16, Kilpatrick Fall 2024
UNT-KILPATRICK-F24S6G16
3 Members
5 Guides authored
