
Amazon Luna Controller Faceplate Replacement

Cade Queen and one other contributor
Last updated on Dec 30, 2024
Views: 330
View statistics:
- Past 24 Hours:
- 3
- Past 7 Days:
- 13
- Past 30 Days:
- 61
- All Time:
- 330
Comments: 0
No one has left comments on this guide. Will you be first?
Go to guide commentsCompleted: 1 2
1 person has marked this guide "completed." Will you be next?
2 people have marked this guide "completed." Including you — great job!
Favorites: 0 1
No one has favorited (and subscribed to) this guide. Will you be the first?
1 person has favorited (and subscribed to) this guide — and that's you!
Introduction
Go to step 1 ↓Removing the front plate of your Amazon Luna Controller is a crucial first step if you need to replace a damaged front plate or access internal components for repairs. Before you begin, ensure your controller is powered off to prevent accidental damage.
What you need
Tools

-
-
-
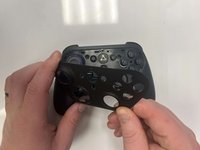
Flip the controller over to its front and locate the seam where the front plate connects to the rest of the body.
 Ask FixBot
-
-
-
Hold the controller firmly.
-
Insert the thin edge of an iFixit opening tool into the seam at the edge of the front plate close to the A button.
-
Work slowly and carefully around all sides to avoid snapping the clips.
-
-
-


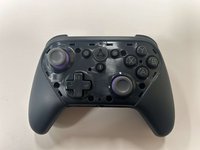
To reassemble your device, follow these instructions in reverse order.
Cancel: I did not complete this guide.
One other person completed this guide.

Team

Western Carolina University, Team 1-4, Virtue Fall 2024 Member of Western Carolina University, Team 1-4, Virtue Fall 2024
WCU-VIRTUE-F24S1G4
3 Members
60 Guides authored
