
Amazon Fire Game Controller Outer Shell Replacement

Andrew Klopfenstein and 4 other contributors
Last updated on Jan 8, 2020
Views: 968
View statistics:
- Past 24 Hours:
- 1
- Past 7 Days:
- 17
- Past 30 Days:
- 77
- All Time:
- 968
Comments: 0
No one has left comments on this guide. Will you be first?
Go to guide commentsCompleted: 1 2
1 person has marked this guide "completed." Will you be next?
2 people have marked this guide "completed." Including you — great job!
Favorites: 0 1
No one has favorited (and subscribed to) this guide. Will you be the first?
1 person has favorited (and subscribed to) this guide — and that's you!
Introduction
Go to step 1 ↓This guide will show you how to properly replace the outer shell of the Amazon Fire game controller. This procedure may be necessary when a part of the outer shell becomes damaged, and will remedy both functionality and cosmetic issues.
What you need
Tools


-
-
-
Use a Triangle #2 screwdriver to remove the six 10 mm screws from the back of the controller.
 Ask FixBot
-
-
-
Pry the two shell pieces from one another from the top orientation with a plastic opening tool.
-
-
-
Disconnect the battery terminal wires and the play, pause, and stop wires from the motherboard.
-
-
-
-
-
Use a JIS #0 screwdriver to remove the two 7 mm screws from the retaining bracket that secures the play, stop, and pause button wiring.
-
-
-
-
Use a JIS #0 screwdriver to unscrew the 5 mm screws from the LED indicator assembly.
-
-


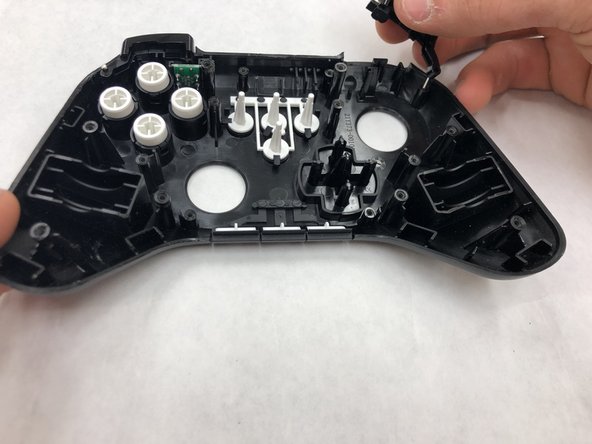
To reassemble your device, follow these instructions in reverse order.
Cancel: I did not complete this guide.
One other person completed this guide.

Team

IUPUI, Team S4-G4, Wilson Summer 2019 Member of IUPUI, Team S4-G4, Wilson Summer 2019
IUPUI-WILSON-SU19S4G4
4 Members
48 Guides authored
