Introduction
If the action button located on the back of your Amazon Echo Glow isn't responding properly, it may need to be replaced. The action button is responsible for turning the device on and off, and this guide will help show you step-by-step on how to remove and replace the button on your device.
- CAUTION! When working on any electrical components, it is vitally important to be sure that the device is completely powered off prior to making any repairs. Additionally, internal components can still retain electrical charge long after being powered off. To maintain your safety, be sure that your workspace is clean of any moisture or debris, and remove any conductive items such as rings, bracelets or watches.
What you need
-
-
-
Using the metal spudger, cut through the glue that is in the seam between the outer shell and the base of the device.
-
Work the metal spudger through the seam all the way around the device until the outer shell is completely loose from the base of the device.
-
Remove the outer shell from the base of the device.
 Ask FixBot
-
-
-
-
Slightly lift the motherboard from the device. Do not fully remove, you still need to detach the red and black cables from the motherboard.
-
Using your fingers or tweezers, carefully hold the connector itself and remove the red and black cable connector from the motherboard.
-
-
-
Remove the four the T10 Torx screws securing the bracket.
-
Remove the bracket.
-
-
-
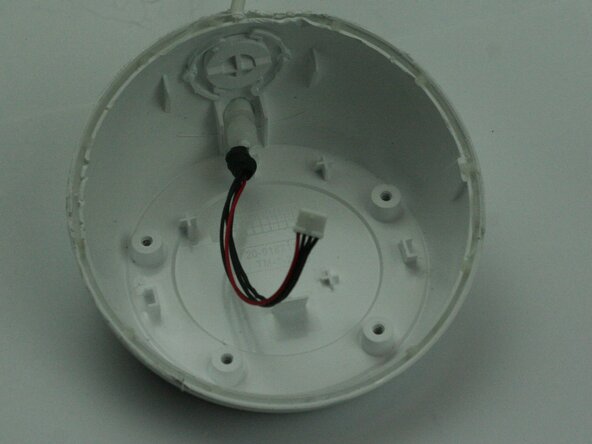
The bracket is removed from the device, you will then need to pull the red and black cables out from the device to ensure they won't be damaged.
-
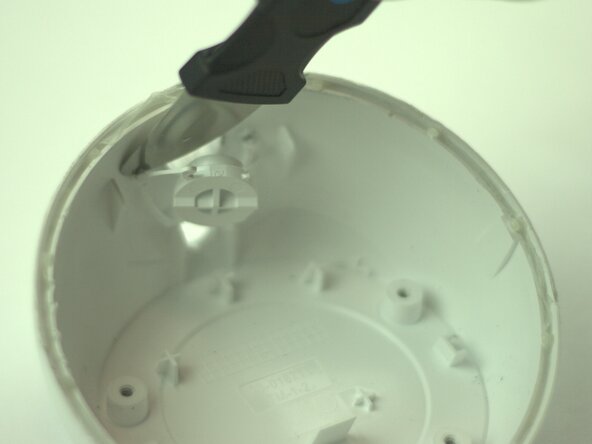
There are two points that connect the button and the device together, you will need to cut through those two points with the metal spudger to remove the defective button from the device.
-
-
-
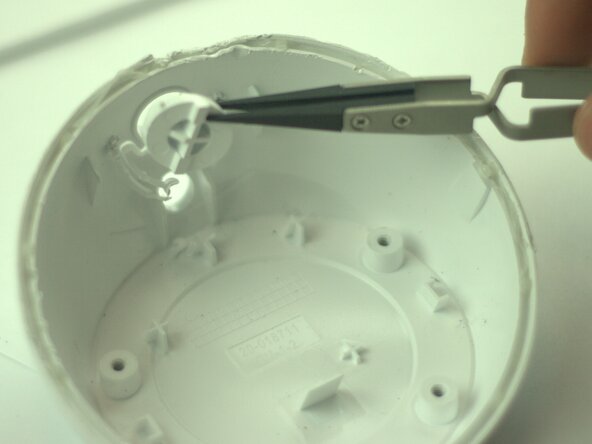
Remove the defective action button with tweezers, once you have completed cutting through the two connectives points.
-
Now the button is removed apply adhesive glue to the new button at the same two points that they were previously connected to.
-
Allow for proper time for the adhesive glue to dry.
-
-






To reassemble your device, follow these instructions in reverse order.

Team

Texas Tech, Team 8-1, Johansen Spring 2026 Member of Texas Tech, Team 8-1, Johansen Spring 2026
TTU-JOHANSEN-S26S8G1
4 Members
48 Guides authored
