This translation was generated by a machine and has not been reviewed by a person yet. Speak this language? Review it.
Introduction
Replacing the LCD screen on an Altyk L16 laptop.
What you need
-
-
-
Remove the 8 screws from the bottom of the PC (all screws are identical).
-
Slide an opening pick between the black plastic grille hidden behind the hinge cover. You can then slide it all the way along the plate to undo all the plastic snap fits.
 Ask FixBot
-
-
-
Locate the battery connector.
-
Using plastic or ceramic tweezers, separate the connector from the motherboard using the corners of the connector as indicated in red.
-
Lift the battery wires to finish completely removing the battery from its connector.
-
-
-
-
-
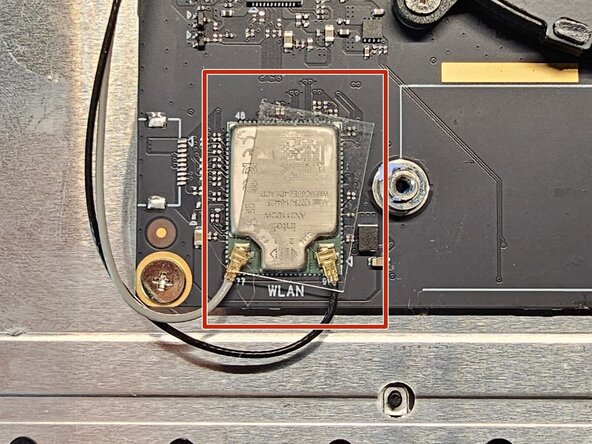
Remove the clear tape securing the antennas.
-
Disconnect the antennas. The connectors on the board and the antennas themselves are very fragile, so proceed with caution.
-
Free the antennas up to the clutch hinge.
-
-
-
Remove the protective tape over the cable
-
Disconnect the cable
-
Remove the cable from its recess
-
-
-
-
Remove the three screws securing the right clutch hinge
-
Use pliers to lift the clutch hinge and set it to a 90° open position
-
-
-
Remove the three screws securing the clutch hinge
-
Using a screwdriver in the slot provided for securing the PC, lift the clutch hinge to a 90° angle
-
-
-
After opening the clutch hinges to 90°, lift the palm rest to attach it to the clutch hinges.
-
Slide it in the direction of the arrows to release it.
-
-
-
Slide an opening tool near one of the clutch hinges and slowly lift to unclip it.
-
Use an opening pick to unclip the cover along the length of the display.
-
-
-
The screen bezel is clipped in place. Starting from one of the top corners, slide an opening pick between the back of the screen and the bezel to unclip it.
-
On the bottom part of the screen, the display panel is adhered to the screen bezel with double-sided tape. Slide an opening pick all the way along to break the adhesive and free the screen bezel.
-
-
-
Locate the pull tabs on both sides of the screen. Grip them and pull them. as shown in photos 2 and 3
-
-
-
Remove the tape securing the flex cable to the LCD panel. Careful, this tape is attached to the LCD flex cable, do not tear it off!
-
Remove the latch securing the LCD flex cable connector to the display. You can use your fingernail or a pick to pry it out of the LCD panel connector. This latch is attached to the LCD flex cable, do not tear it off!
-
-
-
You can use the latch or the tape on the cable to disconnect the LCD panel.
-
You can now install the new panel and follow this guide in reverse order to reassemble the PC.
-
-





To reassemble your device, follow the instructions in reverse order.

